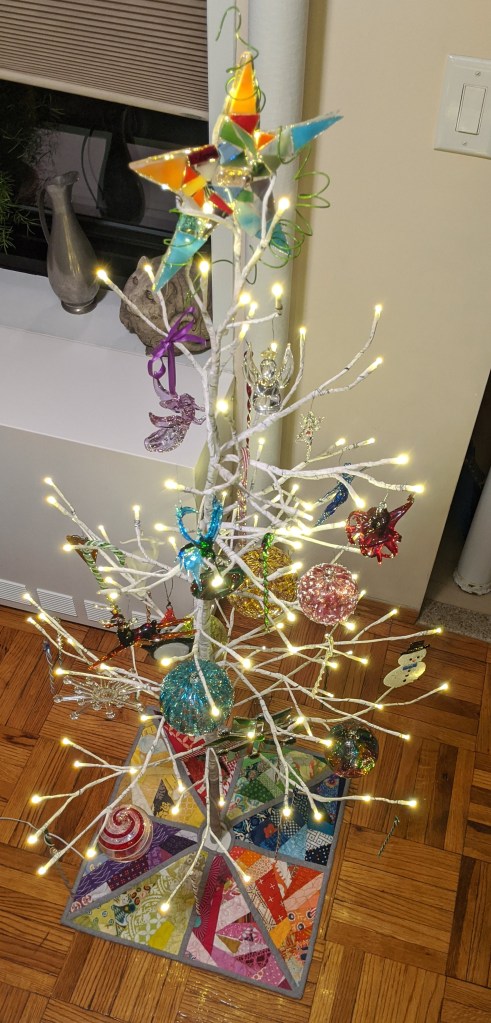
My Christmas tree is the most beautiful Christmas tree in the world. Many people disagree. They are wrong. I was born and raised in Toledo, Ohio, which is the Glass City due to its history of glass manufacturing for the past several decades. Luckily, that means there are amazing glass artisans throughout the area, and the Toledo Museum of Art houses one of the most impressive glass collections in the world. Many years ago, my mom began gifting my siblings and me with a glass ornament each Christmas, so I have an AMAZING collection at this point and I am deeply in love with each and every one.
One of the most beautiful characteristics of glass ornaments is the way they interact with light. Because of this, I decided I wanted a tree that allowed the natural sunlight to fully shine through them during the day and the Christmas tree lights to cause the ornaments to twinkle at night, which meant I wasn’t interested in a traditional tree with pine needles that would block the light. After MUCH searching, I finally found the perfect tree — a simple birch-style tree with built-in lights at the tip of each branch. I truly love how my ornaments shine and sparkle hanging from this tree.
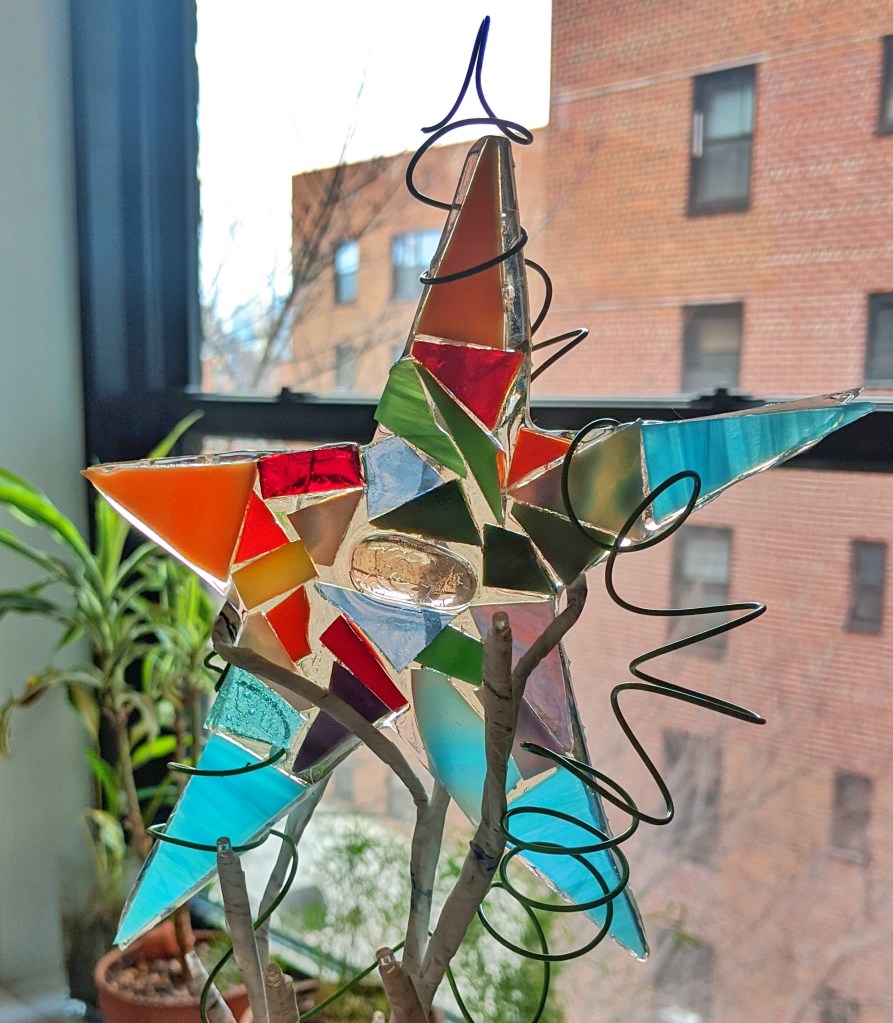
This is all a very long build-up to explain how I came about creating my Christmas tree skirt. One of the ornaments my mom gave us a few years ago was a fused-glass star, which I use as my tree topper. It’s super modern and colorful and awesome, and it inspired me to create an improv-pieced tree skirt using up some of the billions of scraps I’ve collected over the last few years of quilting.
Because I have a very non-traditional tree, I decided I wanted a very non-traditional skirt. I really love Justin Stafford’s Squareburst quilt, and I thought a square tree skirt would work really well with my tree. So I took some of the craft paper that’s been used as packaging and that I save for moments like this. I decided on the size and drew out the pattern. I then cut it all up to use as templates.
Then I had to go through all of my scraps and sort them by color. That was a process. Oy. However, it was necessary and made the piecing process so much easier. I wanted to use all of the colors that are on my tree, which is pretty much everything, so I decided on red, orange, yellow, chartreuse, green, blue, purple, and pink.
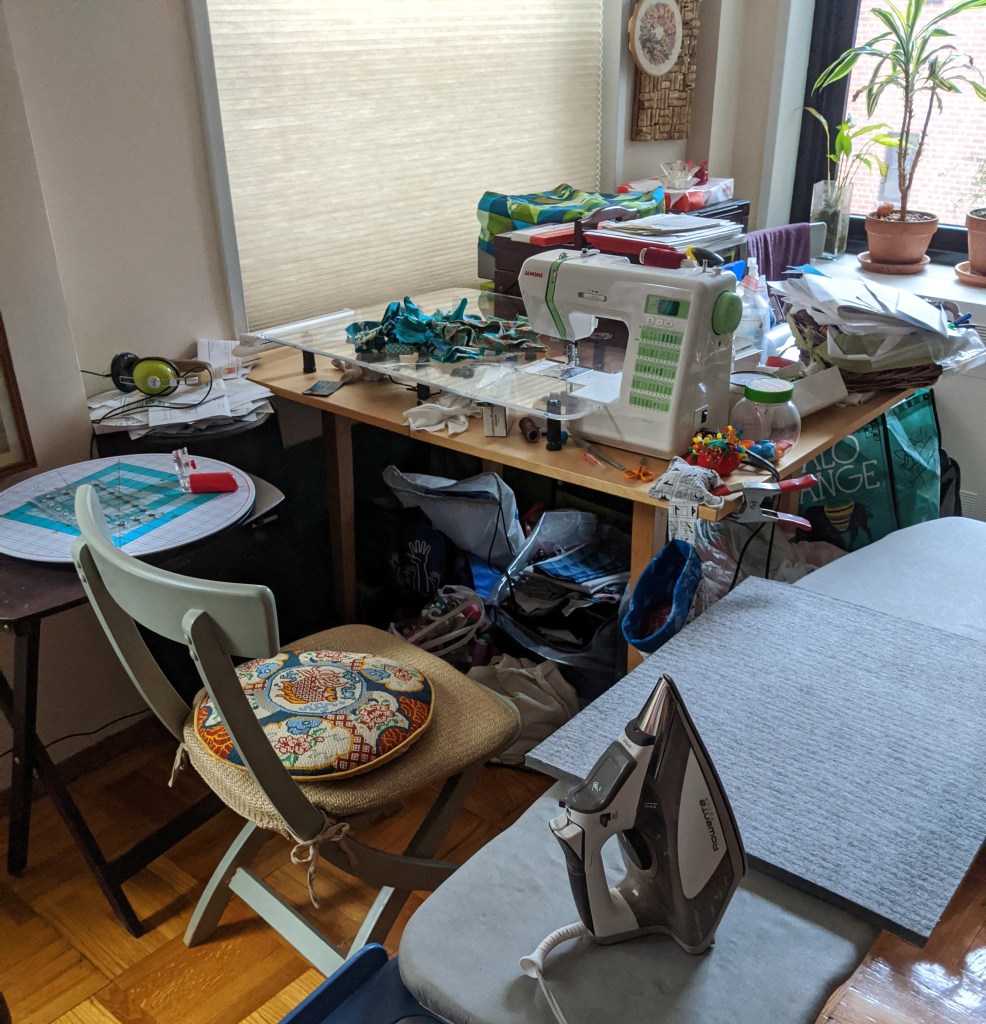
I set up my improv piecing station, consisting of my Martelli Round-About Cutting mat and Rotary Ergo cutter on one side of my sewing machine and my ironing board on the other. At that point, it was just a matter of sewing, pressing, and slicing, sewing, pressing, and slicing, sewing, pressing, and slicing, over and over again in each of the colorways until I had pieced enough scraps to fit with the triangular template.
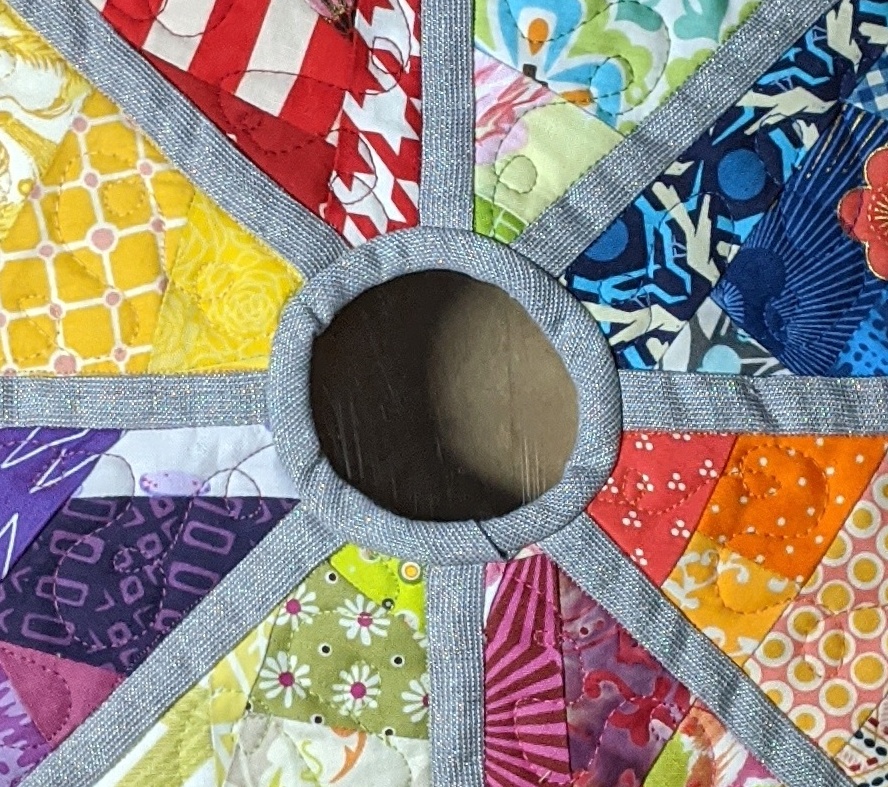
The trickiest part of this tree skirt was binding the center hole. I have never sewn a curved binding before, so I needed to look up a few different YouTube tutorials to figure it out. Other than that, everything went together pretty quickly and easily, resulting in what I think is a pretty darn gorgeous Christmas tree skirt!
This will most likely be my last blog post of 2019 as I will be traveling to the Glass City in a couple of days to visit my family for the next couple of weeks. Happy holidays to all and have a very happy new year!!