BLACK LIVES MATTER — Please click on the link to find out what you can do to help end the oppression and killing of our fellow human beings.
This trunk show video shows my version of the #BrooklynConnectedQAL challenge we put together for the Brooklyn Quilters Guild back in March and April of 2020 to help keep our guild members connected during the lockdown. I had made a few tutorial videos to give our quilters options as far as creating standard ruler-cut blocks or improv-pieced blocks. I decided to do both and then mashed them together! Watch the video to see the result!
BLACK LIVES MATTER — Please click on the link to find out what you can do to help end the oppression and killing of our fellow human beings.
In this next trunk show video I talk about the creation of BK Snaps, which I created to hang in the 2020 Brooklyn Quilters Guild quilt show. Unfortunately, the quilt show had to be canceled due to the COVID-19 pandemic, so this is your chance to see the quilt up close and personal!
BLACK LIVES MATTER — Please click on the link to find out what you can do to help end the oppression and killing of our fellow human beings.
This is another long episode because I’m talking about six quilts. These are mini quilts, all created based on prompts. I love making mini quilts because I can really experiment with ideas and techniques without committing to a full quilt. I highly recommend making them!! I’ve listed the names of the quilts and the time they appear in the video in the Description box on my YouTube channel, just in case you want to jump to one in particular.
It’s time for the next video tutorial for our virtual quilt-along, hosted by the Brooklyn Quilters’ Guild ! I hope you’ve all been busy making all of your blocks, and now it’s time to start putting them all together. How exciting!!
Please post pics of your progress on Instagram and Facebook and use the hashtag #BrooklynConnectedQAL. And be sure to follow that hashtag so you can see everyone else’s posts. Find the written pattern instructions on Barbara Danzi’s blog. Also be sure to subscribe to my YouTube channel so you don’t miss any of my upcoming demos. And please leave questions and comments and advice in the Comments section. This is all about staying connected as a community even as we’re staying home and social distancing.
Welcome to the next video tutorial for our virtual quilt-along, hosted by the Brooklyn Quilters’ Guild ! In this video, I’m demonstrating cutting and piecing the individual blocks for the quilt top. I include demos for ruler-cut blocks as well as improv-pieced blocks. Because it’s such a long video, I’ve listed the demo timings in the description box on my YouTube channel so you can skip ahead to the sections you want to watch.
Be sure to post pics on Instagram and Facebook and use the hashtag #BrooklynConnectedQAL. And follow that hashtag so you can see everyone else’s posts. Find the written pattern instructions on Barbara Danzi’s blog. Also be sure to subscribe to my YouTube channel so you don’t miss any of my upcoming demos. And please leave questions and comments and advice in the Comments section. This is all about staying connected as a community even as we’re staying home and social distancing.
In this time of social distancing and self-quarantining, the Brooklyn Quilters’ Guild is hosting a virtual quilt-along. Watch the video below to learn all about it, and please join us! As you start putting your blocks together, be sure to post pics on Instagram and Facebook and use the hashtag #BrooklynConnectedQAL. And follow that hashtag so you can see everyone else’s posts. Find the written pattern instructions on Barbara Danzi’s blog. I’ll be posting demo videos throughout. Be sure to subscribe to my YouTube channel so you don’t miss any of them!
The Brooklyn Quilters Guild 2020 quilt show is coming up, and I finally came up with an idea for the quilt I want to make for it. My friend Shannon Reed (@knittingchick on Instagram and @sreed151 on Twitter) suggested I use this as an opportunity to post my process from the very beginning to the very end of the quilt’s journey. I thought that was such a great idea, so here we go! Thanks, Shannon!
When I’m trying to think up a completely new quilt, the first thing I do is look for inspiration. Sometimes the inspiration is given to me by a prompt for a quilt challenge or contest. Sometimes — VERY rarely — the idea just pops into my head fully formed and my finished product looks exactly like what I pictured in my head from the very beginning. This happens very rarely for me. In fact, it’s maybe happened one time so far. Generally, I’m a big fan of prompts and parameters.
In this case, however, my inspiration came in a roundabout way and I just allowed my brain to take that curvy path to what I think will be a pretty cool quilt. I’ve been looking at all the beautiful quilt blocks people have been posting on Instagram for the Tula Pink #100blocksin100days challenge inspired by her City Sampler book, which happens around this time every year. And then I was chatting on my Facebook page with Johnny Barfuss (@johnnybarfuss on Instagram) who had suggested I take a look at Elizabeth Hartman‘s book Patchwork City, and I mentioned I had been thinking about designing my own blocks. Like all good quilters, Johnny was very encouraging. So I started doodling some blocks in my sketchbook without any ultimate goal in mind.
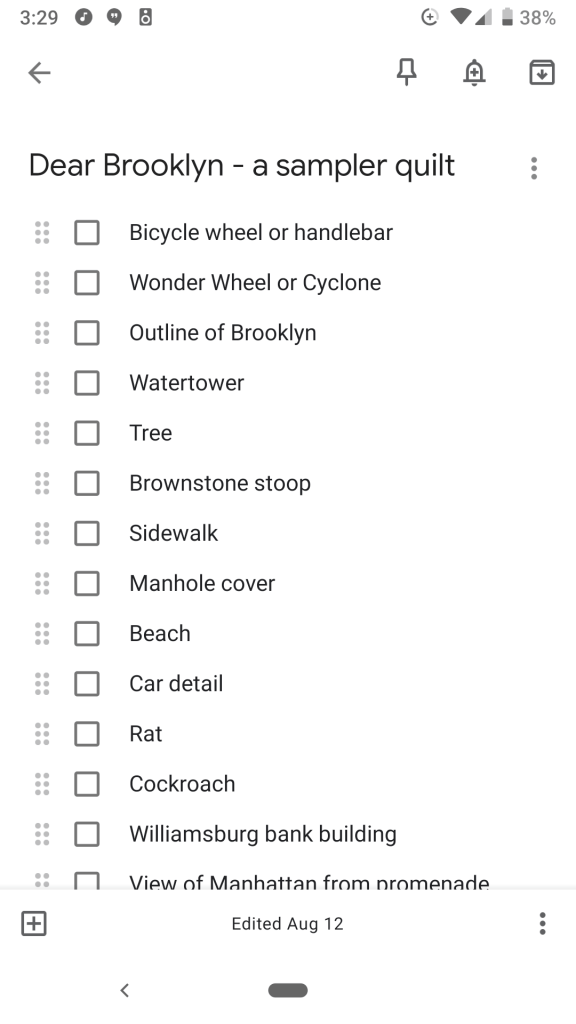
When I looked into Elizabeth Hartman’s book, I read how her blocks were inspired by objects and places in her daily life, and — boom! — that was when inspiration struck. Eureka! I realized I could combine this desire to design some new blocks with my desire to create an original quilt for the upcoming quilt show. I would sketch out a bunch of images that pop in my head when I think specifically of Brooklyn. Then I would make those into a series of blocks and create a Dear Brooklyn sampler quilt, as an homage to the Dear Jane quilts that I ogle every time I go to a quilt show.
My first step was listing all of the ideas I could think of for my quilt blocks. At this point I wasn’t thinking about what would make a good block and what would be impossible. I just let the ideas flow and kept the list going. This is the beginning of the ideation phase (just in case that’s a new concept for you). In the design world, the ideation phase generally involves a whiteboard and hundreds of Post-its. My version involves my smartphone’s Google Keep app and a sketchbook.
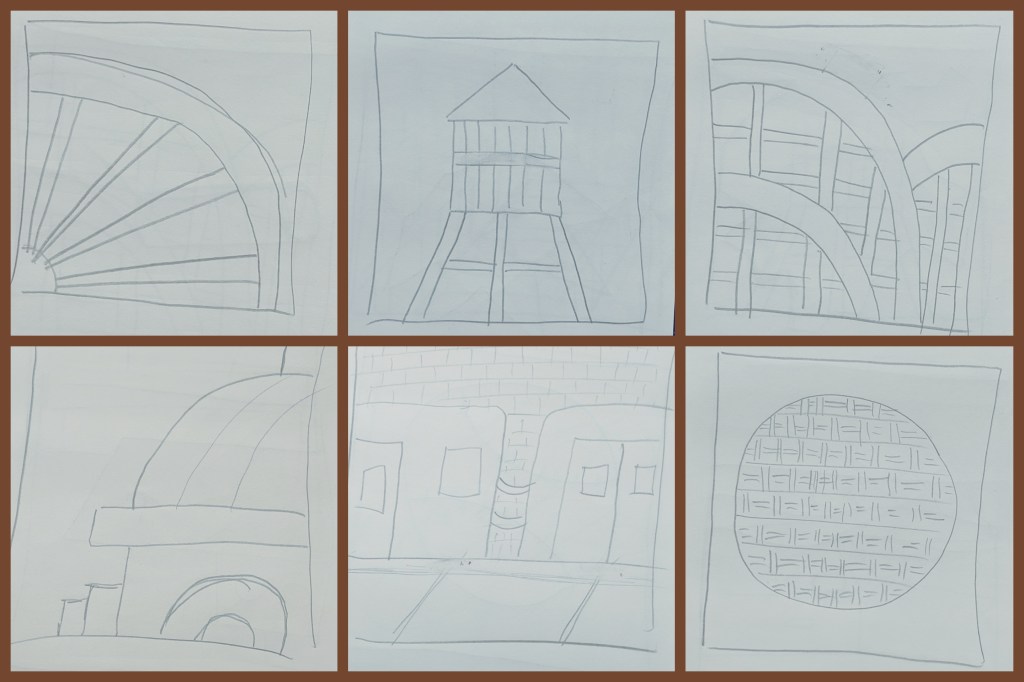
Once I had a good-sized list, I started sketching the ideas out. My sketches varied between abstract and realistic because I hadn’t decided yet what direction I ultimately wanted to take my quilt. I think it’s important at this very early stage of the creative process that you don’t put too many limitations on yourself. Editing will come later and is necessary for the final product, but right now just allow yourself to create anything and everything that comes to mind. You never know — one of those absurd, impossible ideas might end up being what works the best.
I started looking over the several sketches I had drawn and decided I wanted my quilt blocks to lean more towards abstraction versus realism. In fact, right now I’m thinking I want them to be so abstract that someone looking at my quilt won’t even necessarily know the reference material for each of the blocks. So I started making thumbnail sketches of the more realistic blocks, focusing on a small section of the overall sketch. As the creator of the quilt, I want to be able to look at the blocks and know exactly what inspired them, so I don’t necessarily want the blocks to be super abstract. But on the other hand, I’m not so concerned that anyone else looking at the quilt will be able to instantly see the source material for each block. In other words, I’ll know that block with a series of curves was inspired by a cockroach, but a random viewer of my quilt would probably never guess that’s how the block came about.
And that’s where I’m at so far. I still have a lot of sketching to do for most of my ideas. The next phase will be playing with scraps of fabric to see how the blocks work in reality and not just on paper, so you can look forward to seeing how that turns out in the next post about this process. I’d love to hear about how you find inspiration in your quilting and other craft projects. Do you prefer parameters when you’re creating? Or are you someone who can some up with ideas completely out of the blue? Please share in the comments section below, and let’s get a conversation started. Happy quilting!
The quilt featured on my home page is the very first original quilt I ever designed, pieced, and quilted all on my own. In making this quilt I had the epiphany that I feel so much more joy when I create a quilt from scratch rather than following someone else’s instructions. This is not a judgment for anyone else’s process or creative expression. We are all on our own journeys, and I respect and honor that. But for me, I find more fulfillment realizing my own creative ideas versus someone else’s. In this post, I want to take you through the process of creating this quilt from start to finish. If you haven’t tried designing your own quilt, I hope this inspires you to rise to the challenge. You might be surprised how it could change your outlook on your creative process!
This particular quilt started with a prompt. The Brooklyn Quilters Guild was gearing up for its 2018 quilt show, and the co-presidents put out a mini quilt challenge to celebrate the guild’s 25th anniversary. We were given the following parameters.
R E Q U I R E M E N T S :
Shades of gray (white OK)
A drop of red, not more the 3 x 3 inches or less than 1 x 1 inch.
40 x 40-inch quilt
Quilt pattern of your choice
Quilt must have sleeve, label, and name attached.
Keep in mind that we are celebrating the 25th anniversary of our guild, our new location at Industry City, and a little modern twist. Be creative, have fun, and make some beautiful fiber art.
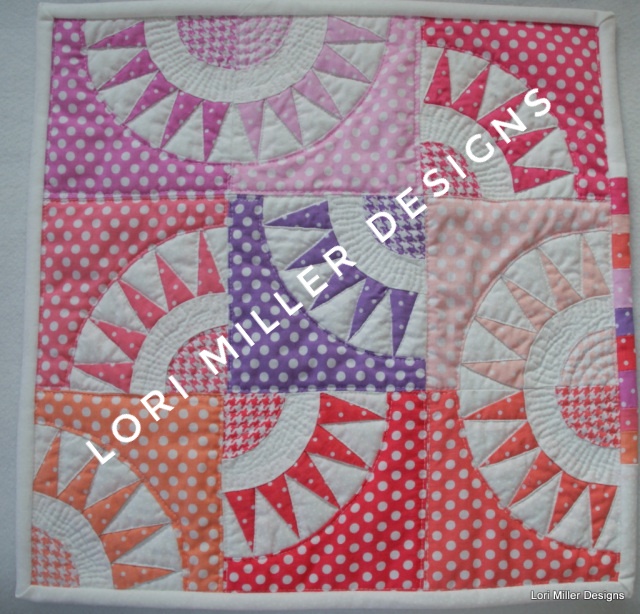
I didn’t really know this about myself at this point since this was my first original quilt, but I have since realized that I love prompts and parameters. Creating something out of thin air does not come easy for me, so I need a starting off point, even something rather open like the above prompt. I began thinking about being a Brooklyn quilter and a New Yorker. I had been seeing a lot of New York Beauty quilts online recently (see photo below), and I thought it might be fun to do an industrial twist on that idea.
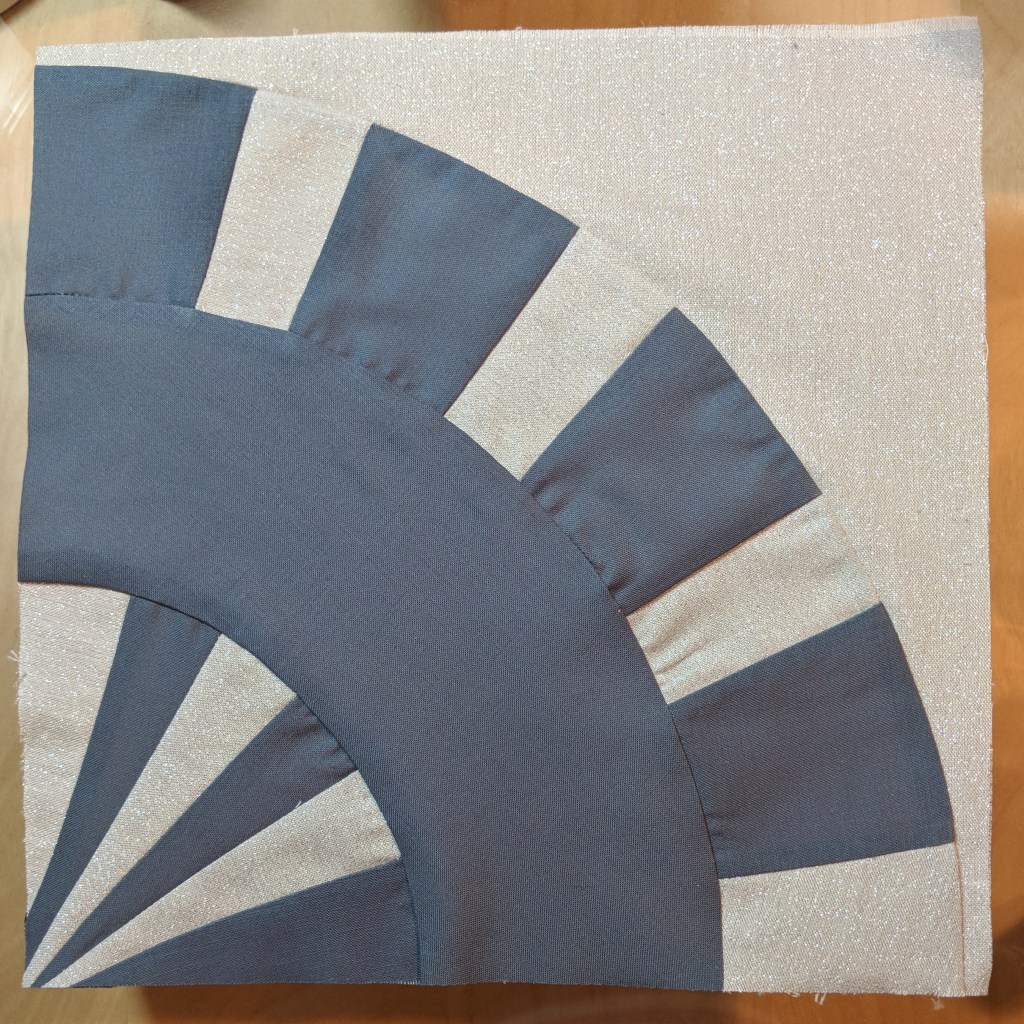
I opened up Electric Quilt 8 (EQ8) on my computer and drafted a block that resembled a quarter of a cogwheel.
One of the many benefits of working in EQ8 is that I was then able to print out paper templates for the block.
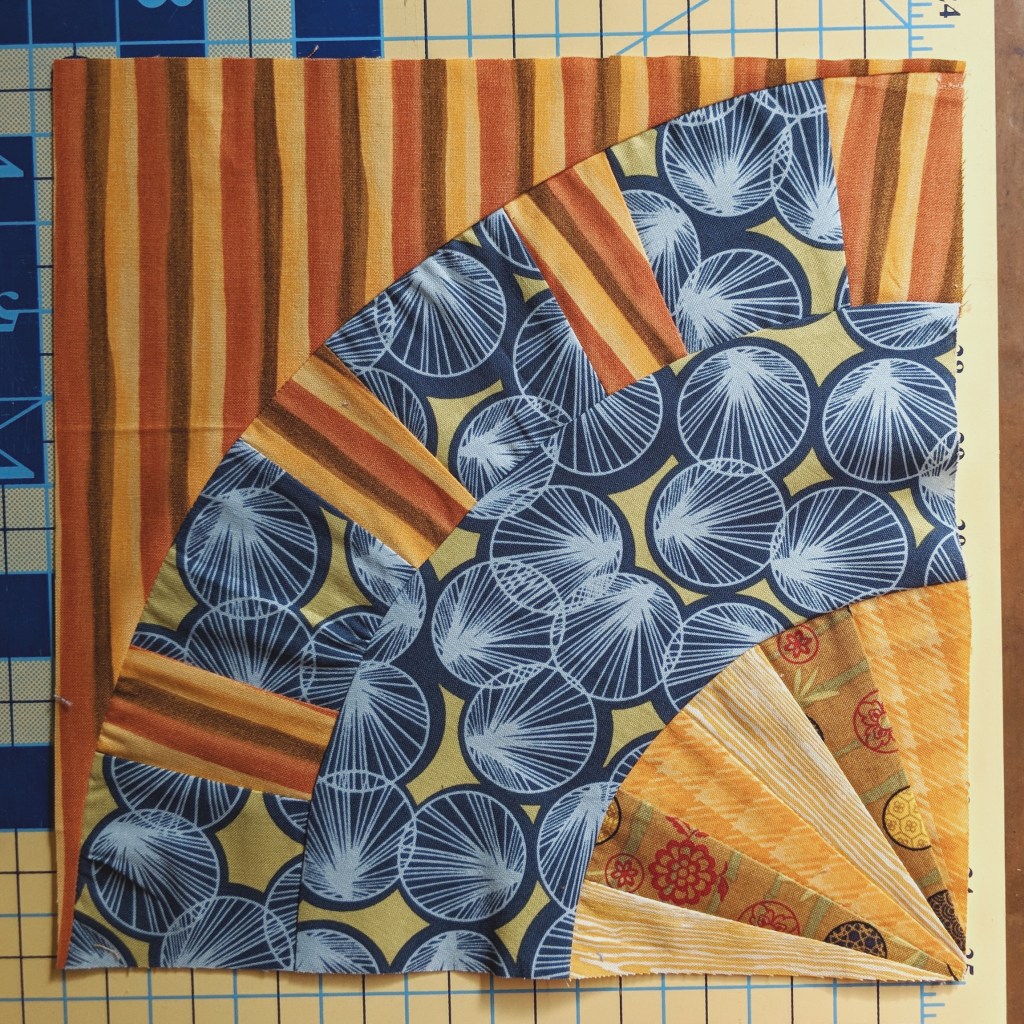
I grabbed some fabric scraps and created a very rough draft of the block just to make sure everything fit together and the dimensions were correct.
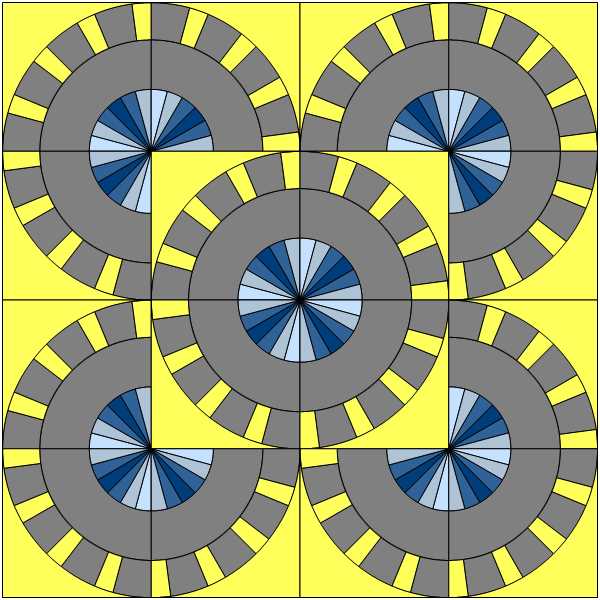
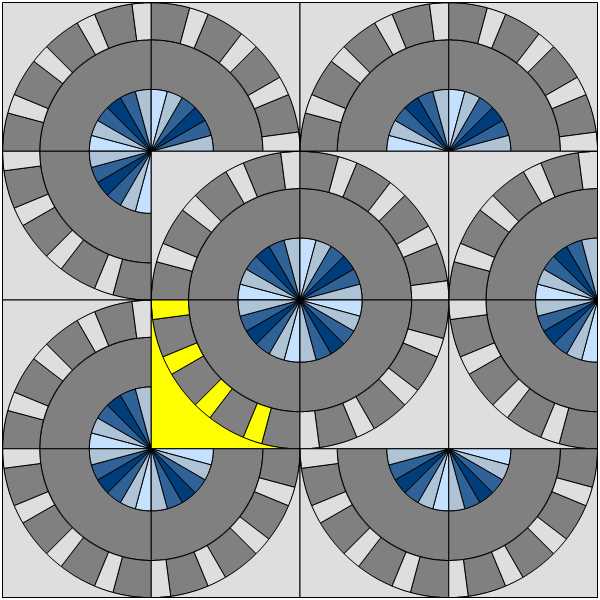
Then I went back into EQ8 to begin playing with the overall quilt layout. The images below are just a couple of layouts I tried out. Using the computer program allowed me to make quick adjustments without having to actually sew all of the blocks together like you would with a design wall.
Now it was time to figure out the real fabric I wanted to use. I found a great fabric shop on Etsy called AA Cotton Creations, and they had just what I was looking for. I chose a light gray background fabric with just a touch of metallic glitter to honor the silver anniversary of the guild. Then I decided to go with Kona Cotton in Metal because, you know, the cogwheels are made out of metal. Nothing too mind blowing there! Once the fabrics arrived, I began cutting them up and piecing them together into my 16 blocks.
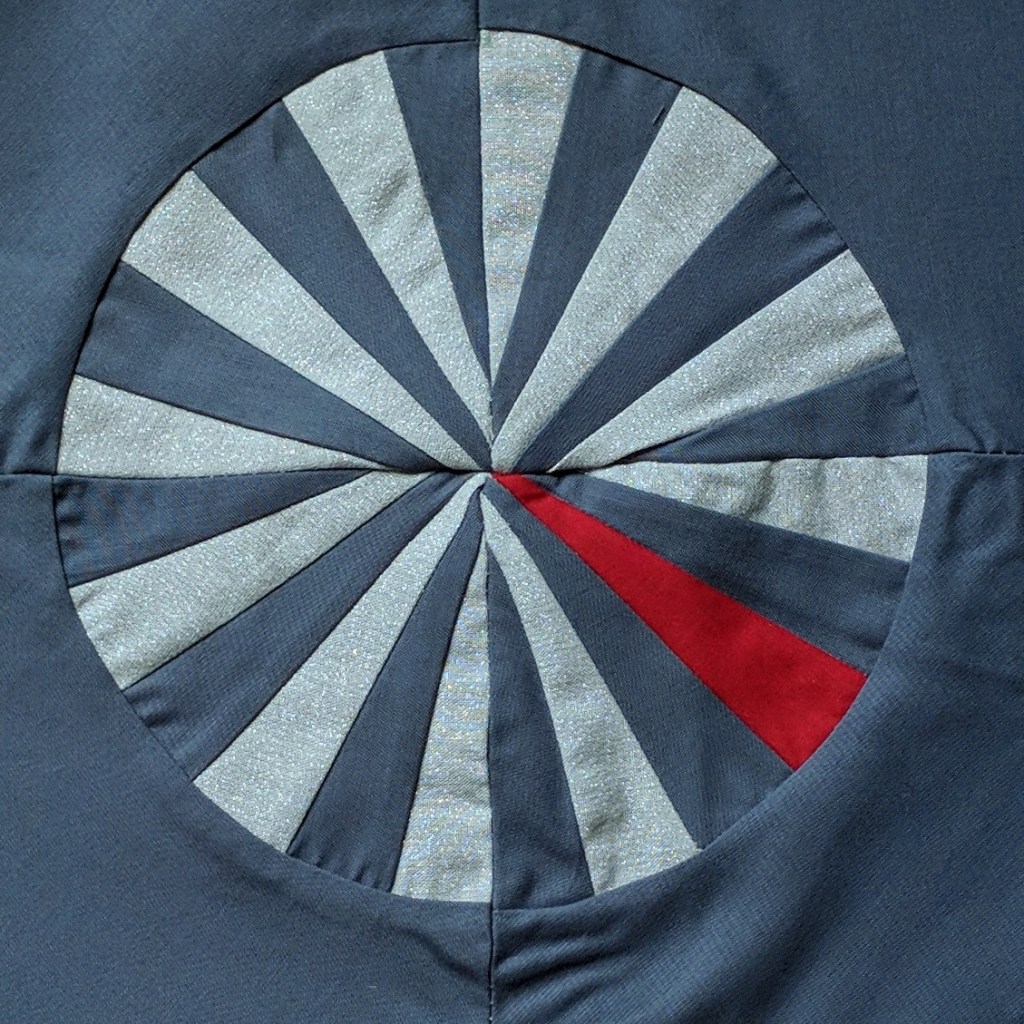
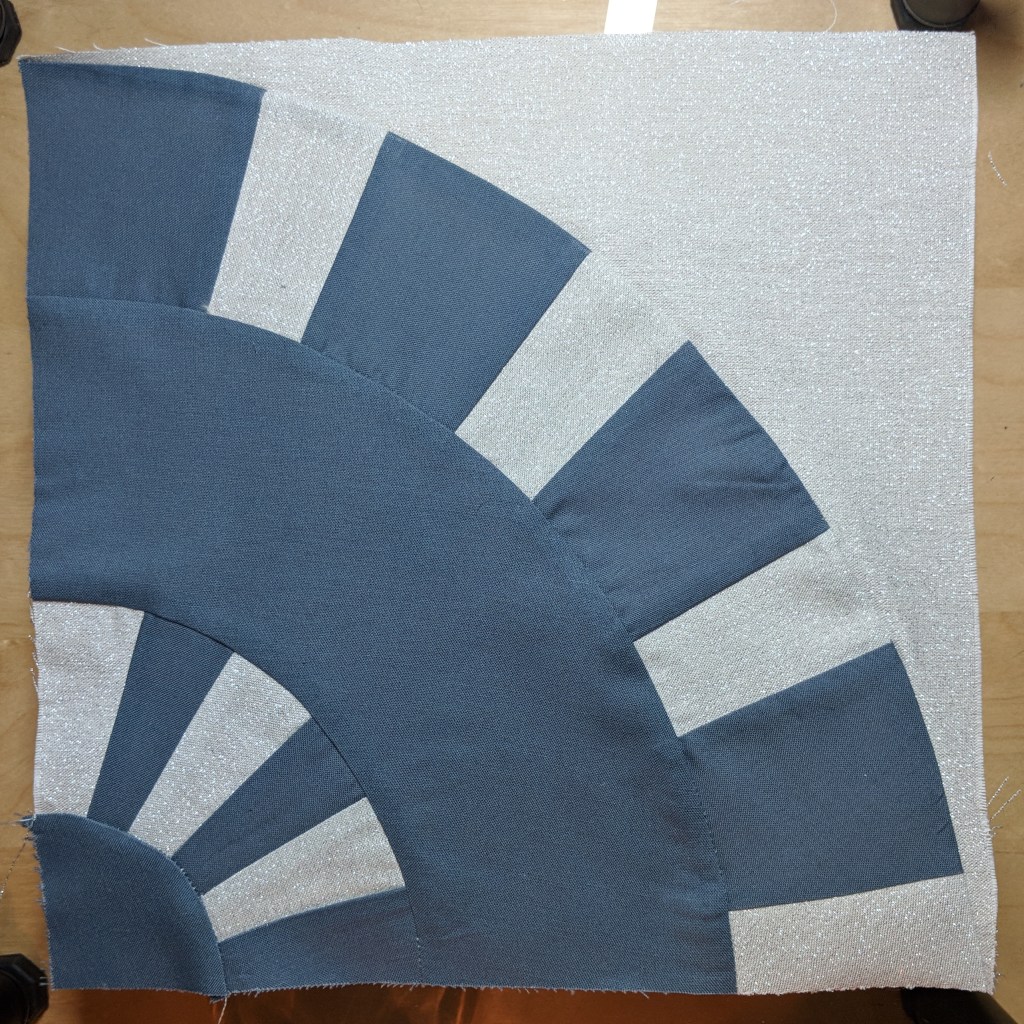
After piecing all 16 blocks, I realized I might not like how the center spokes come together once the blocks are sewn to each other. I decided to piece four of the blocks together to make one complete cogwheel to see how it would look.
AAAHHH!!! That is NOT what I wanted the center of my cogwheels to look like! I went online to look at actual cogwheels and realized I was missing the essential central hub. So I picked these blocks apart and added another quarter circle to each block.
Wow! What a difference that made! I talked about process in my previous post, and this is yet another example of how the creative process is usually not a barrier-free journey from beginning to end. Don’t let these challenges discourage you. Get that problem-solving brain working and overcome these obstacles because the end result will be so much more worthwhile!
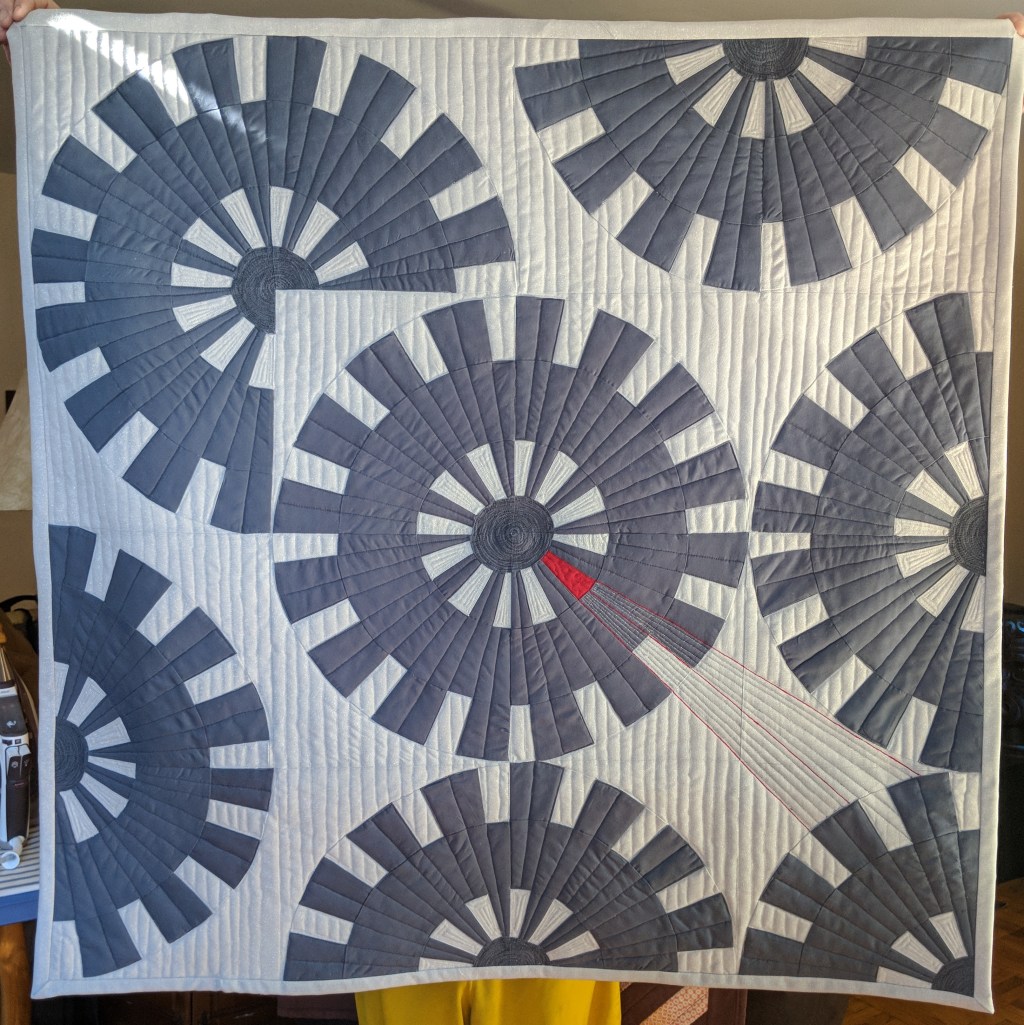
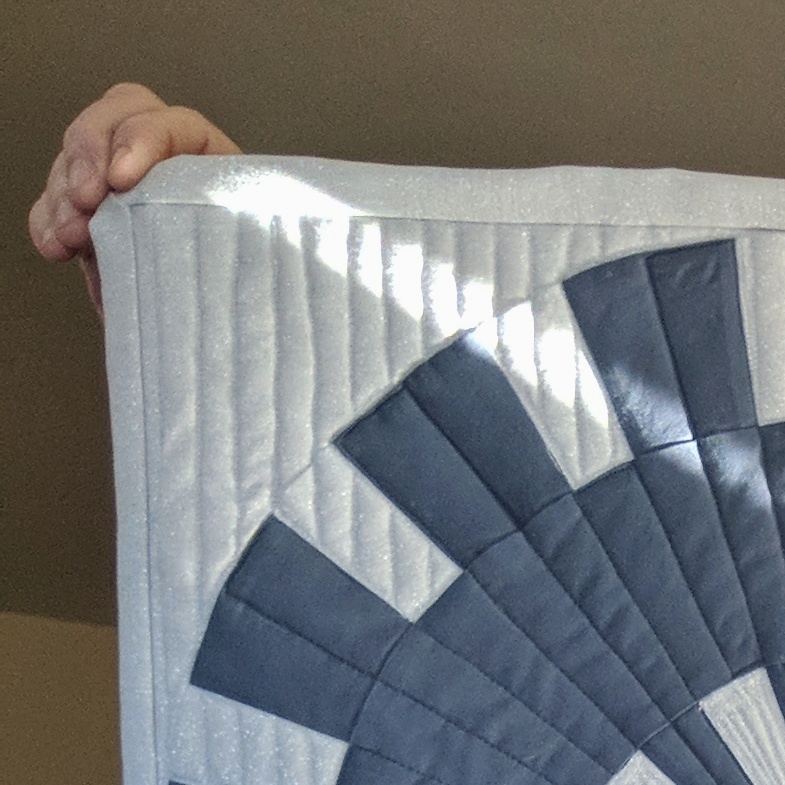
Now that the top was pieced together, it was time to quilt. I really liked how modern this quilt looked, so I wanted the quilting to reflect that same feeling. I decided to quilt straight lines going from top to bottom in the background. But because I wanted a feeling of movement to come from the cogwheels, I quilted straight lines moving in the direction of each of the teeth of the cogs. I filled the hubs with thread to give them a fun texture.
I had my friend Ryan come over as a second pair of eyes to look at what I had done so far, and he wanted to see some red thread used in the quilt. That’s when I thought of having the red piece start to emit its own light in opposition to the rest of the lines. Then I quilted gem-like lines in between the center spokes so that I could have the red “gem” start to crack and break. I thought a silver metallic thread would be a fun way to add just a bit more glitz to the quilt to emphasize how this red piece was breaking out from the machine.
And that’s pretty much it! I love how this quilt came together. There were many frustrating moments, but I couldn’t have been happier once it all finally coalesced into my first original quilt. I’d love to hear your thoughts on what you think about creating an original quilt versus following someone else’s pattern. What brings you more joy? Tell me what you think. Happy Quilting!!!
Pennsylvania National Quilt Extravaganza, September 2018