BMQ YouTube Series – Ep. 19: Virtual Trunk Show #10

BLACK LIVES MATTER — Please click on the link to find out what you can do to help end the oppression and killing of our fellow human beings.

This trunk show video shows my version of the #BrooklynConnectedQAL challenge we put together for the Brooklyn Quilters Guild back in March and April of 2020 to help keep our guild members connected during the lockdown. I had made a few tutorial videos to give our quilters options as far as creating standard ruler-cut blocks or improv-pieced blocks. I decided to do both and then mashed them together! Watch the video to see the result!

BMQ YouTube Series – Ep. 16: Virtual Trunk Show #7

BLACK LIVES MATTER — Please click on the link to find out what you can do to help end the oppression and killing of our fellow human beings.

This is another long episode because I’m talking about six quilts. These are mini quilts, all created based on prompts. I love making mini quilts because I can really experiment with ideas and techniques without committing to a full quilt. I highly recommend making them!! I’ve listed the names of the quilts and the time they appear in the video in the Description box on my YouTube channel, just in case you want to jump to one in particular.

#BrooklynConnectedQAL – Cutting & Piecing

Welcome to the next video tutorial for our virtual quilt-along, hosted by the Brooklyn Quilters’ Guild ! In this video, I’m demonstrating cutting and piecing the individual blocks for the quilt top. I include demos for ruler-cut blocks as well as improv-pieced blocks. Because it’s such a long video, I’ve listed the demo timings in the description box on my YouTube channel so you can skip ahead to the sections you want to watch.

Be sure to post pics on Instagram and Facebook and use the hashtag #BrooklynConnectedQAL. And follow that hashtag so you can see everyone else’s posts. Find the written pattern instructions on Barbara Danzi’s blog. Also be sure to subscribe to my YouTube channel so you don’t miss any of my upcoming demos. And please leave questions and comments and advice in the Comments section. This is all about staying connected as a community even as we’re staying home and social distancing.

Improv Piecing: Oh, the Possibilities!

The first few quilts I made were all about learning how to follow a pattern, learning basic quilting techniques and blocks, and getting comfortable with using my sewing machine and tools. Then I bought a Craftsy class taught by Joe Cunningham a.k.a. Joe the Quilter. The class was called “Pattern-free Quiltmaking.” I suddenly realized I could just take pieces of fabric, sew them together, and make beautiful blocks without any plan! This was so exciting!

Those of you reading this who are more experienced quiltmakers will know that this is not a new concept. “Crazy quilts” have been around for a couple centuries, but I had no idea at the time. As I began experimenting on my own as well as doing a little online research, I realized just how much freedom improv piecing can give you. Also, what a great way to use your scraps! (The image below is NOT MY WORK.)

My first real attempt to create something completely through improv piecing was a wine bottle holder. I had a bunch of Christmas-themed fabric scraps that I didn’t want to just throw away, and I had a Secret Santa party coming up. So I just started sewing, cutting, sewing, cutting, over and over until I came up with enough fabric to create the bottle holder. I loved the process and I loved the result!

I then decided to try an approach that combined a bit of a plan with improv piecing. I selected three fat quarters that were different shades of the same hue, cut them into strips, pieced the strips together, and then started randomly cutting and sewing them all back together. I then squared them off until I had enough to create a queen-sized quilt. My favorite discovery during this process was that I could take all of the scraps and put those together into rainbow strips which I used as partial inner borders for the quilt. This is one of my very favorite creations and it is proudly displayed on our bed.

My latest discovery that amped up my improv piecing was from reading Victoria Findlay Wolfe’s book Modern Quilt Magic. One of the chapters is about the kind of improv piecing I’d already been doing, but then she goes into free-form curves. Gasp!! I could improv piece curves??!! This blew my mind and it has opened up a whole new slew of possibilities for my improv piecing game.

While I still like just sitting down and randomly picking out scraps and sewing them together for a “crazy quilt” type style, what I really enjoy doing is combining sketched out ideas with improv piecing to come up with truly unique blocks that will never be completely replicated. That’s what I’m working on right now with my current quilt. Sometimes the process is frustrating because the improv just doesn’t work out the way I want it to. But for the most part, I find myself so fulfilled by this process.

Have any of you tried any sort of improv piecing? I’d love to hear from you. I find it meditative, but maybe some of you find it frustrating? Share your thoughts in the Comments section below and happy crafting!!

Portrait Quilt: A Happy Surprise

The current co-president of the Brooklyn Quilters Guild began a small group last year called Quilt Explorers. We are given prompts and are then tasked with interpreting those prompts into 20″ x 20″ mini quilts. It’s a fun way to experiment with new techniques, flex your creative muscles, and often surprise yourself with the finished result. At least that’s what usually happens for me, and the most recent prompt was no exception: A portrait quilt.

I decided I wanted to use my mother’s high school senior photo as the inspiration for my quilt. I currently don’t use appliqué, but I wanted to figure out how to get a similar result with piecing. My first idea was to create a pixelated quilt. I had never tried that before, and I thought it would be a fun interpretation. However, once I started working on it, I was not happy with the result. I’ll probably go back to the pixel idea one of these days, but I decided to change tack.

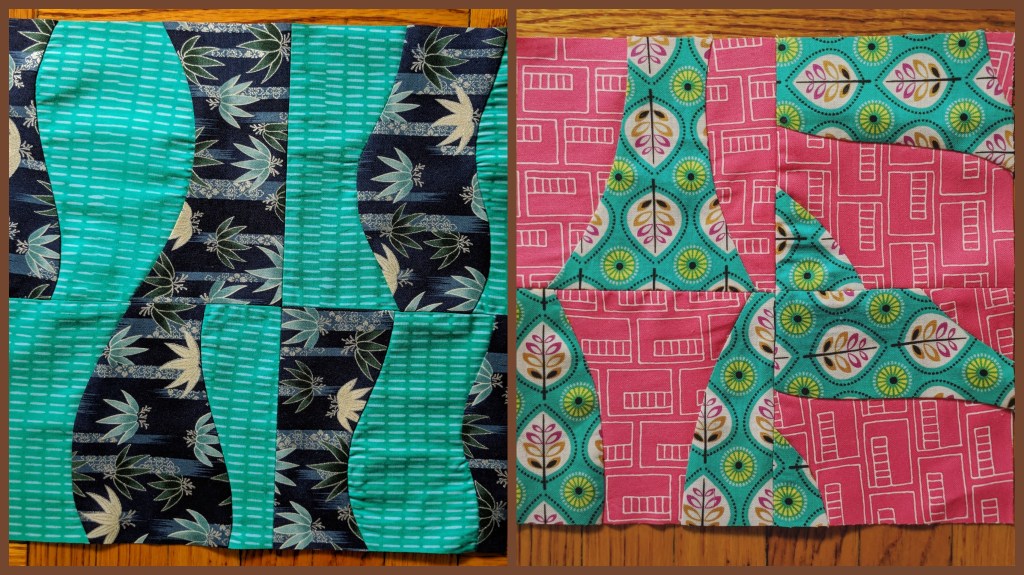
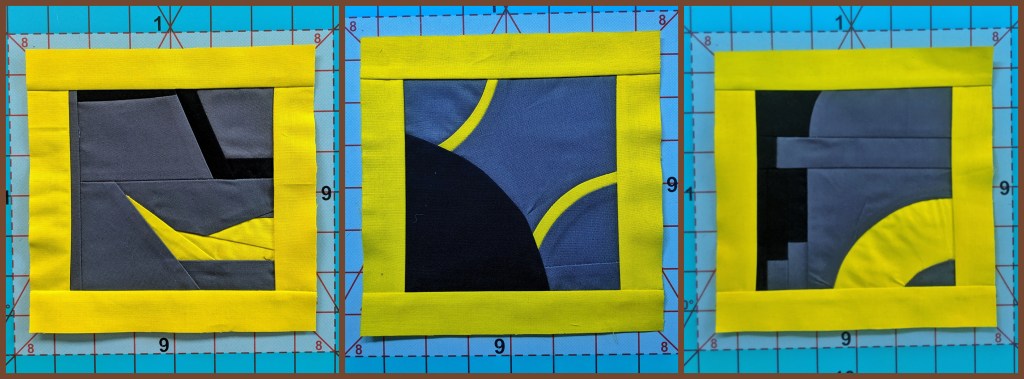
I had been having fun with improv curves, so I figured I would go ahead and try to piece the portrait using curved piecing throughout. I mean, I was getting pretty good at it, so it shouldn’t be too hard, right? Oof. The result was not pretty.

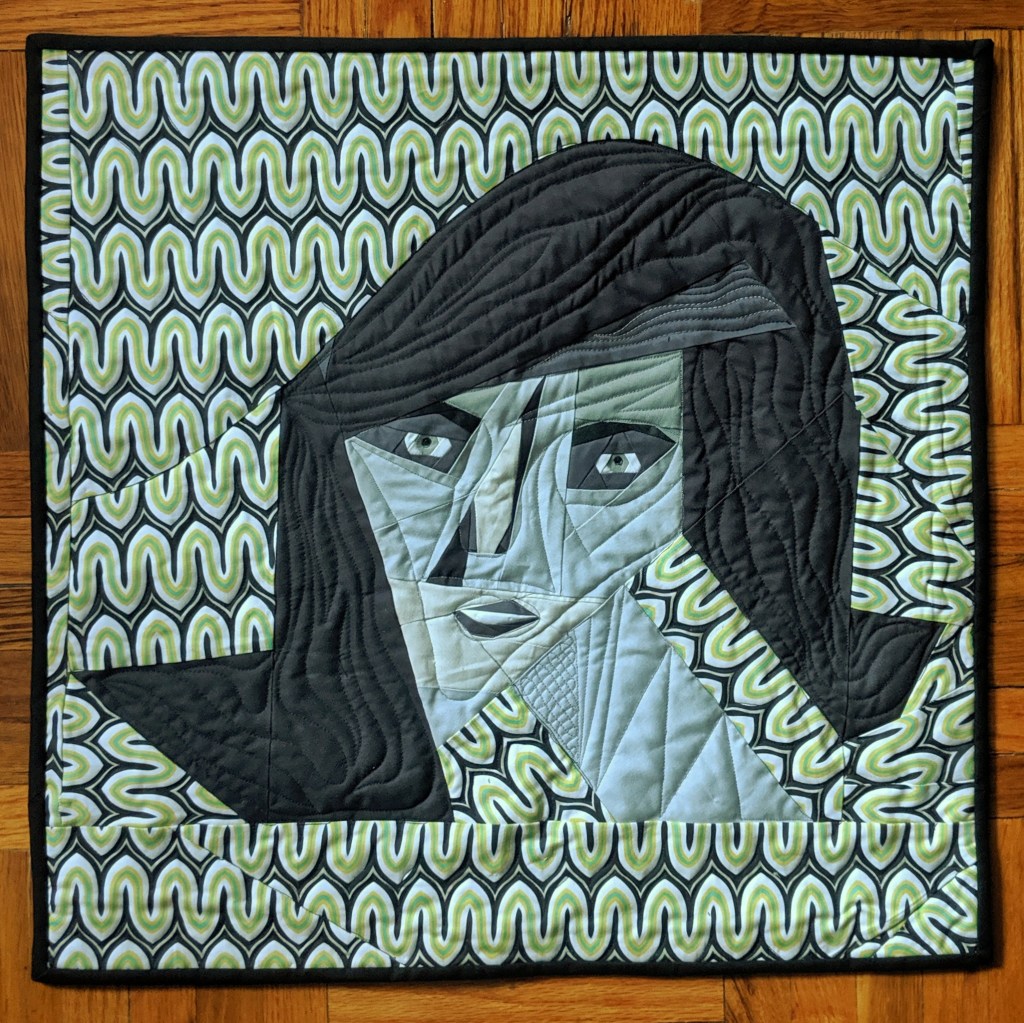
I was feeling pretty dejected at this point, so I decided to put the portrait quilt project to the side. However, I had an idea for how to piece eyes that I wanted to try out. So I grabbed my smallest hexi template, cut out some fabric, and then pieced around it until I came up with a couple of really cool eyes. Suddenly I was inspired! I realized I could use these as the kernel for my portrait quilt. But instead of using my mother’s photo I was just going to completely improv piece a random portrait and see what would happen. (And I was going to keep the improv curves to a minimum.)

The result was a pretty funky-looking woman that I’m totally happy with. I think I must have been drawing subconscious inspiration from the old Beetlejuice cartoons I used to watch on Saturday mornings as a kid because this character would have totally fit in.

If I had to do it again, I would definitely make some changes, especially for the nose. But overall, this turned out to be a happy ending. It is yet another example of where my initial couple of ideas completely failed, I wanted to give up, and then a burst of creative energy fueled me into a fun finish. In fact, I’m thinking at some point I’ll do a whole family of these portraits and make a “gallery” quilt out of them. I think that’ll be super fun!

Have you had any similar experiences? Have you started out a project one way and then ended with a completely different finish? I’d love to hear about it! Leave comments below and share your stories with all of us. Happy crafting!!