BLACK LIVES MATTER — Please click on the link to find out what you can do to help end the oppression and killing of our fellow human beings.
This is another long episode because I’m talking about six quilts. These are mini quilts, all created based on prompts. I love making mini quilts because I can really experiment with ideas and techniques without committing to a full quilt. I highly recommend making them!! I’ve listed the names of the quilts and the time they appear in the video in the Description box on my YouTube channel, just in case you want to jump to one in particular.
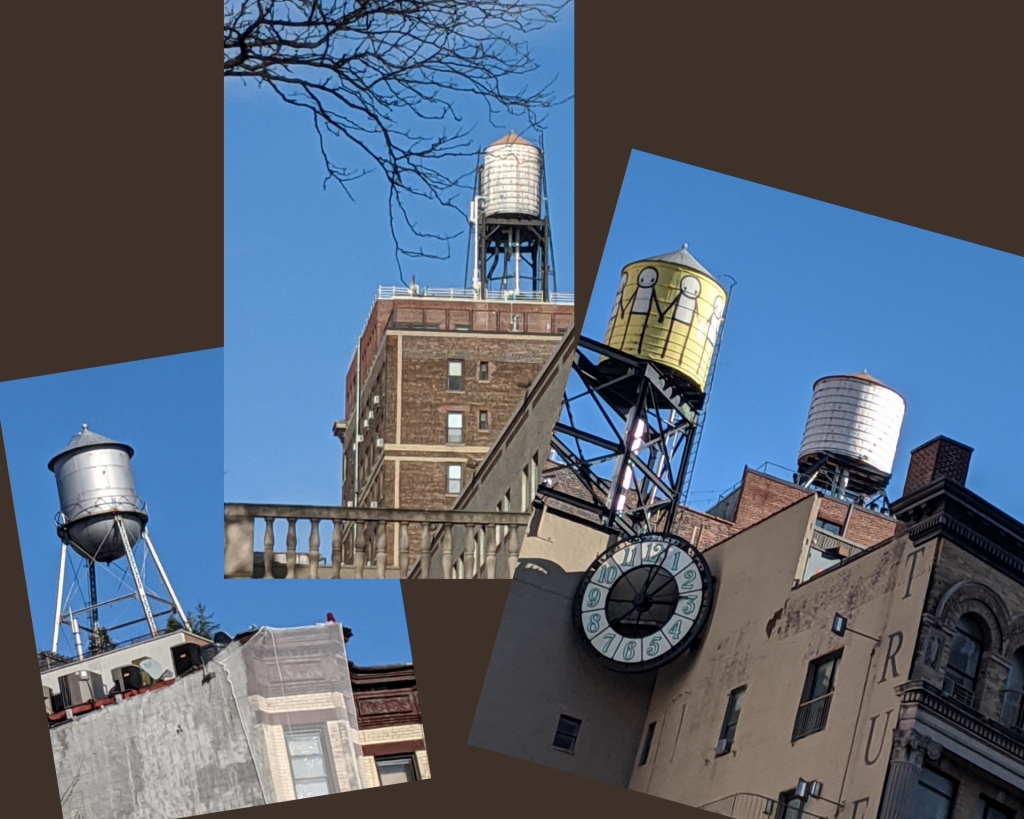
This quilt design was inspired by all of the rooftop water towers you’ll see as you perambulate around New York City. You might think the rooftop water tower is just some rotting old, unused piece of infrastructure from a bygone era, but after reading this article from 6sqft you’ll realize they’re just as much in use today as they were decades ago. As a result, the rooftop water tower has become a well-recognized symbol of NYC, appearing in graphic designs on hipster tees, screenprinted tea towels sold at outer borough flea markets, and stenciled graffiti walls throughout the city.
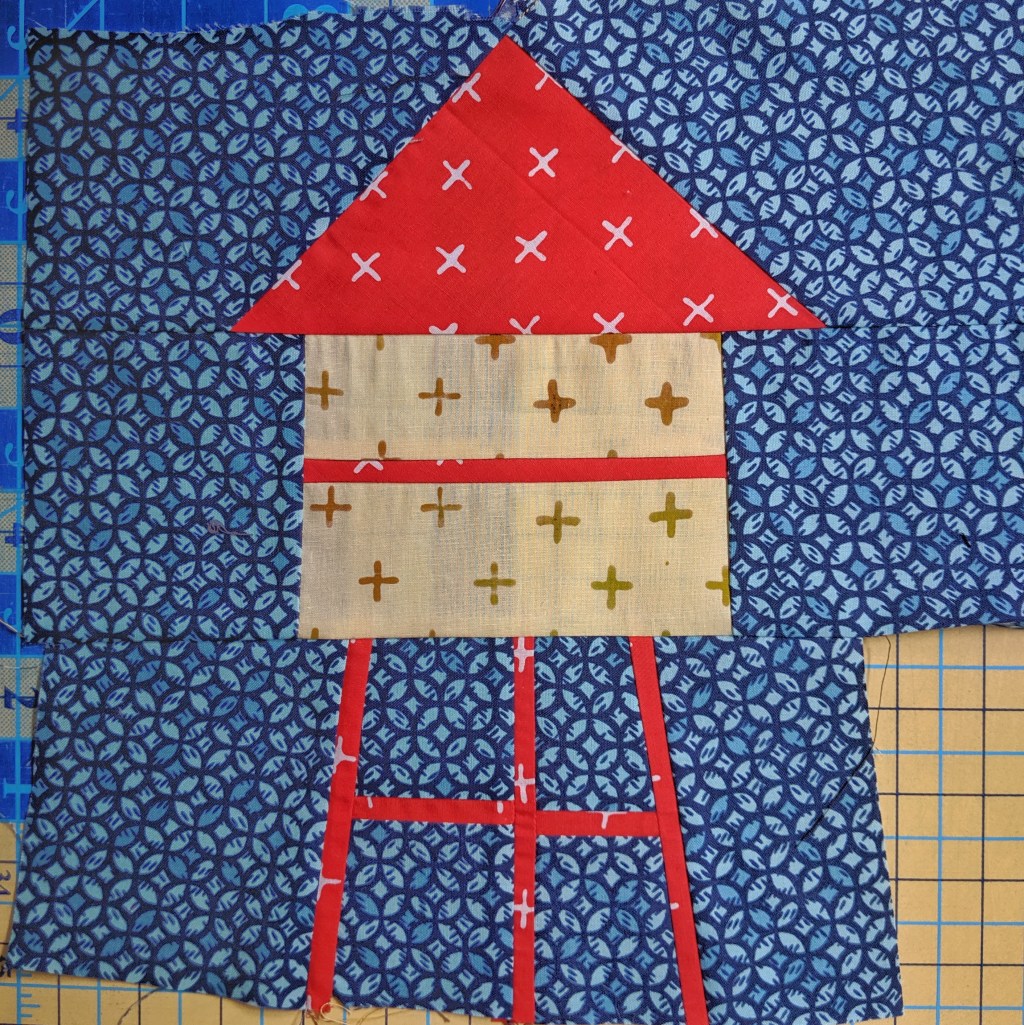
When I was working on my BK Snaps quilt, I wanted the blocks to represent different “snapshots” you would find around Brooklyn. Of course, I had to include a rooftop water tower. I used scraps to make my prototype block, and it was so cute I decided right then and there that I would design a whole quilt around that block at a later date.
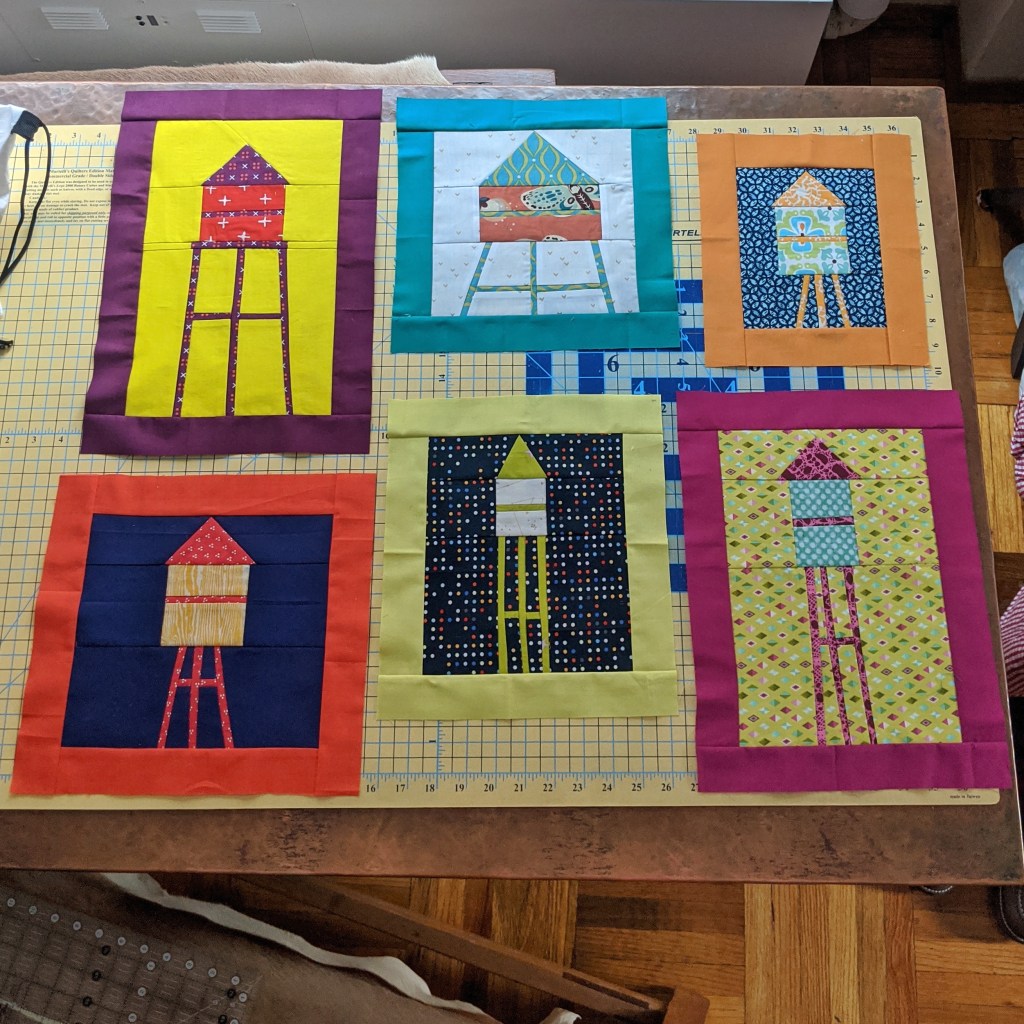
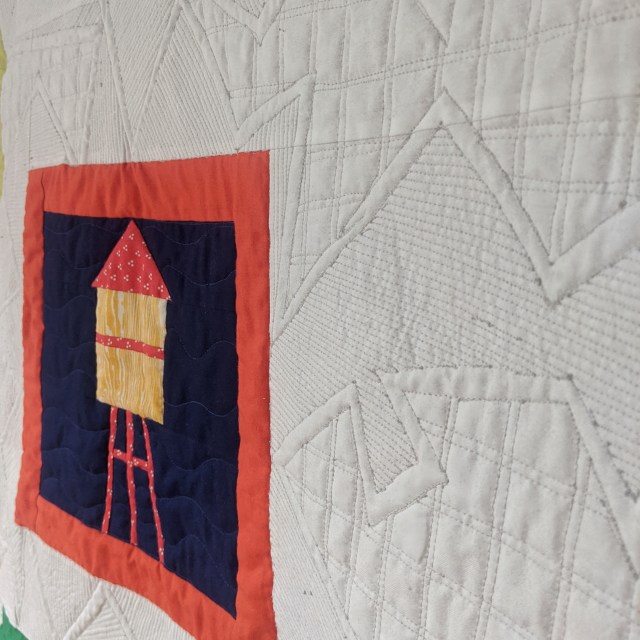
A few months ago I finally started working on a bunch of different water tower blocks. I was determined to only use scraps for the blocks themselves and improv piece them so they were each unique. Once I made a few, I started thinking about the overall layout I would want for the quilt top and decided I wanted it to look like a gallery wall of “framed photos” of rooftop water towers. So I framed each block with matching solid strips of fabric and kept making blocks in different shapes and sizes until I was satisfied with the layout.
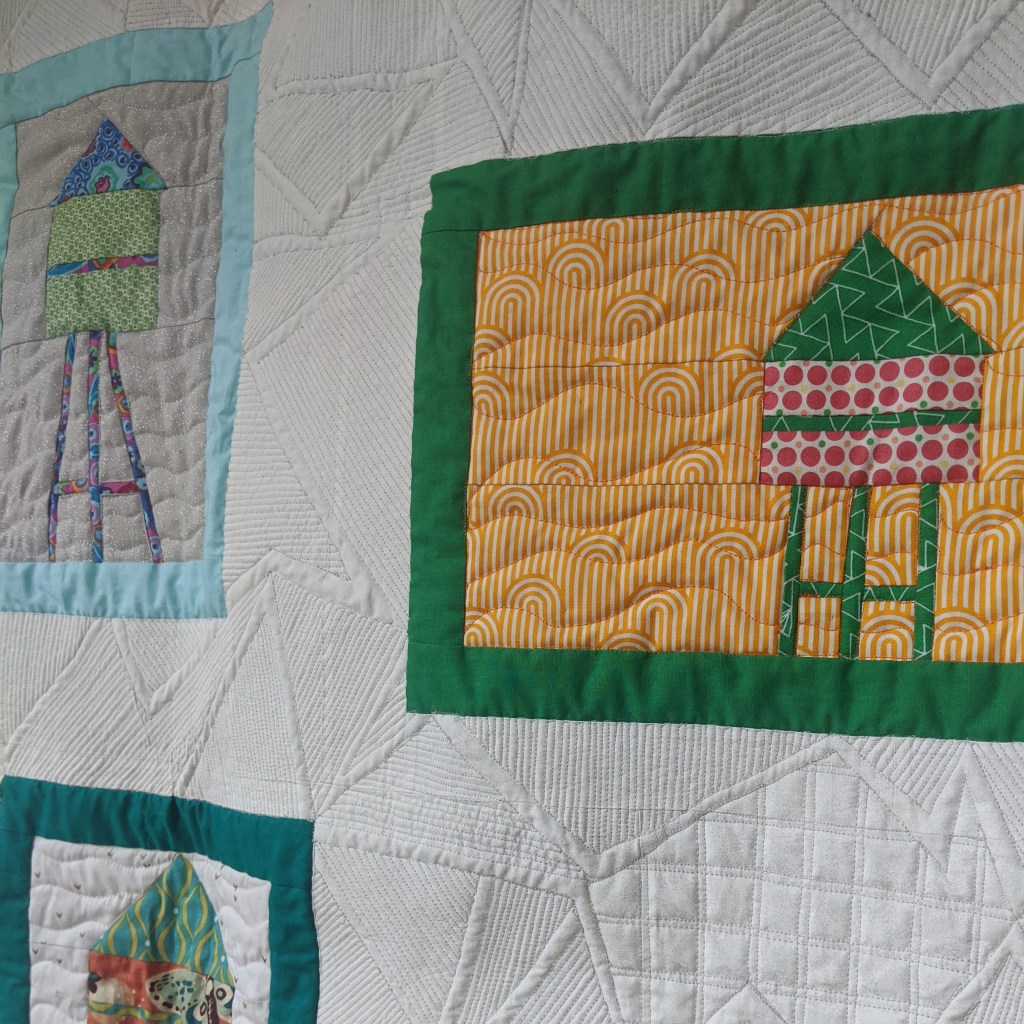
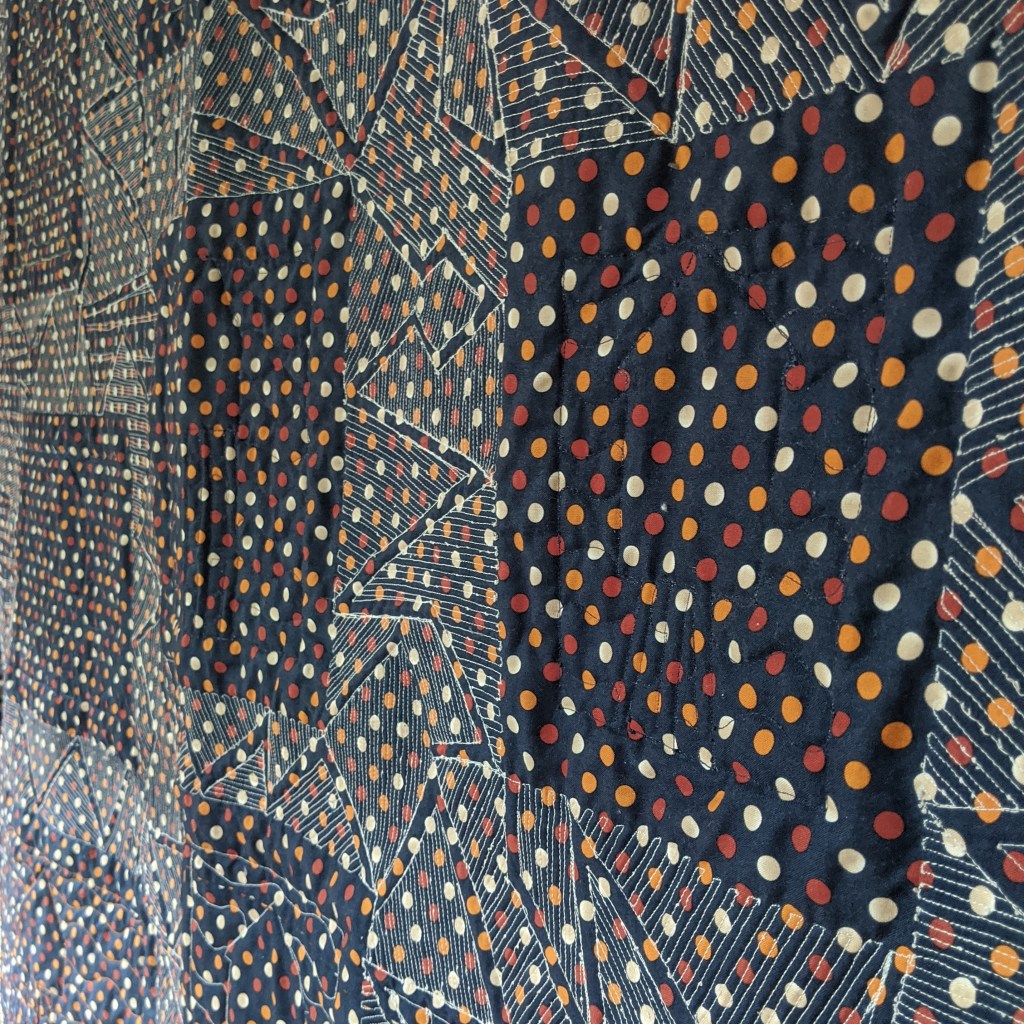
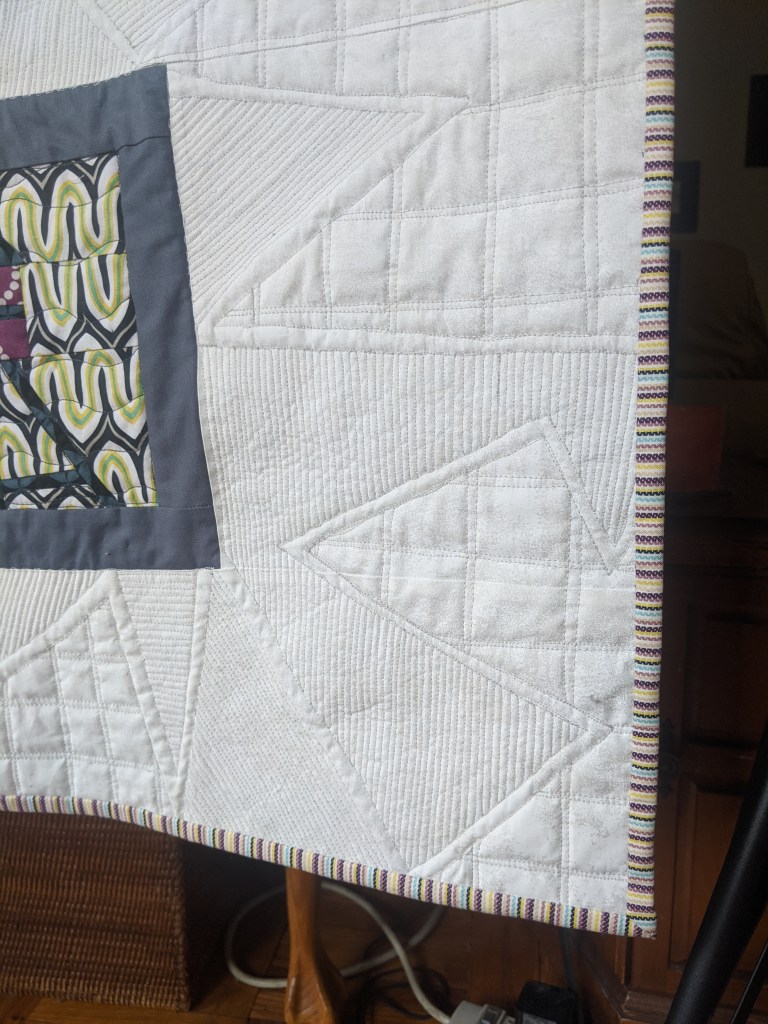
As I was piecing the quilt top, I began thinking about the overall quilt design. Because the blocks are scrappy and cutesy, I wanted the quilting to contrast — maybe something a little more graphic and urban. I decided to fill the white background sashing with various triangular shapes and sharp-angled polygons filled in with very dense matchstick quilting. Then every once in a while, I would break that up with a more open grid-like quilting design. I find the overall effect to have a graffiti-like quality, which I think is appropriate for the subject matter.
Because the majority of the quilting is very dense, I decided to keep the quilting inside the blocks very simple. I stitched in the ditch around each water tower and then quilted easy wavy lines in the “air” around each tower. I ultimately decided to not quilt inside the actual frames at all because I wanted a noticeable break between the dense quilting of the sashing and the very low-volume quilting of the water towers. (A distinction you might notice more on the back of the quilt.)
My final design decision was using a striped binding to frame the entire “gallery wall.” I was fortunate enough to have this fabric on hand, and the colors of the stripes are varied enough that they seem to match whatever colors are near them. And the colors of the binding are light enough that they don’t take the eye away from the blocks, which should be the focus of the quilt.
Et voilà! That’s my Rooftop Water Towers quilt! It took me FOR-EV-AH to finish, but I’m so happy with how it turned out. I really love how it combines urban imagery with a traditional crafting style. Have you ever been inspired by your surroundings and created something as a result? I’d love to hear about it, so please post comments and questions below. Share your own crafting stories, please! Happy making, everyone!!
I just completed a new quilt, and this video takes you from the beginning to the end of the process. And what a process it was! Whew!! I’d love to hear about your own quilting and making process, so be sure to leave any questions or comments here or on my YouTube channel so we can keep the quilting conversation going. And please subscribe so you don’t miss out on any upcoming videos!
The quilt featured on my home page is the very first original quilt I ever designed, pieced, and quilted all on my own. In making this quilt I had the epiphany that I feel so much more joy when I create a quilt from scratch rather than following someone else’s instructions. This is not a judgment for anyone else’s process or creative expression. We are all on our own journeys, and I respect and honor that. But for me, I find more fulfillment realizing my own creative ideas versus someone else’s. In this post, I want to take you through the process of creating this quilt from start to finish. If you haven’t tried designing your own quilt, I hope this inspires you to rise to the challenge. You might be surprised how it could change your outlook on your creative process!
This particular quilt started with a prompt. The Brooklyn Quilters Guild was gearing up for its 2018 quilt show, and the co-presidents put out a mini quilt challenge to celebrate the guild’s 25th anniversary. We were given the following parameters.
R E Q U I R E M E N T S :
Shades of gray (white OK)
A drop of red, not more the 3 x 3 inches or less than 1 x 1 inch.
40 x 40-inch quilt
Quilt pattern of your choice
Quilt must have sleeve, label, and name attached.
Keep in mind that we are celebrating the 25th anniversary of our guild, our new location at Industry City, and a little modern twist. Be creative, have fun, and make some beautiful fiber art.
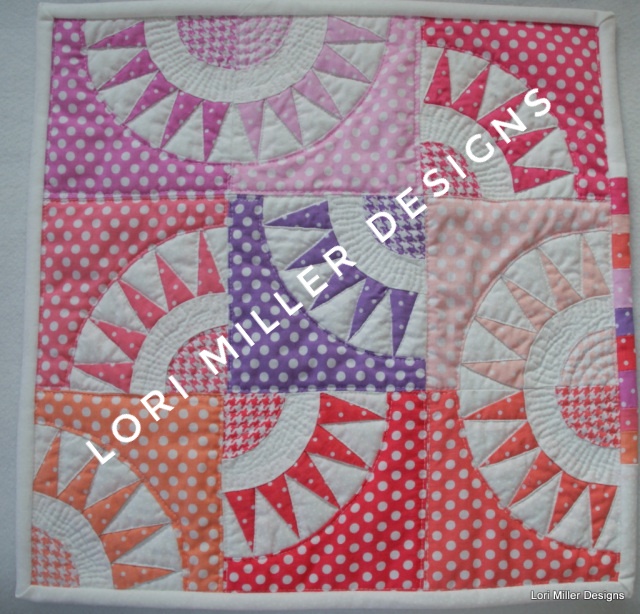
I didn’t really know this about myself at this point since this was my first original quilt, but I have since realized that I love prompts and parameters. Creating something out of thin air does not come easy for me, so I need a starting off point, even something rather open like the above prompt. I began thinking about being a Brooklyn quilter and a New Yorker. I had been seeing a lot of New York Beauty quilts online recently (see photo below), and I thought it might be fun to do an industrial twist on that idea.
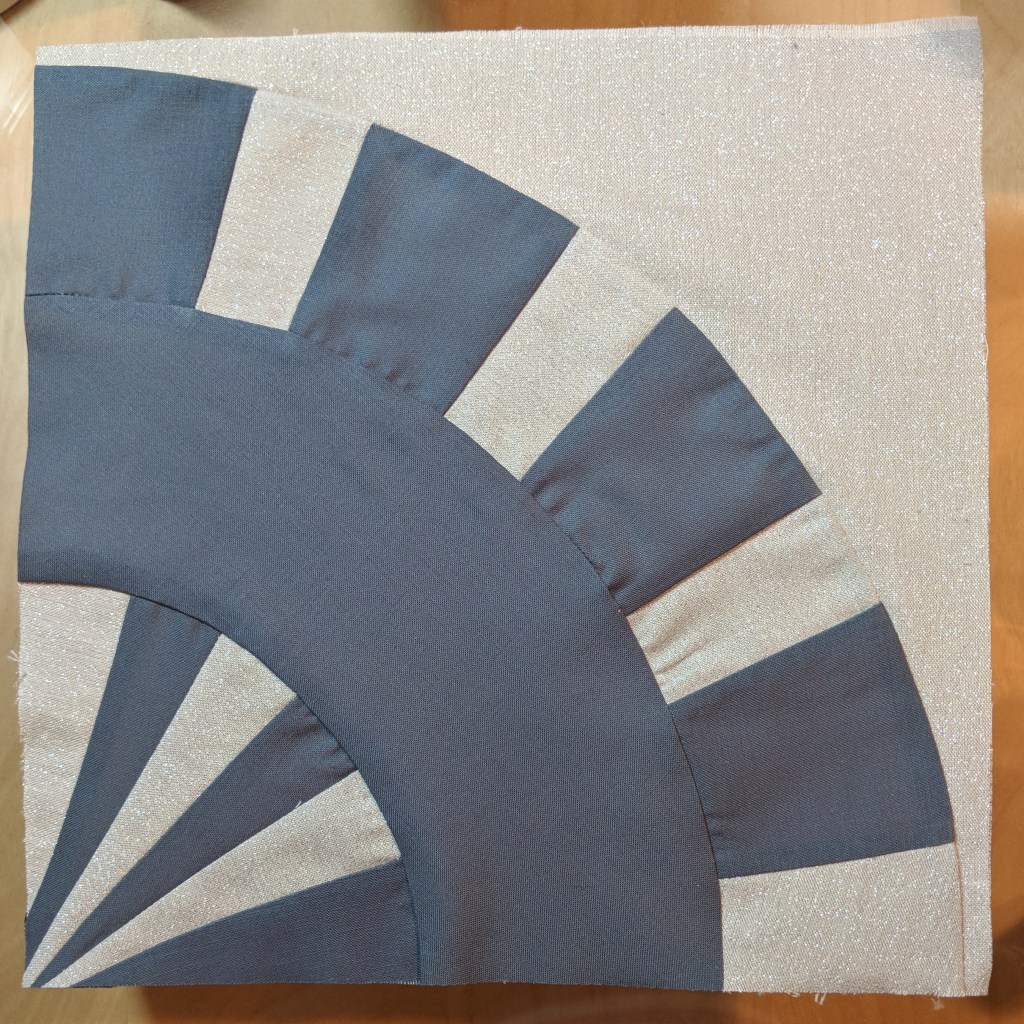
I opened up Electric Quilt 8 (EQ8) on my computer and drafted a block that resembled a quarter of a cogwheel.
One of the many benefits of working in EQ8 is that I was then able to print out paper templates for the block.
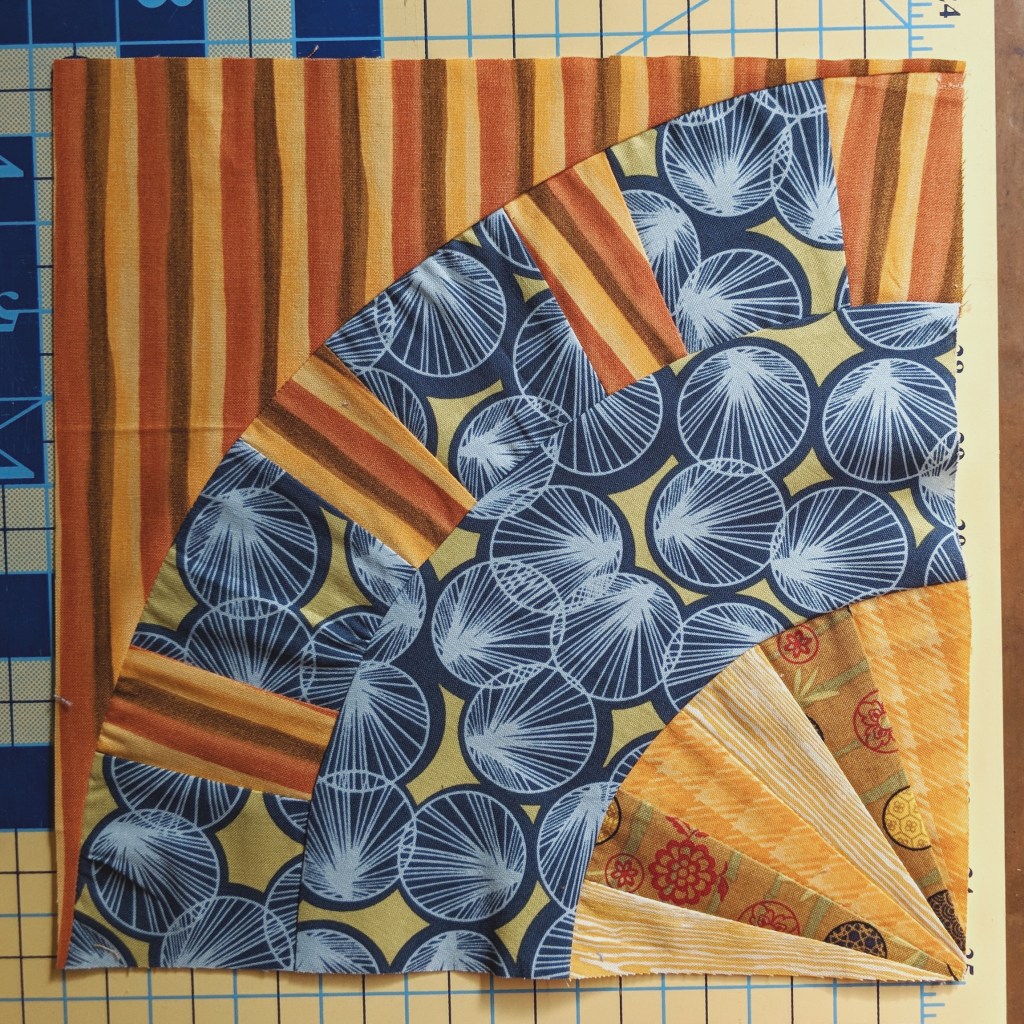
I grabbed some fabric scraps and created a very rough draft of the block just to make sure everything fit together and the dimensions were correct.
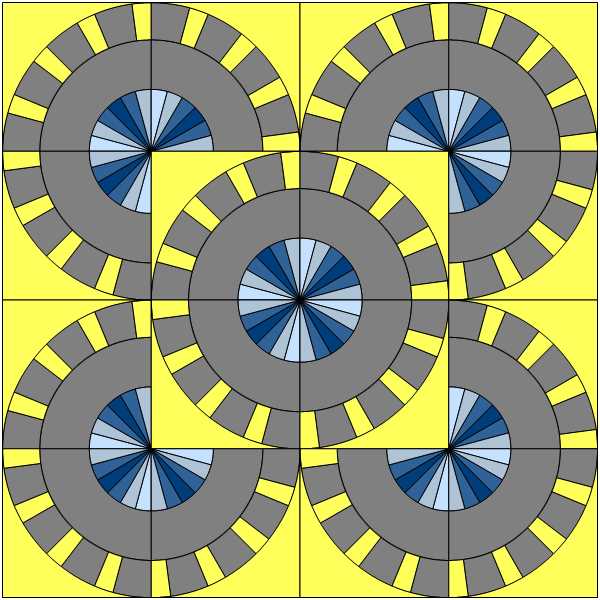
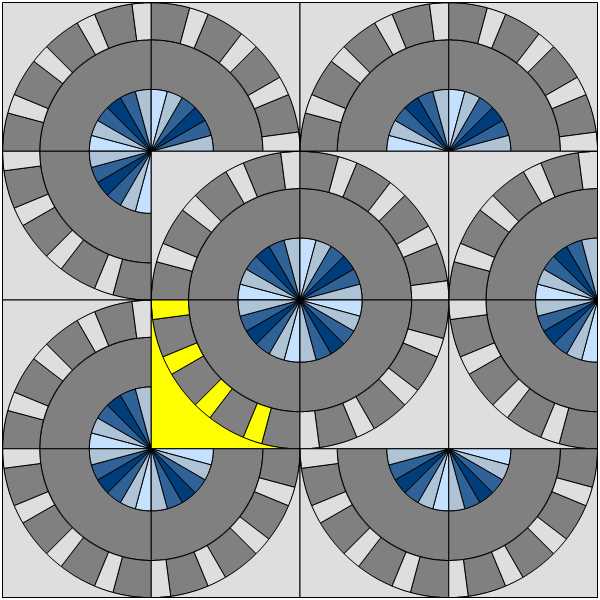
Then I went back into EQ8 to begin playing with the overall quilt layout. The images below are just a couple of layouts I tried out. Using the computer program allowed me to make quick adjustments without having to actually sew all of the blocks together like you would with a design wall.
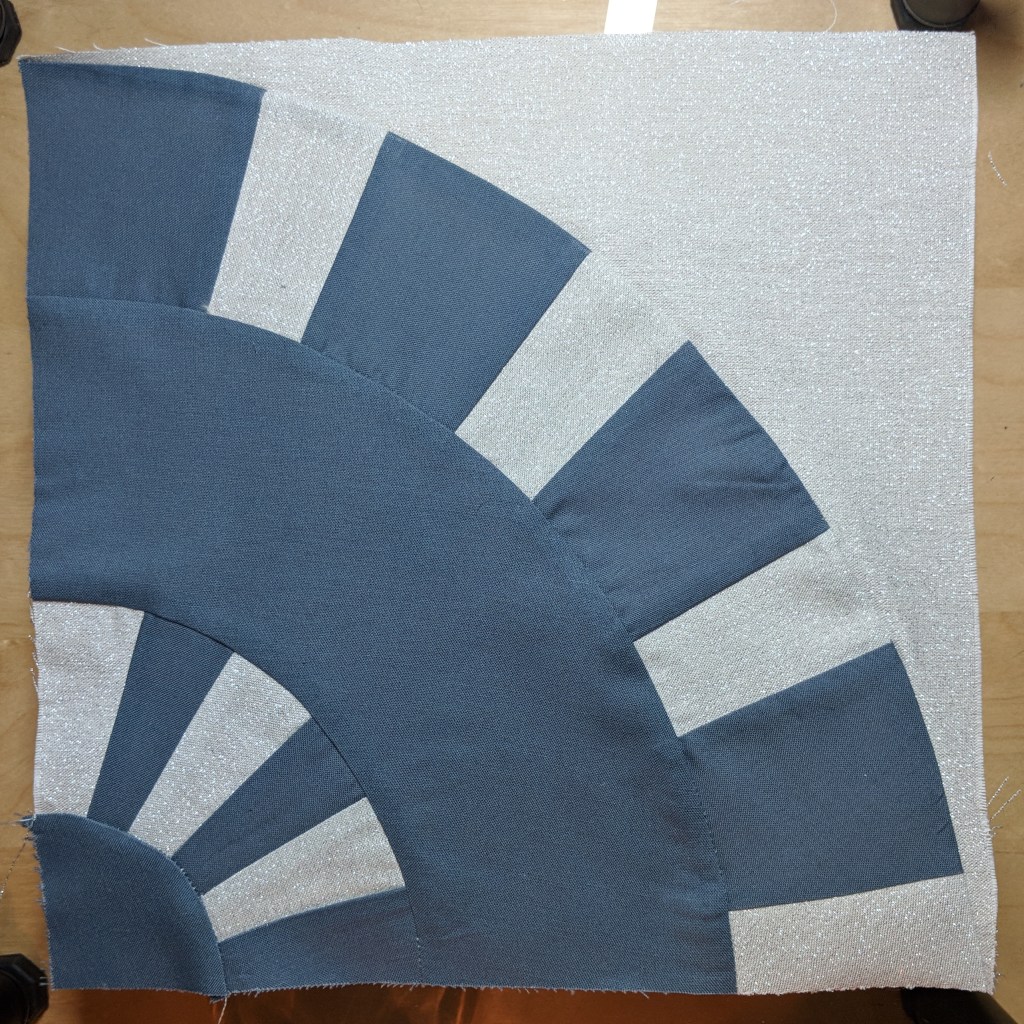
Now it was time to figure out the real fabric I wanted to use. I found a great fabric shop on Etsy called AA Cotton Creations, and they had just what I was looking for. I chose a light gray background fabric with just a touch of metallic glitter to honor the silver anniversary of the guild. Then I decided to go with Kona Cotton in Metal because, you know, the cogwheels are made out of metal. Nothing too mind blowing there! Once the fabrics arrived, I began cutting them up and piecing them together into my 16 blocks.
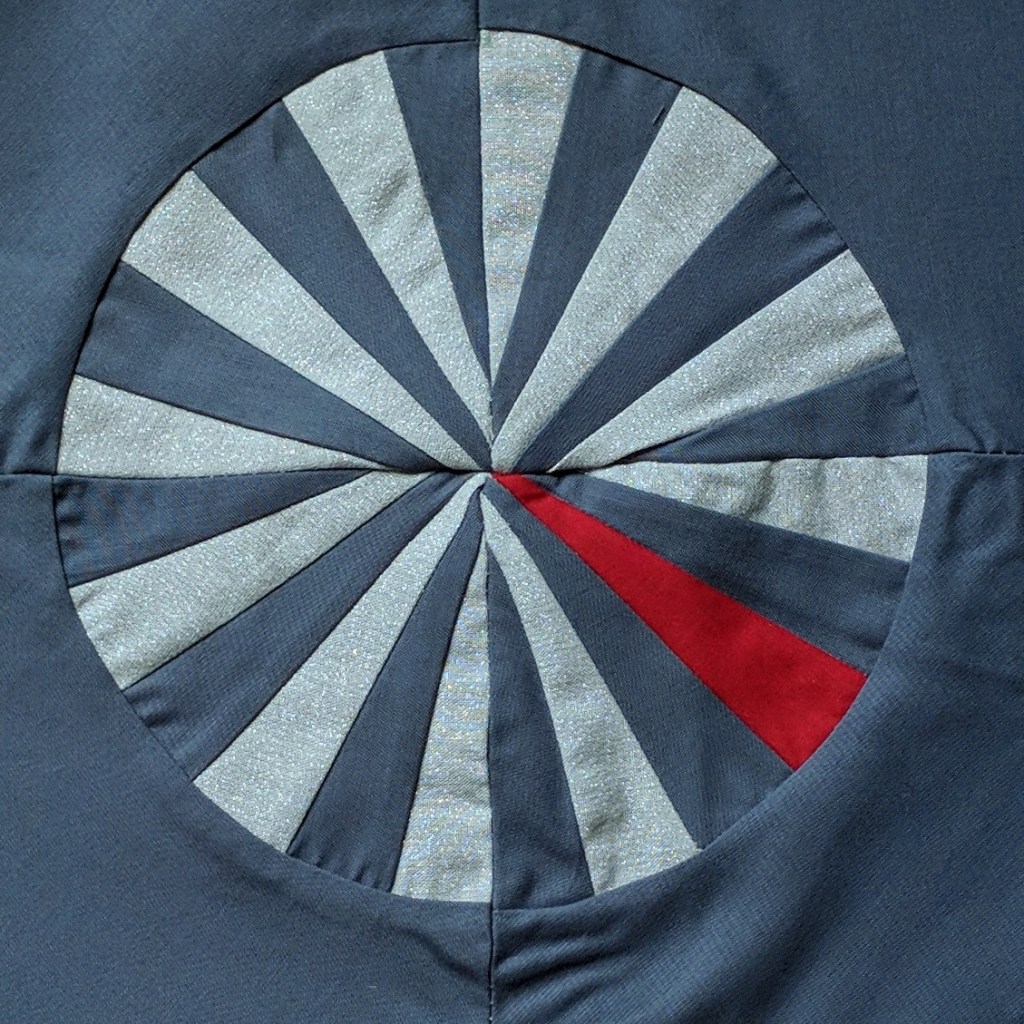
After piecing all 16 blocks, I realized I might not like how the center spokes come together once the blocks are sewn to each other. I decided to piece four of the blocks together to make one complete cogwheel to see how it would look.
AAAHHH!!! That is NOT what I wanted the center of my cogwheels to look like! I went online to look at actual cogwheels and realized I was missing the essential central hub. So I picked these blocks apart and added another quarter circle to each block.
Wow! What a difference that made! I talked about process in my previous post, and this is yet another example of how the creative process is usually not a barrier-free journey from beginning to end. Don’t let these challenges discourage you. Get that problem-solving brain working and overcome these obstacles because the end result will be so much more worthwhile!
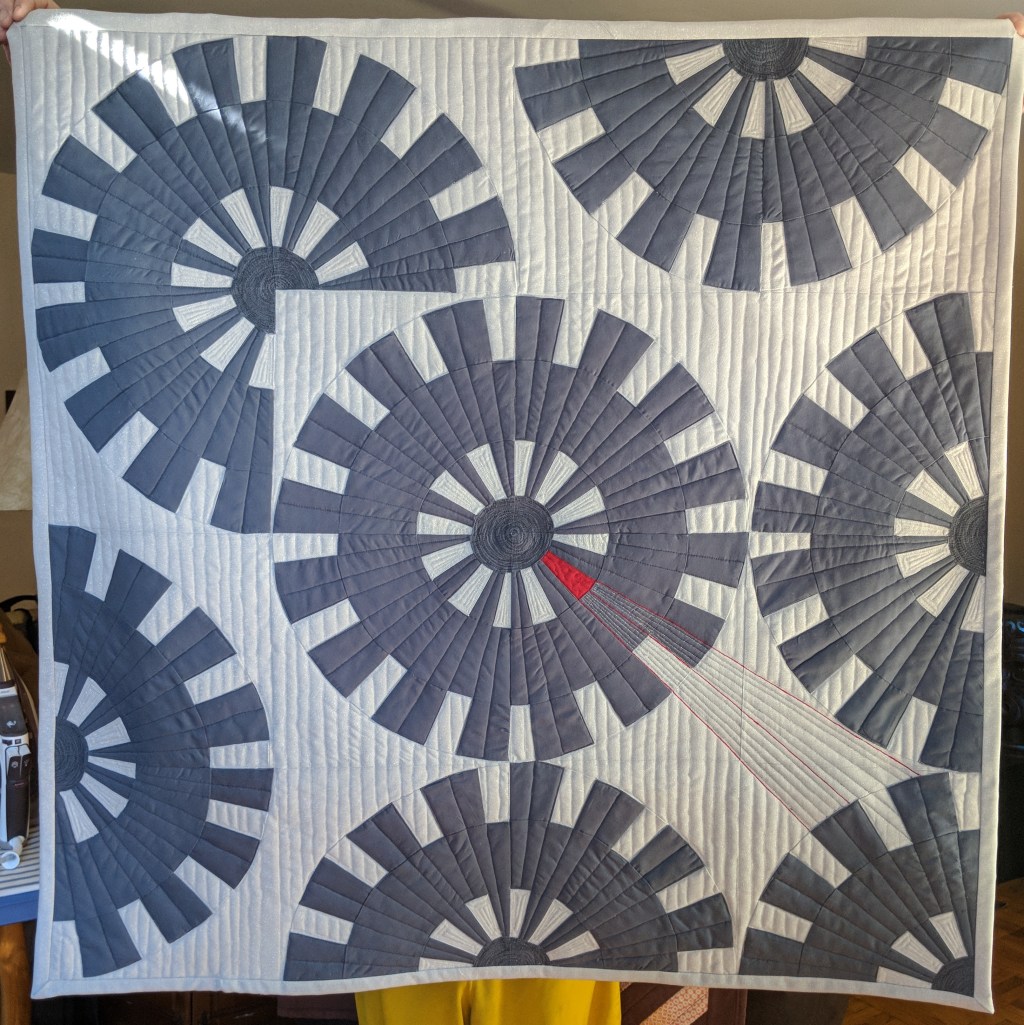
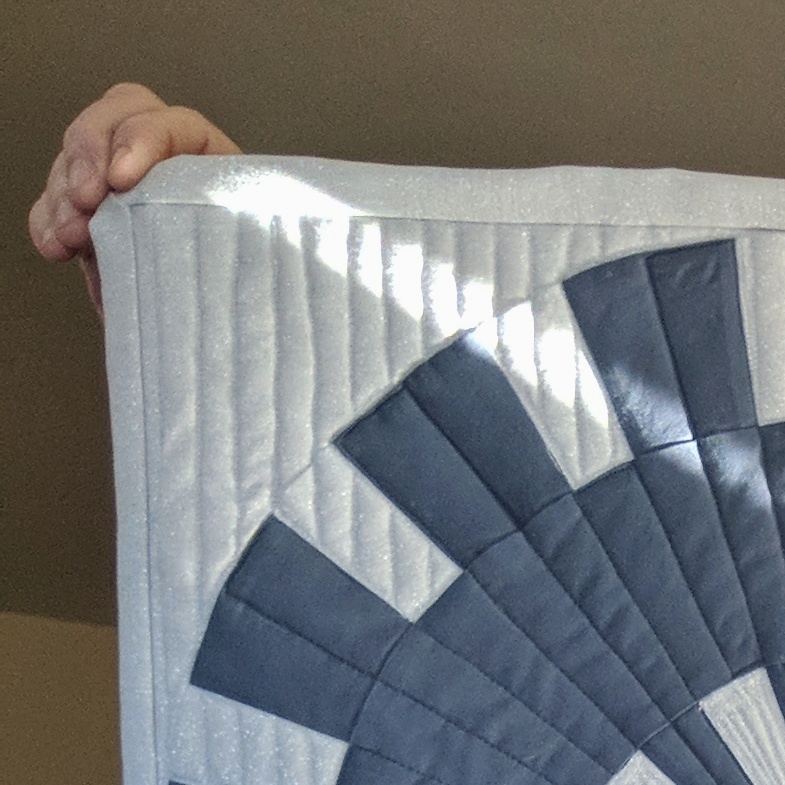
Now that the top was pieced together, it was time to quilt. I really liked how modern this quilt looked, so I wanted the quilting to reflect that same feeling. I decided to quilt straight lines going from top to bottom in the background. But because I wanted a feeling of movement to come from the cogwheels, I quilted straight lines moving in the direction of each of the teeth of the cogs. I filled the hubs with thread to give them a fun texture.
I had my friend Ryan come over as a second pair of eyes to look at what I had done so far, and he wanted to see some red thread used in the quilt. That’s when I thought of having the red piece start to emit its own light in opposition to the rest of the lines. Then I quilted gem-like lines in between the center spokes so that I could have the red “gem” start to crack and break. I thought a silver metallic thread would be a fun way to add just a bit more glitz to the quilt to emphasize how this red piece was breaking out from the machine.
And that’s pretty much it! I love how this quilt came together. There were many frustrating moments, but I couldn’t have been happier once it all finally coalesced into my first original quilt. I’d love to hear your thoughts on what you think about creating an original quilt versus following someone else’s pattern. What brings you more joy? Tell me what you think. Happy Quilting!!!
Pennsylvania National Quilt Extravaganza, September 2018