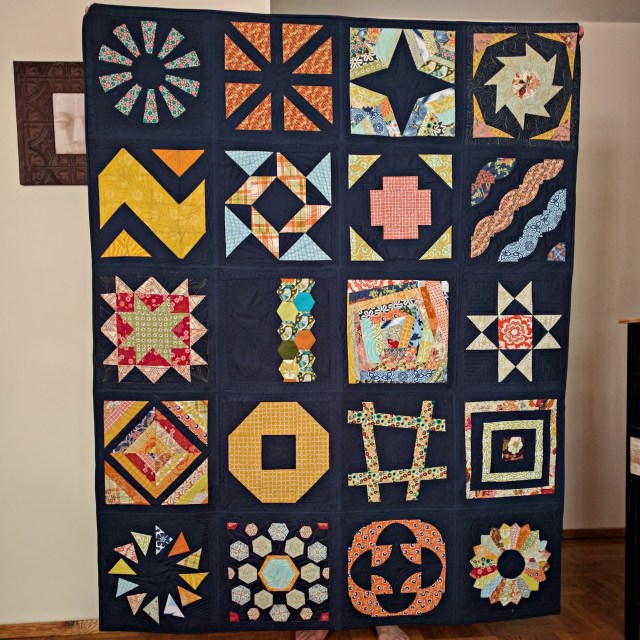
This is the first of a series of posts I’m calling Quilting 101, where I’m going to walk you through the basics of quilting as well as introduce you to some vocabulary.
Today’s post will start to answer: What exactly is a quilt? At the most basic level, a quilt is made up of three layers, also known as the quilt sandwich. The front of the quilt is often called the quilt top. Then you have the backing. And in between you have the batting. Those three layers are sewn together, and that is called the quilting.

That said, I am by no means a quilting purist — I do not belong to the Quilt Police — and I truly believe the answer to “What is a quilt?” can be far more varied and nuanced. In fact, I want to emphasize this one very important point. There are no hard and fast rules to any of this. Some of the most exciting pieces of fiber art I’ve seen were created by people who broke all of the so-called quilting rules and just went crazy with fabric and thread. First and foremost, quilting is and should always be fun!
As I go through this introduction, keep in mind that everything in the quilting process that involves needle and thread can be done by hand, on a sewing machine, or a combination of both. Because I prefer using a sewing machine over hand sewing, most of my posts will be dealing with machine piecing and quilting. But people have been creating beautiful quilts completely by hand for centuries, so if that’s what you prefer, go for it — see the last sentence of the previous paragraph, please.
The beginning of the quilting process usually starts with creating a design for the quilt top or choosing a premade design. Once you’ve made that decision, it’s time to find the fabric — oh, the pretty, pretty fabrics!!

If you haven’t already done so, please find your local quilt shops and bask in the glory of their gorgeous merchandise. I certainly buy plenty of fabrics online, but nothing beats seeing the colors and prints in person and actually feeling them before deciding what you want for your project. And even when I do buy fabrics online, I try to buy from quilt shops through Etsy versus big retailers like Joanne or Fabric.com. That said, sometimes you want something very specific and you just have to buy it where you find it.
You can technically quilt with any kind of fabric — cotton, silk, denim, jersey knit, even leather! I mean, the list goes on and on, but most quilters use quilting cotton or a medium weight cotton because it’s the easiest to work with, so that’s what I would recommend to anyone just starting out.
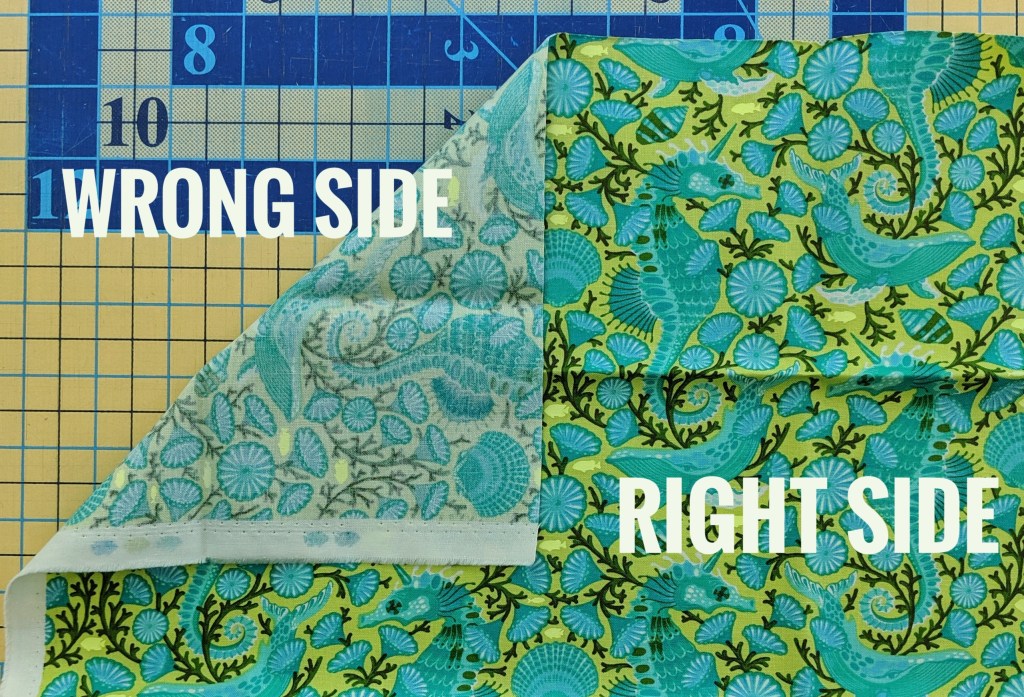
Quilting cottons come in a huge variety of prints and solids. Printed fabrics will have a right side and a wrong side. The right side is the side with the printed design on it. The wrong side will look like a faded version of that design or not have the design on it at all. Solids usually don’t have a right or wrong side — both sides are the same.
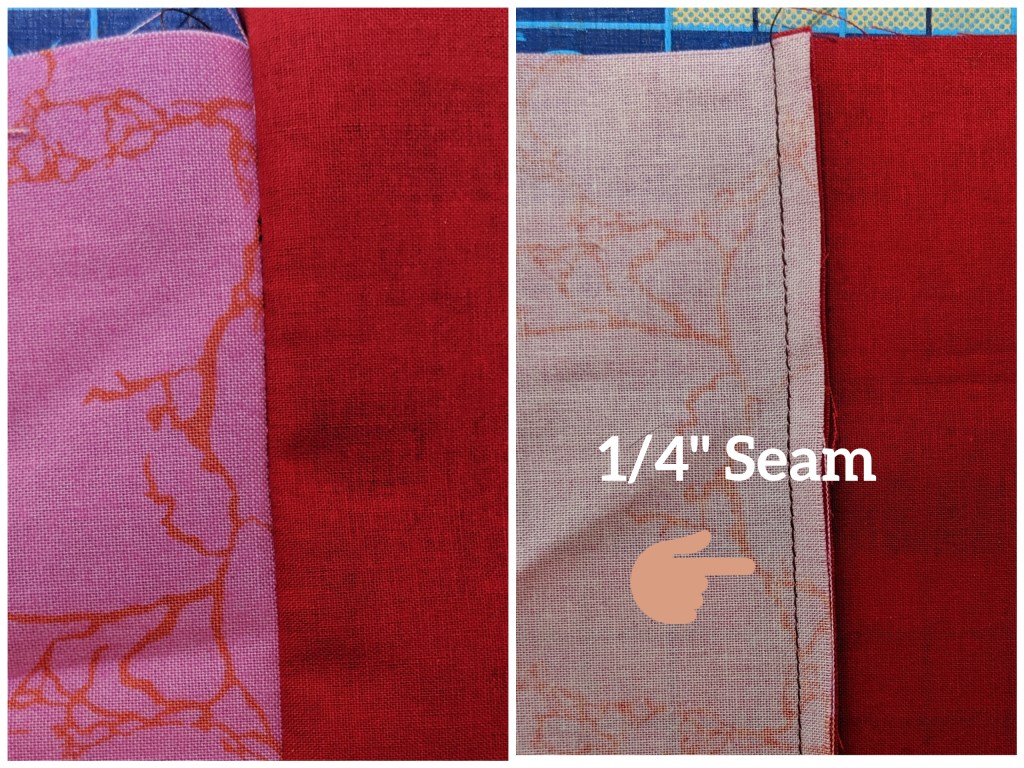
There are many ways to create the quilt top. Most quilts use piecing methods or appliqué or a combination of both. Piecing is when you put two pieces of fabric right sides together and sew a seam along the edge.
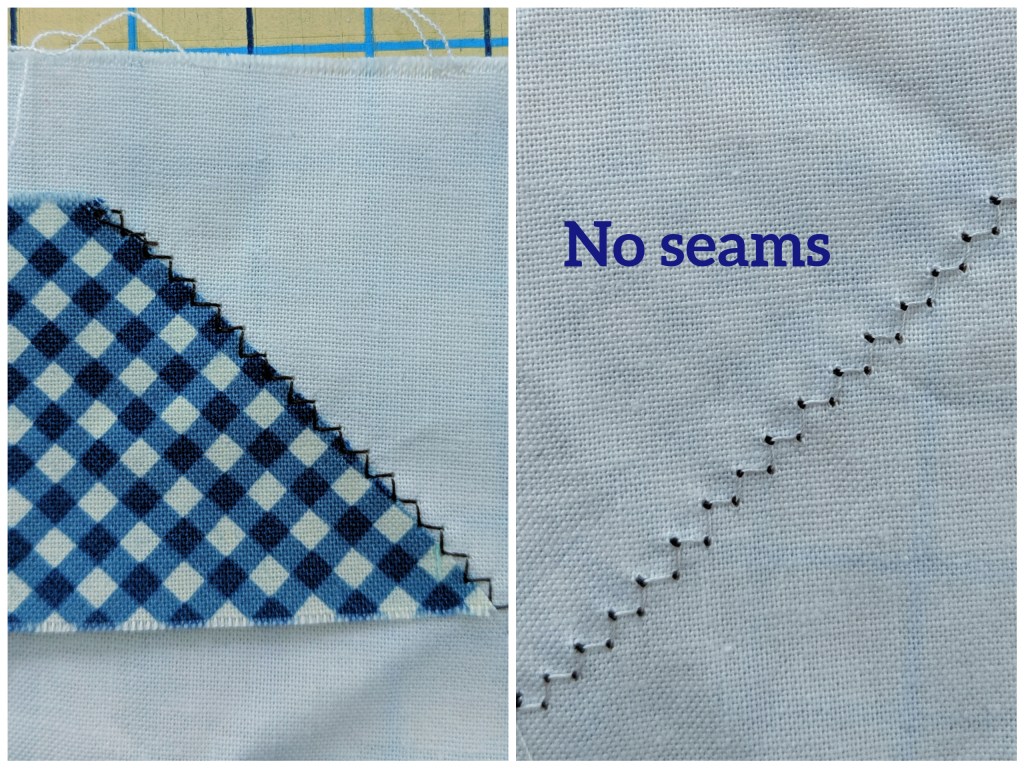
Appliqué is when you sew a piece of fabric on top of another piece of fabric. In other words, you apply a piece of fabric on top of another.
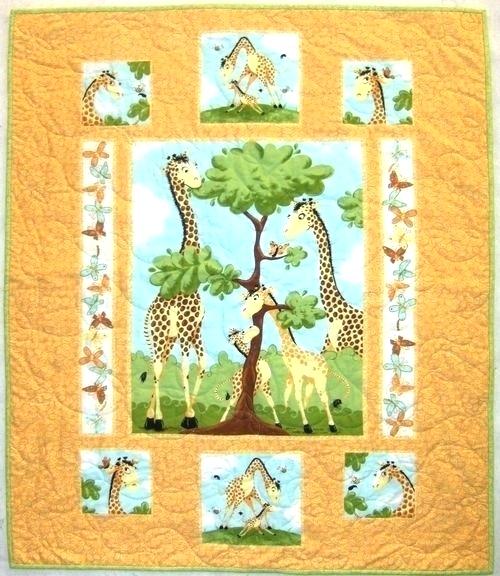
Another way to create a quilt top is to use a panel. Panels are large pieces of fabric with an image printed on them. Depending on how the panel is printed, you can use it as a single piece for the top or you can cut it up and sew it back together to form a new design or you can add borders around it so that it becomes the centerpiece of your pieced top.
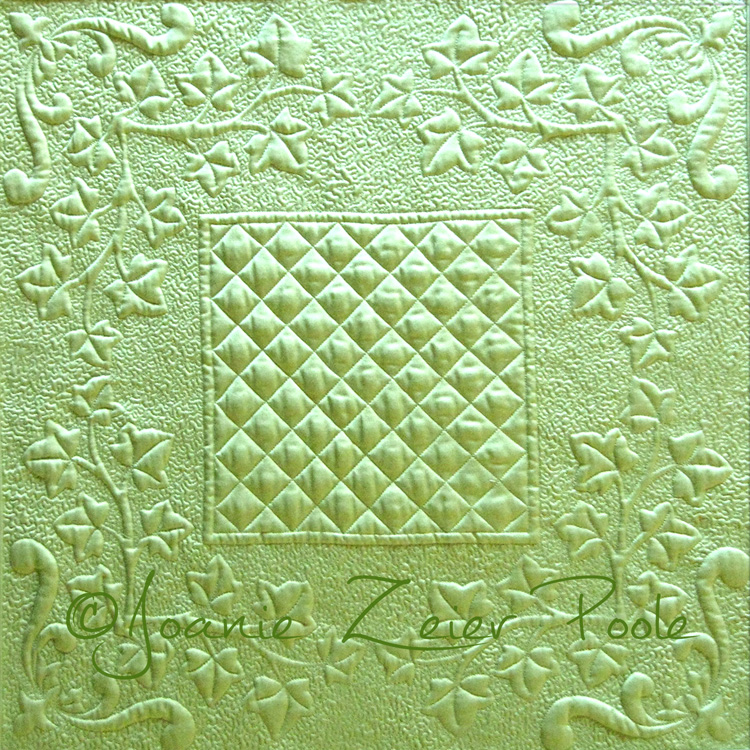
You could also create a whole cloth quilt, which is simply a large piece of fabric, usually a solid, with no piecing or appliqué. The purpose of a whole cloth quilt is to show off the quilting.
Most pieced and appliqué quilts will require you to cut up fabric and sew it together. There are a variety of tools to expedite the cutting process including self-healing cutting mats, rotary cutters, quilting rulers specifically designed for rotary cutters, and of course scissors.

If you are piecing a quilt top, you usually create a series of blocks and then sew the blocks together into bigger blocks and on and on. Most blocks are pieced using a quarter inch seam. You might also hear the term “scant quarter inch,” which means a seam that is just one or two thread widths shy of a true quarter inch.
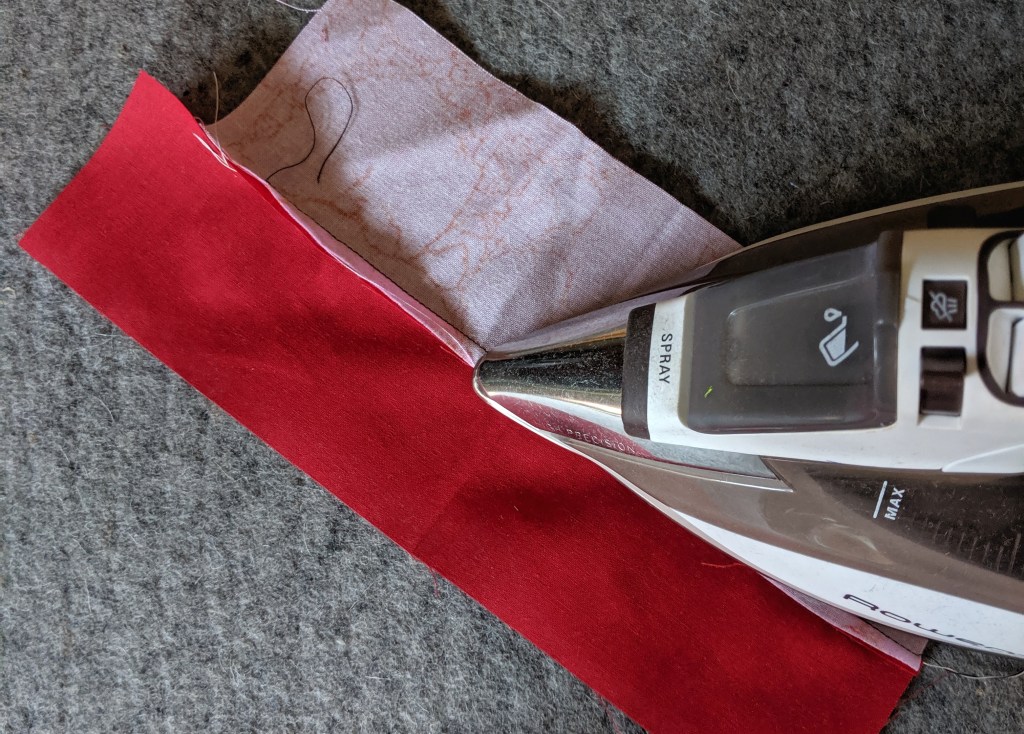
Once you’ve pieced two pieces of fabric together, you need to press the seam with an iron.
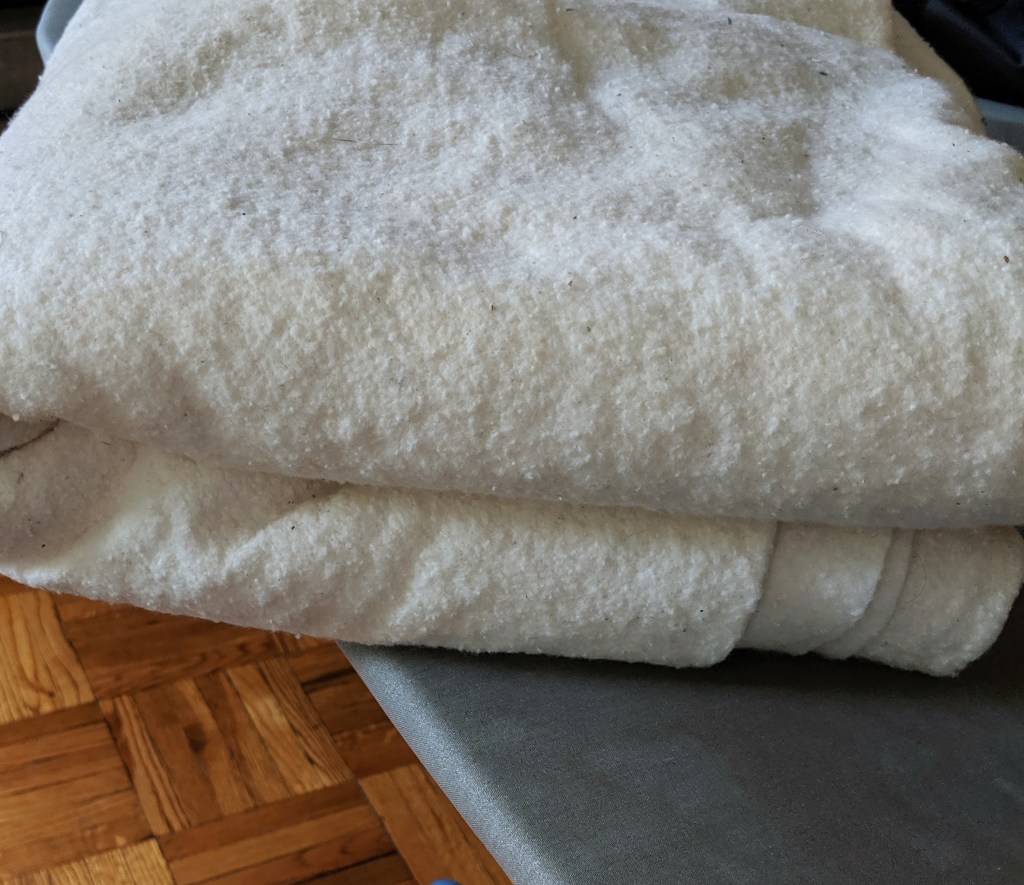
The middle layer is the batting. There are many kinds of batting made of many different fibers. For the purposes of this post, just know that the batting is the fluffy stuff in the middle of the quilt, which is what makes the quilt all warm and cozy.
The bottom layer is called the backing. Just like the top, there are many ways to create the backing of a quilt, though most quilters use either a single piece of fabric or very large pieces of fabric sewn together rather than any sort of complicated piecing techniques. Of course, some quilters are over achievers and love to make the back of their quilts just as visually interesting as the front of their quilts. Again, see my statement above about doing whatever the heck you want as long as you’re having fun.

Once you’ve prepared the three layers of your quilt, you need to baste them together before you quilt them. Basting is simply a no-nonsense way of putting layers together so they don’t move when you are ready to do more controlled sewing. At this point in my quilting journey, I pin baste all of my quilts using curved safety pins. However, there are several methods for basting a quilt, and the method you choose is simply a matter of personal preference.

Once your quilt is basted, it’s ready to be quilted. A lot of quilters do not find any pleasure from the actual quilting process, so they pay someone else to quilt their tops for them. However, it is totally possible to quilt any sized quilt on your domestic machine, so if the only reason you’ve avoided this step in the past is because you’re afraid to try, stop being afraid and just go for it! You might be surprised at how fulfilling you find this part of the process. I certainly was!
There are a few different ways to quilt on your home machine. A very popular and relatively fast way is to attach a walking foot and quilt straight lines from edge to edge.

There’s also free-motion quilting, which is basically “doodling” with thread on your quilt.

Of course you can always hand quilt the layers together.

And finally, you could do any combination of these techniques or even come up with a new and creative way of securing the three layers of your quilt together!
Once the quilt has been quilted, it’s time to square it up, which eliminates all of the extra fabric on the edges of your quilt and gives you a clean, raw edge.

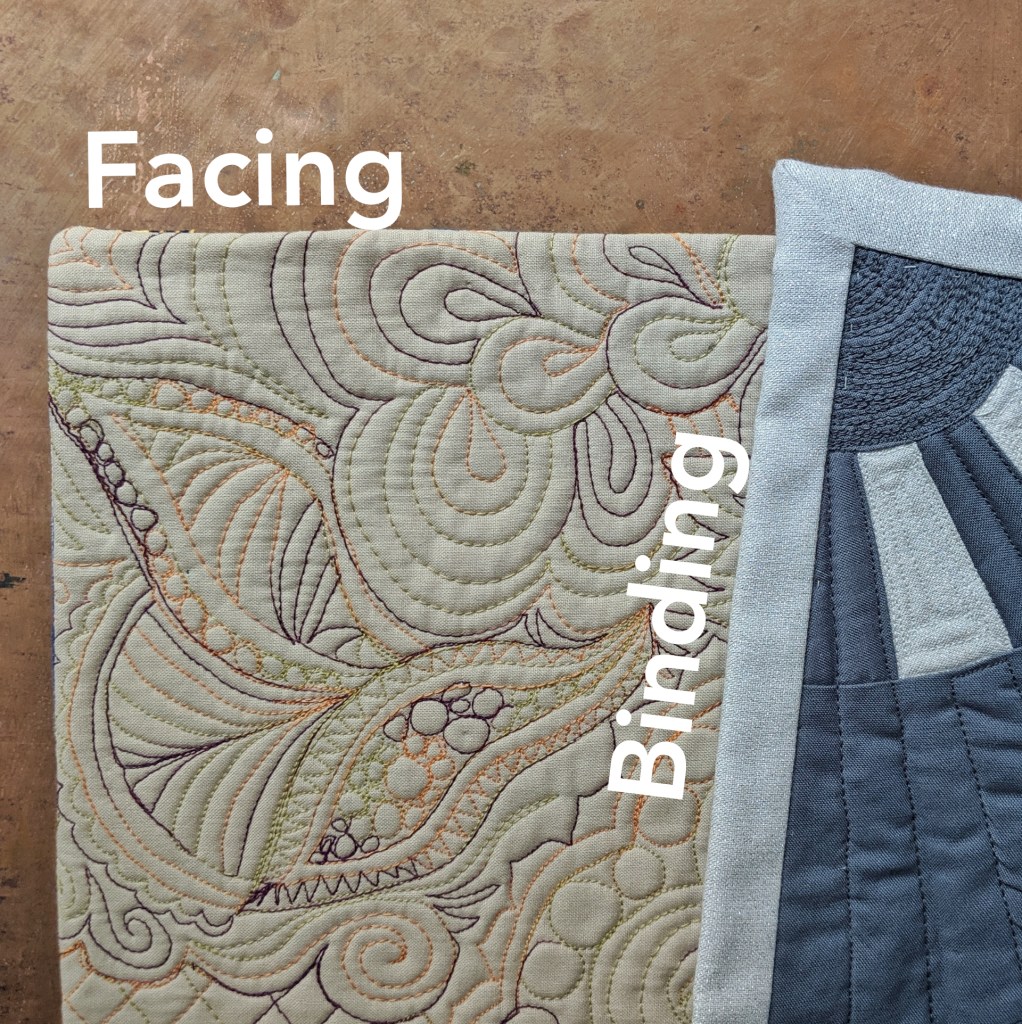
After you’ve squared it up, it’s time to add the binding or facing, which are two different techniques to cover up the raw edges.
And that’s it! You just made a quilt! (Or at least you imagined making one.) Have you started your quilting journey yet? If so, what is your favorite part of the process? What’s your least favorite? Post your comments below and let’s share our joys and tribulations with the quilting community. Happy quilting!