BLACK LIVES MATTER — Please click on the link to find out what you can do to help end the oppression and killing of our fellow human beings.
The third quilt in my virtual trunk show — Beyond the Machine — is very near and dear to my heart because it is the first quilt I designed myself. This quilt was made as part of the 25th anniversary celebration of the Brooklyn Quilters Guild. I wanted to make an industrial-looking version of the New York Beauty pattern, so I created a template that came together as cogwheels. Watch the video to find out more!
BLACK LIVES MATTER — Please click on the link to find out what you can do to help end the oppression and killing of our fellow human beings.
The Craftsy 2012 Block of the Month by Amy Gibson sampler quilt is the second quilt I ever made. I learned so many useful basic quilting skills and techniques, and I also used this as an opportunity to teach myself free-motion quilting thanks to Leah Day’s Free Motion Quilting a Sampler class, also on Craftsy.
Heads up! This is a very long video because I say a little bit about each block of the quilt. I’ve listed the blocks with their corresponding time stamp in the Description box below the YouTube video, so feel free to skip to whatever block you’re interested in.
BLACK LIVES MATTER — Please click on the link to find out what you can do to help end the oppression and killing of our fellow human beings.
Welcome to the first video of my virtual “trunk show”! Since I’m not planning on showing my quilts in person anytime soon, I decided it would be fun to take you on a chronological journey of my quilt making. In this video, I talk about the very first quilt I ever made thanks to a Craftsy class by Amy Gibson. If you want to make sure you don’t miss my following trunk show videos, be sure to click on that Subscribe button! Keep on making, everyone!
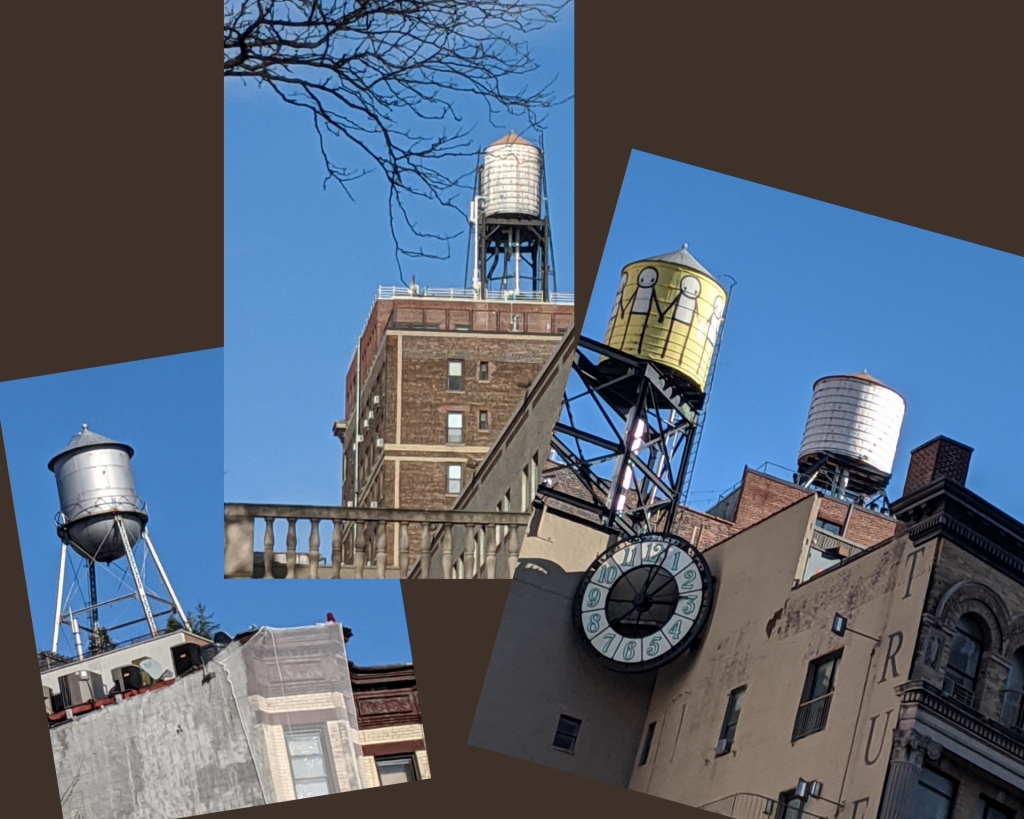
This quilt design was inspired by all of the rooftop water towers you’ll see as you perambulate around New York City. You might think the rooftop water tower is just some rotting old, unused piece of infrastructure from a bygone era, but after reading this article from 6sqft you’ll realize they’re just as much in use today as they were decades ago. As a result, the rooftop water tower has become a well-recognized symbol of NYC, appearing in graphic designs on hipster tees, screenprinted tea towels sold at outer borough flea markets, and stenciled graffiti walls throughout the city.
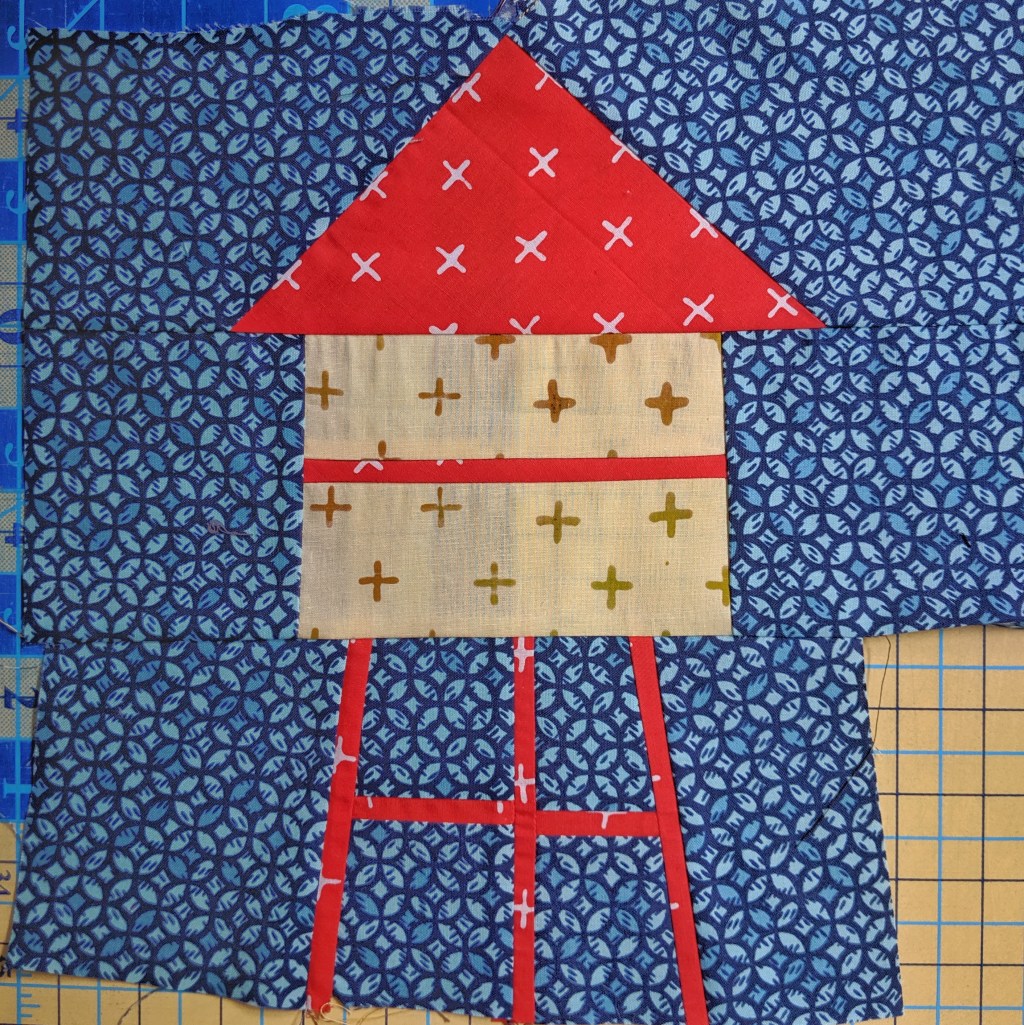
When I was working on my BK Snaps quilt, I wanted the blocks to represent different “snapshots” you would find around Brooklyn. Of course, I had to include a rooftop water tower. I used scraps to make my prototype block, and it was so cute I decided right then and there that I would design a whole quilt around that block at a later date.
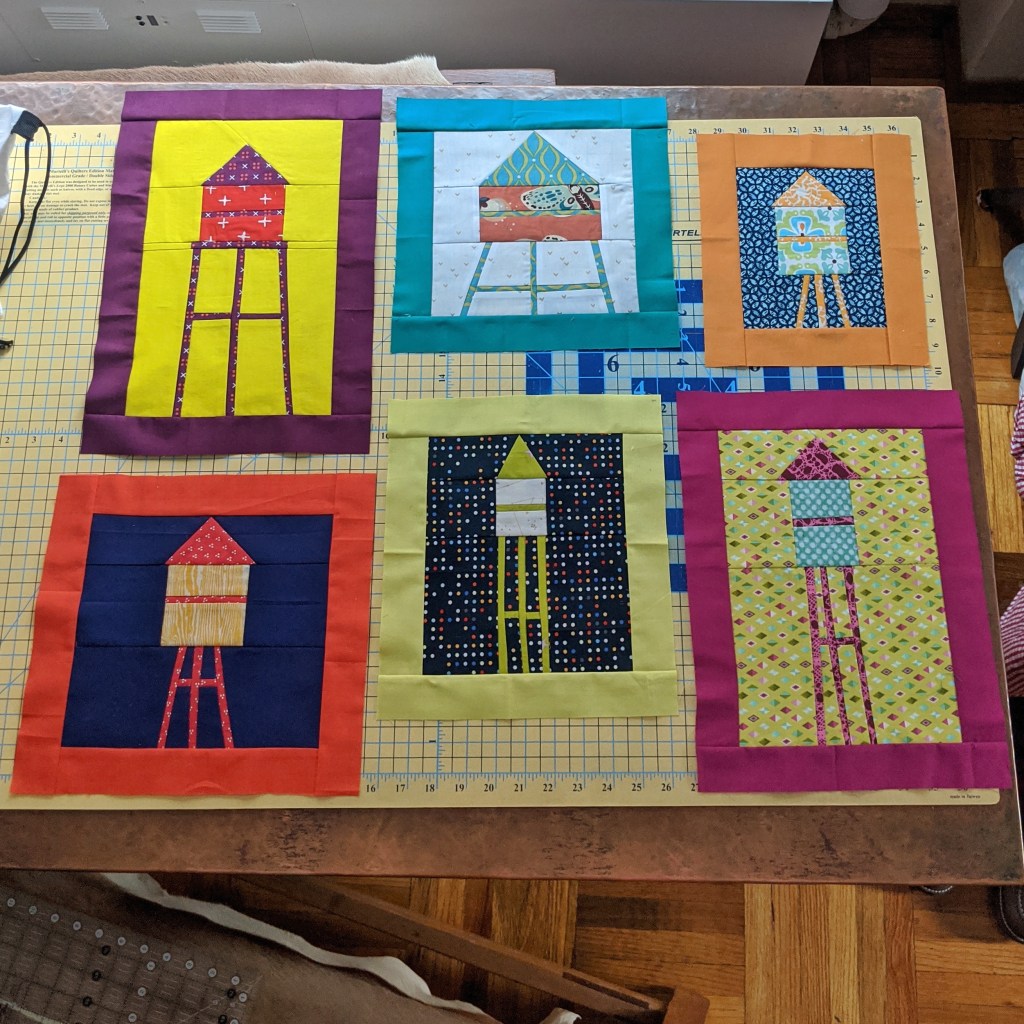
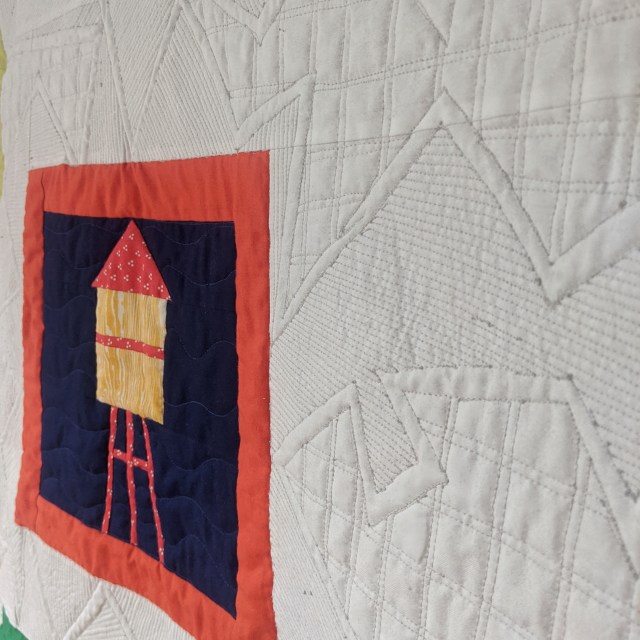
A few months ago I finally started working on a bunch of different water tower blocks. I was determined to only use scraps for the blocks themselves and improv piece them so they were each unique. Once I made a few, I started thinking about the overall layout I would want for the quilt top and decided I wanted it to look like a gallery wall of “framed photos” of rooftop water towers. So I framed each block with matching solid strips of fabric and kept making blocks in different shapes and sizes until I was satisfied with the layout.
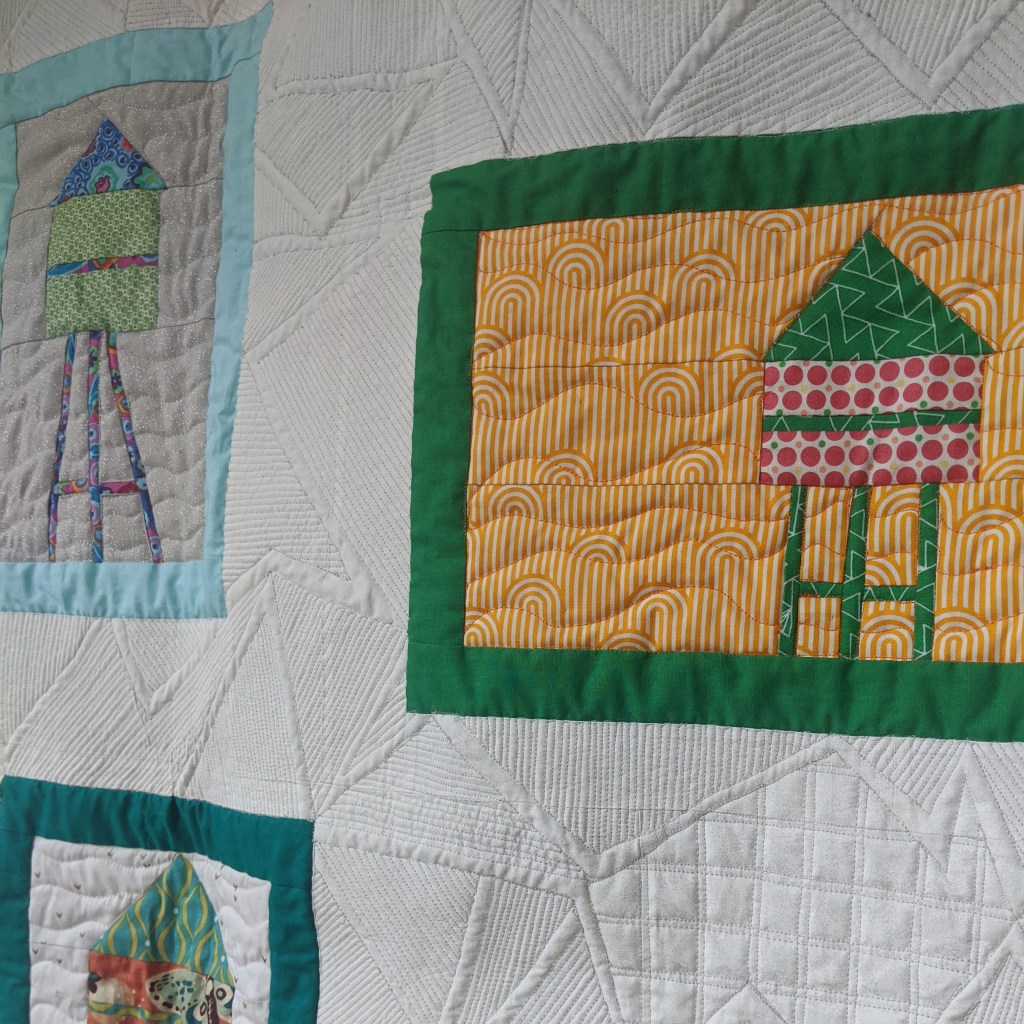
As I was piecing the quilt top, I began thinking about the overall quilt design. Because the blocks are scrappy and cutesy, I wanted the quilting to contrast — maybe something a little more graphic and urban. I decided to fill the white background sashing with various triangular shapes and sharp-angled polygons filled in with very dense matchstick quilting. Then every once in a while, I would break that up with a more open grid-like quilting design. I find the overall effect to have a graffiti-like quality, which I think is appropriate for the subject matter.
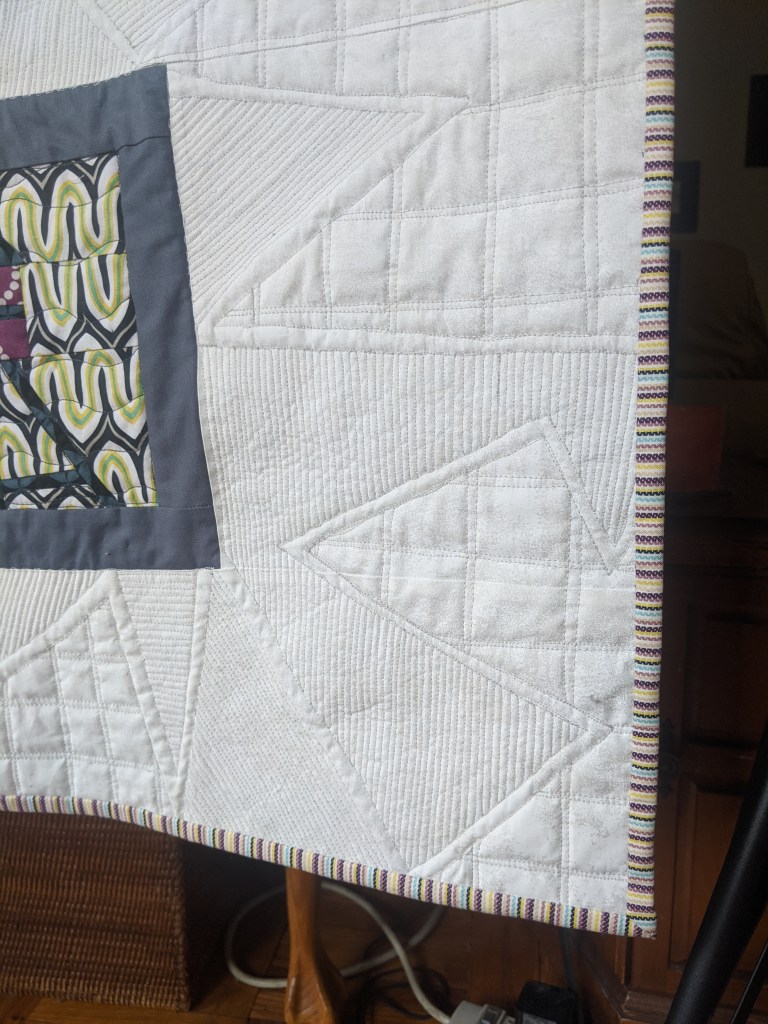
Because the majority of the quilting is very dense, I decided to keep the quilting inside the blocks very simple. I stitched in the ditch around each water tower and then quilted easy wavy lines in the “air” around each tower. I ultimately decided to not quilt inside the actual frames at all because I wanted a noticeable break between the dense quilting of the sashing and the very low-volume quilting of the water towers. (A distinction you might notice more on the back of the quilt.)
My final design decision was using a striped binding to frame the entire “gallery wall.” I was fortunate enough to have this fabric on hand, and the colors of the stripes are varied enough that they seem to match whatever colors are near them. And the colors of the binding are light enough that they don’t take the eye away from the blocks, which should be the focus of the quilt.
Et voilà! That’s my Rooftop Water Towers quilt! It took me FOR-EV-AH to finish, but I’m so happy with how it turned out. I really love how it combines urban imagery with a traditional crafting style. Have you ever been inspired by your surroundings and created something as a result? I’d love to hear about it, so please post comments and questions below. Share your own crafting stories, please! Happy making, everyone!!
I just completed a new quilt, and this video takes you from the beginning to the end of the process. And what a process it was! Whew!! I’d love to hear about your own quilting and making process, so be sure to leave any questions or comments here or on my YouTube channel so we can keep the quilting conversation going. And please subscribe so you don’t miss out on any upcoming videos!
I’m finally premiering the first episode of my Boy Meets Quilt YouTube channel. I sit down with my dear friend Shannon Reed (@knittingchick), who talks about her crafting history and everything she loves to do. Please check it out and be sure to Subscribe if you want to see more. Also, ask questions and make comments so we can share our love of all things crafty!!
If you’ve read some of my past posts you already know how much I love free-motion quilting (FMQ). I find it not only visually stimulating but also completely freeing when I sit down at my sewing machine to finally stitch all of the layers of my quilt together. I pretty much FMQ all of my quilts these days with rare exceptions, and I love whenever I have the opportunity to FMQ a mini quilt because I’m able to quilt more meticulous designs without taking hours to finish like it would take on a larger quilt.
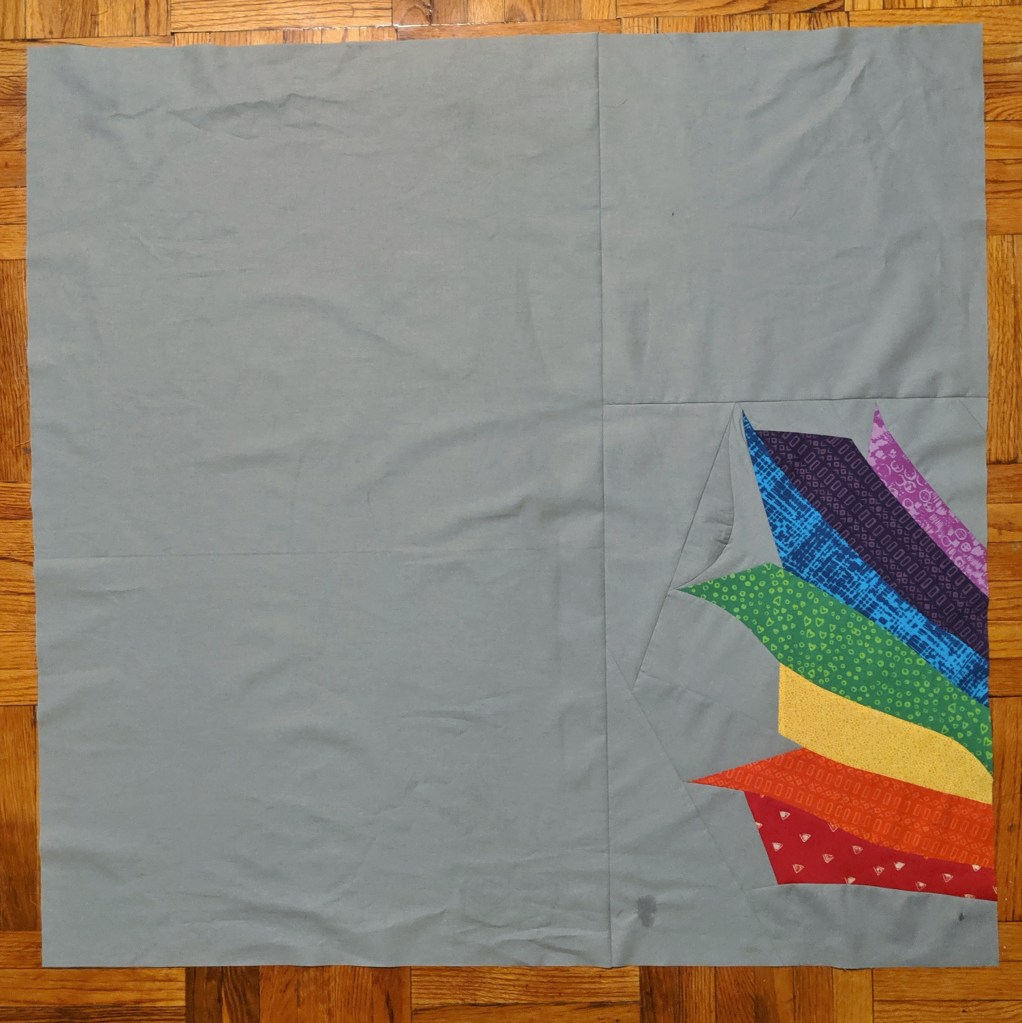
Continuing the trend that the co-presidents began in 2018, the Brooklyn Quilters Guild will have a President’s Challenge for our upcoming biennial quilt show in March of 2020. The prompt is a quote by Maya Angelou.
“Try to be a rainbow in someone’s cloud.”
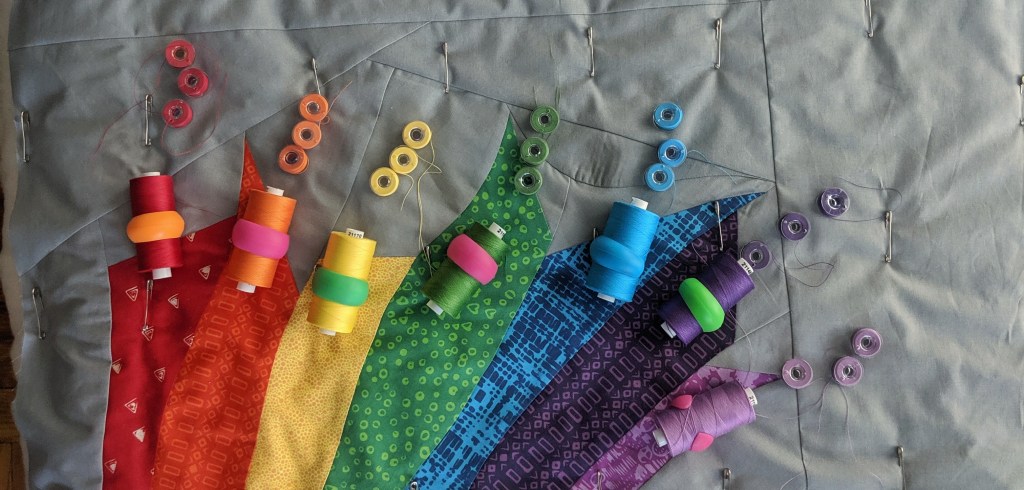
The quilts must measure 36″ x 36″ and incorporate six to seven of the colors of the rainbow in some way. Otherwise, they can be any style, pattern, etc. I decided to take this as an opportunity to go a little crazy with my FMQ by creating a quilt top that is mostly negative space which can be brimming with free-motion quilting.
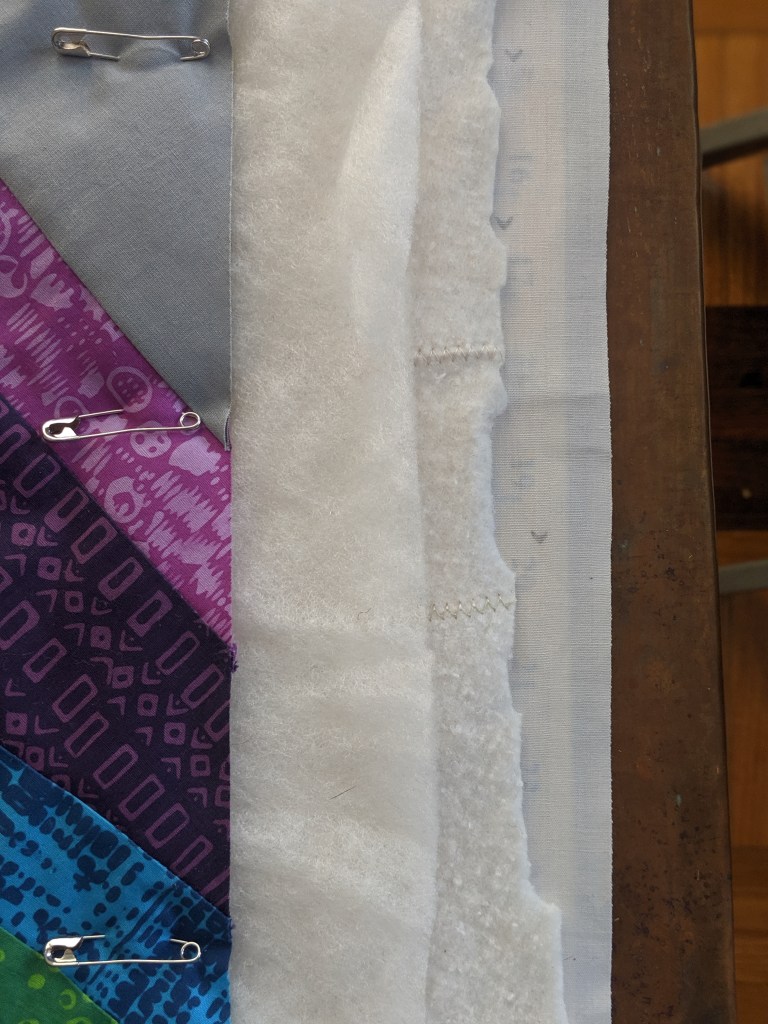
The pieced portion of the quilt is quite small, so this is almost a whole-cloth quilt. Some of the quilters I follow suggest using a double layer of batting for whole-cloth quilts or any quilt where you want the quilting design to really pop. The general suggestion is a layer of 80/20 cotton batting and a layer of wool batting, so I’m going to give it a shot.
Once I pin baste my quilt sandwich, I start thinking about the thread color(s) I want to use. I’ve decided to extend the pieced design onto the negative space of the quilt, so I’ve picked thread colors that match each of the pieced stripes.
Before I start quilting any project, I like to plan out my quilting designs. I get out my sketchbook and start doodling. Not only does this help me clarify some ideas before putting thread to fabric, but it also starts getting those designs into my muscle memory.
Once I’m ready to actually start quilting, I set my machine up by installing my FMQ presser foot and bobbin case, lowering the feed dogs of my sewing machine, and placing a Supreme Slider mat over my needle plate. I want as little friction as possible when I’m sliding my quilt under the needle, and the Supreme Slider really helps me with that.
I also always make a tiny quilt sandwich out of scraps of my actual quilt to test the tension before I ever start quilting on the real one. I’ve learned this lesson the hard way. ALWAYS TEST YOUR TENSION BEFORE STARTING ON YOUR REAL PROJECT!!!
And now I’m ready to start quilting. I can’t wait to see how this turns out! I’d love to hear any pointers you have to share when it comes to FMQ prep. Add them in the Comments section below so we can all benefit from each other’s experience. Happy crafting!!
To piece a backing or not to piece a backing? Many people don’t realize that Shakespeare’s original idea for Hamlet was about a young quilter being driven mad by the various design decisions one must make during the quilting process, but the queen ordered him to go in a different direction. Alas. But seriously, this is one of the many questions we must ask ourselves as we’re getting ready to put together our quilt sandwich.
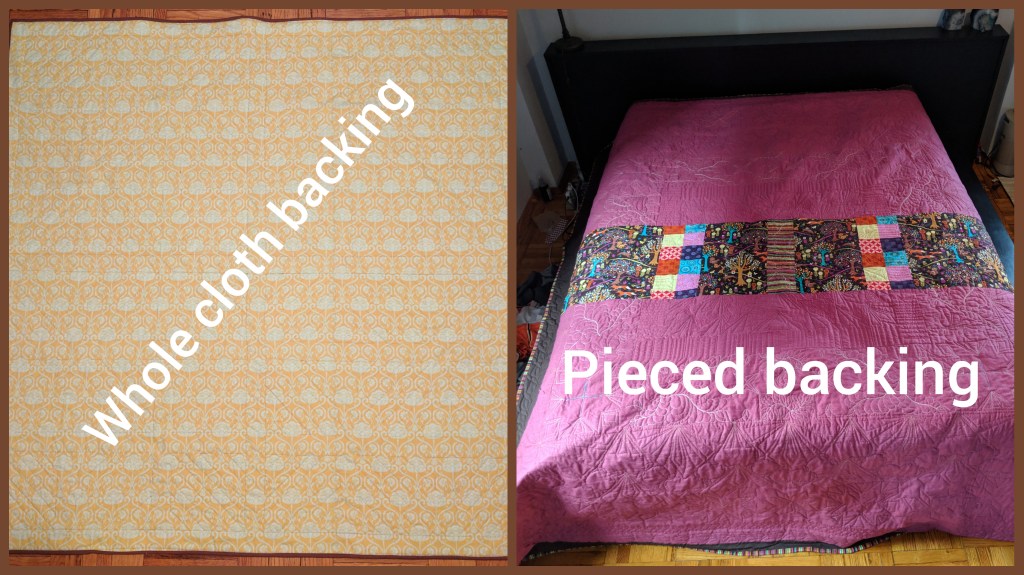
I am always very impressed with the Instagram posts I see of quilts with beautifully pieced backings, while at the same time thinking, “That is an awful lot of work for something that will rarely be seen.” By the time I’ve put together the quilt top, I generally want to take as little time as possible putting everything together because I really want to get to the quilting. That means I usually opt for a simple whole cloth backing.
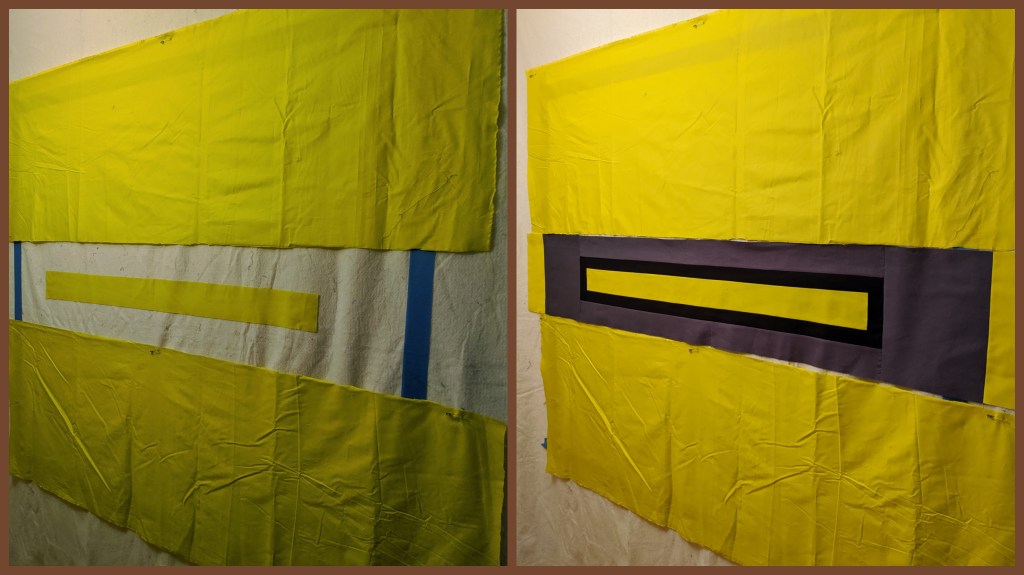
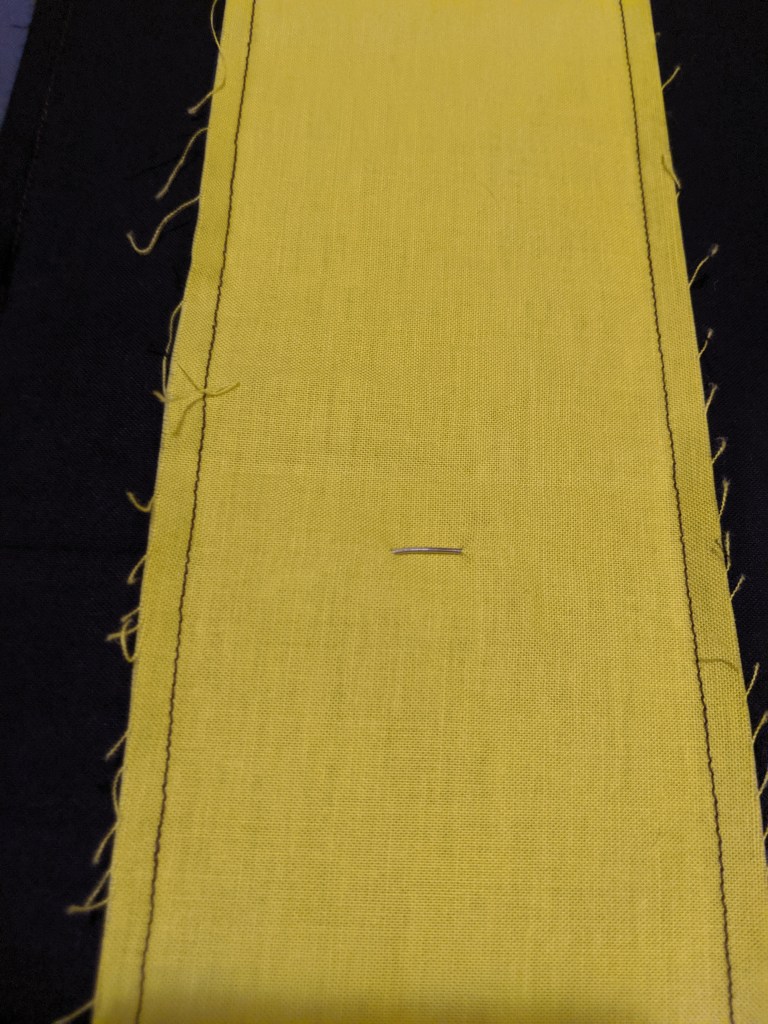
However, for this particular quilt, I had a bit of a dilemma. By the time I had finished piecing my quilt top, I still had a good amount of yardage left over of the pear fabric. I thought it would be fun to use that for the backing, so I went ahead and pinned my completed quilt top to my design wall and taped an outline around it so I could make sure I had enough fabric to use as the backing.
Surprise, surprise — it wasn’t quite enough fabric, which meant I either had to go out and buy more, or I could take my scraps and piece together a back. I opted for the fiscally responsible choice. My first idea was to make a super scrappy section of the backing, which would have been totally fun but was going to take way more time than I wanted to spend on it. Then I realized I had a nice long strip of the pear fabric that could be used as the centerpiece. I went ahead and surrounded that by some long strips of the gray and black I had left over, and — voilà! — I suddenly had a very cool-looking, contemporary quilt back to complement my very cool-looking, contemporary quilt top (I mean, very cool looking in my opinion at least).
Once the backing was complete, it was time to make the quilt sandwich. Just as a reminder, a quilt generally consists of the top and the backing with the batting in between. Because this quilt wasn’t terribly large, I was able to clear out a space on my apartment floor and tape the backing down. I put a safety pin in the very middle of the backing so that I could line up the batting and quilt top, ensuring everything was perfectly centered.
You may also notice that my batting looks a little wonky. That’s because I am a firm believer in using every scrap of batting I have before opening a new package. That means using the zigzag stitch on my sewing machine and “Frankenstein-ing” all my batting scraps together.
Once everything was laid out, I pin basted all three layers together. Pin basting is how I originally learned to baste, and it’s really my preferred method at this point. I am very reticent to use any sort of adhesive with any part of my quilting process, so I plan on sticking with pin basting until my body forces me to pick another way to keep my quilt sandwich together. By the way, for those of you who might not know, basting a quilt sandwich is how you keep all three layers together during the quilting process. If you didn’t baste the layers together, they would shift all over the place while you’re quilting them, and your end result would be quite a mess.
Now that everything is pin basted together, it’s time to start thinking about the overall quilting design, but I will save those ponderings for a later date. Going back to the original question at the top of this post, how do you feel about pieced backings? If you do piece your backings, is it for artistic reasons or is it because you don’t want to waste any fabric? I’d love to hear the stories about your own process, so please share them with all of us in the Comments section below! Happy crafting!
Come up with an idea – check! Make some prototypes and confirm that my idea is a good one – check! Decide on the color scheme – check! Now it’s time to start putting it all together! Yay!! While most of the steps of creating a quilt are exciting, this is where I really start to have fun. This is also the point in the process where I might deviate a little from some other makers because I prefer to fly by the seat of my pants a bit more than is comfortable for many people.
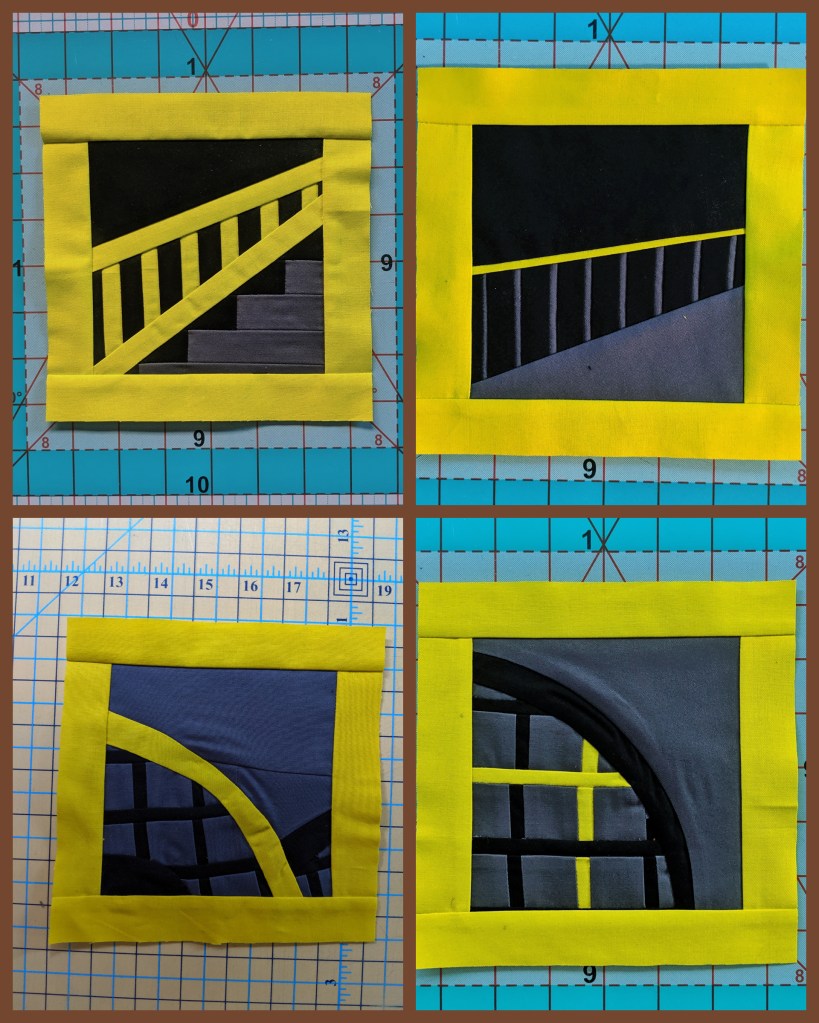
This particular quilt is very much improv based. The only parameters I set for myself were the finished size of each block and the color scheme. I did make prototype blocks for several of my designs, but I was getting very bored with that so I decided it was time to start in with the real fabric and just see what happens. I always get way more excited when I work with my real fabric and colors knowing that I’m actually creating the final quilt.
I started with the blocks I had already experimented with when I was making prototypes. And even though I had already worked on the designs in the prototype phase, some of my blocks still did not work the way I wanted, so that meant redesigning or scrapping the idea all together.
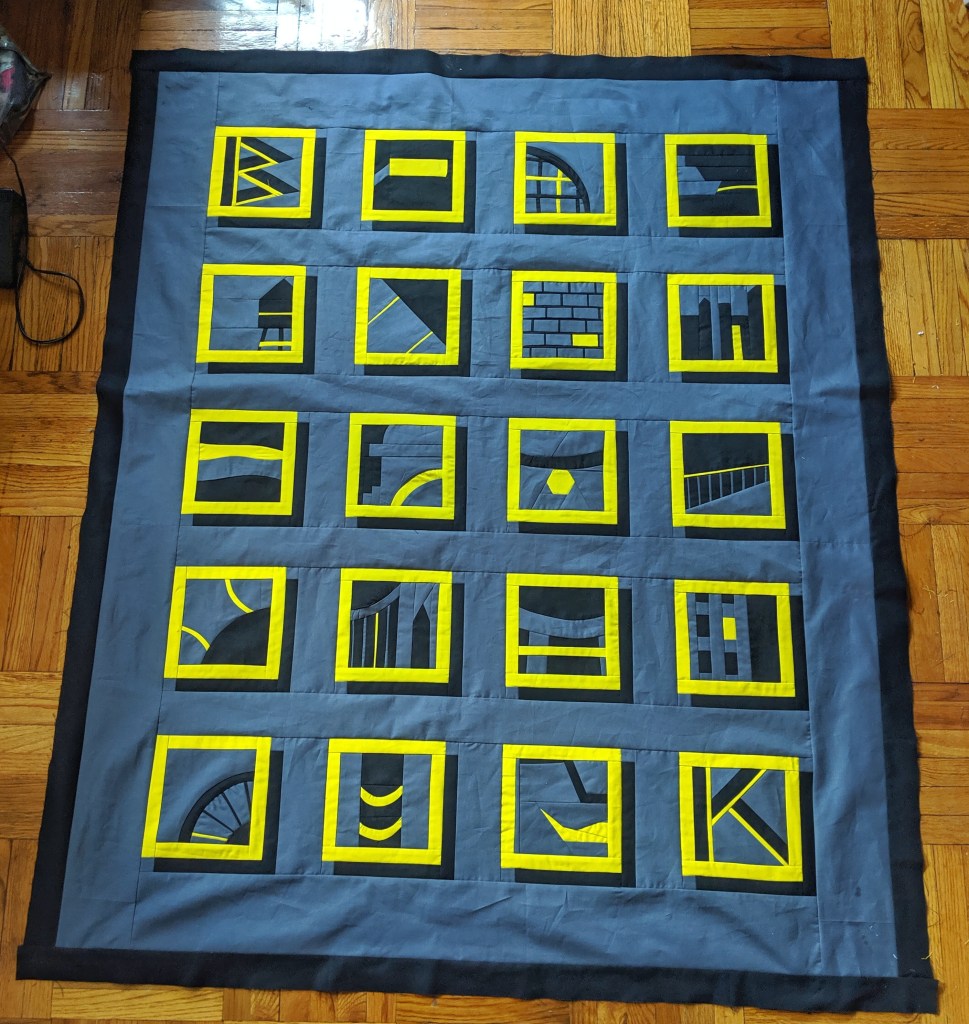
I did not have a set number of blocks in mind when I started thinking about putting this quilt together, but I did know I wanted it to be a wall hanging. And as someone who lives in an apartment with relatively small walls, that meant the quilt wasn’t going to be too big. As I made more and more blocks, I realized that my final number of blocks was most likely going to be 20. Once I had that number in mind, I suddenly felt like this whole thing was much more achievable.
After creating my 20 blocks, it was time to slap them up on the design wall and decide on the overall quilt layout. Because I had framed each of the blocks in the pear fabric, I already knew I wanted to have sashing in between all of the blocks to keep the bright pear color from overwhelming the overall quilt. (For those who don’t know what sashing is, think of it as the inner borders of a quilt that surround each block.) Once all of the blocks were on the design wall, I was able to rearrange them into an order that felt balanced and also start thinking about how wide I wanted the sashing to be in between each block.
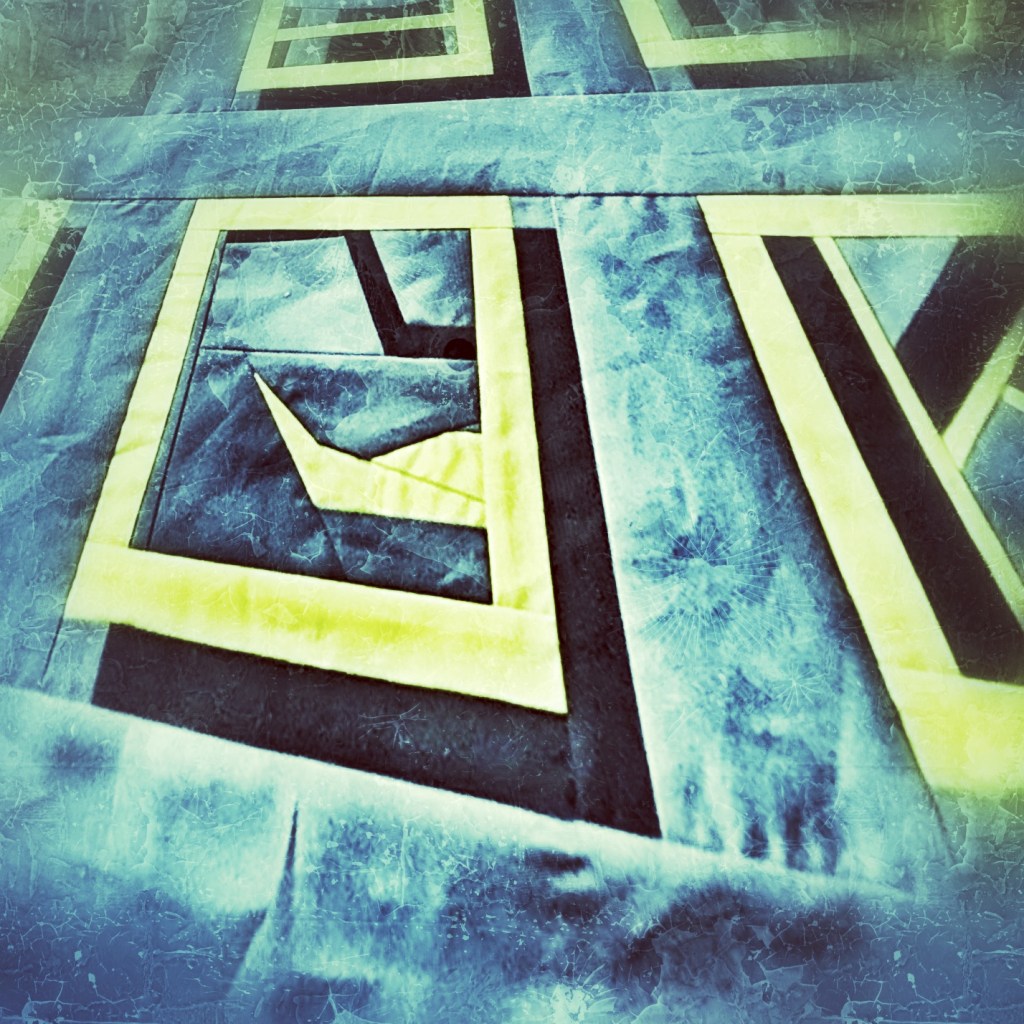
Then I needed to decide what color I wanted to use for the sashing. I pretty quickly decided gray was the way to go, but I was starting to think the pear borders around each block were too strong. Did the blocks need another border of black around them? Then I remembered seeing a bunch of Instagram posts of quilt blocks with a shadow effect that I thought was super cool, and I decided that was going to work really well with this particular quilt.
Once I made those design decisions, I started cutting and piecing everything together. After I had pieced all of the blocks together with sashing, I decided the outer border needed to be a bit thicker and that I wanted a second border to frame the whole thing. But should I add another border of pear? I love the color so much, so maybe I should add just a bit more? Ultimately, I decided there was more than enough pear already, so I committed to a simple black border around the entire quilt. I felt like that was the best design choice to complete the overall graphic look I was trying to achieve.
The next steps will be deciding on my backing and making the quilt sandwich, so stay tuned for my next post about this quilt. I’d love to hear about your creation process. Do you like to fly by the seat of your pants? Or do you prefer having a pretty set design plan in mind before putting everything together? Please share your stories in the Comments section below so we can all learn from each other! Happy crafting!!
I was probably about nine months into my quilting journey before I heard the term “mystery quilt.” For those of you who don’t know, a mystery quilt is designed by a person or group, and the instructions for each quilt block are handed out to the participants at periodic intervals. The participants don’t know what the overall quilt is going to look like until they receive the final set of instructions telling them how to put all of the blocks together.
It’s a very fun concept, and it’s a way for people all over the world to share an experience together at the same time. Most mystery quilt challenges have a Facebook page or an Instagram hashtag that participants use to post progress photos, and you get to see the different color choices everyone made while you also guess about what the overall design is going to turn out to be.
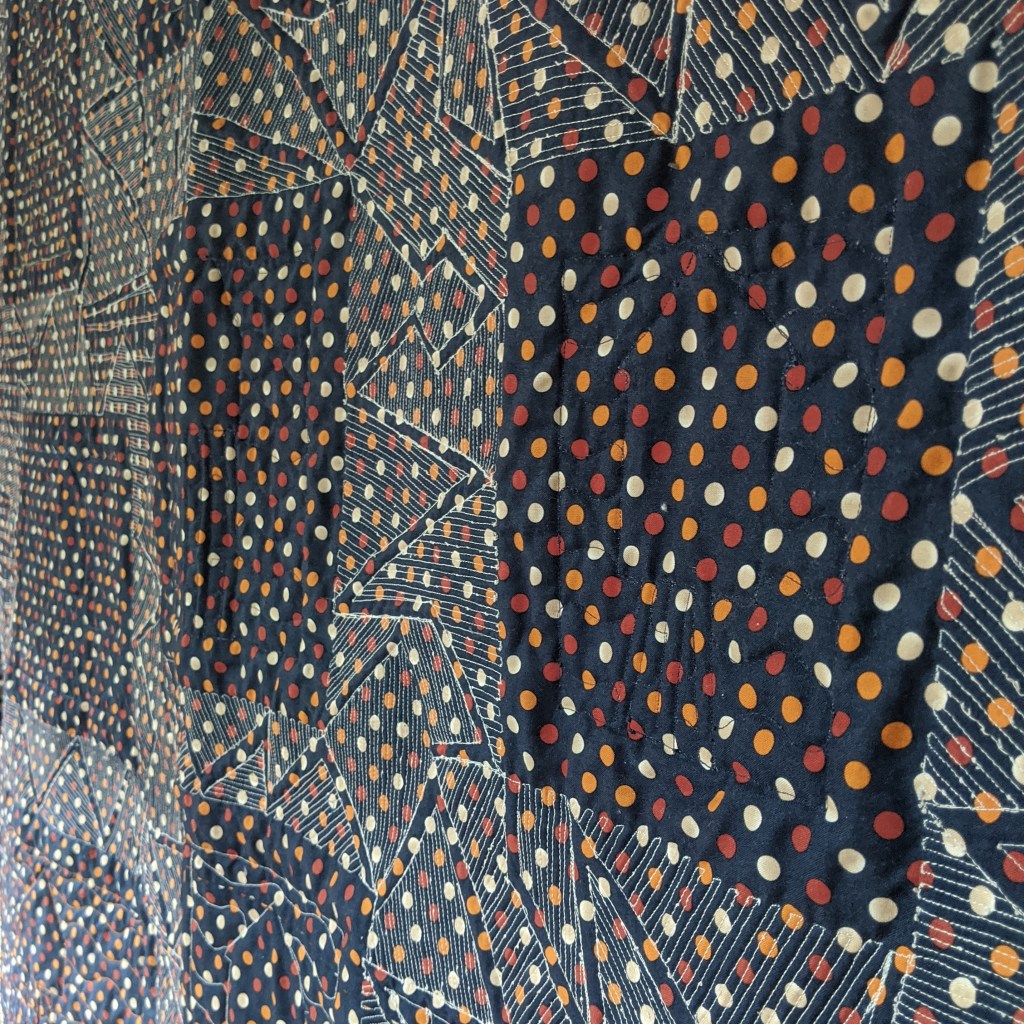
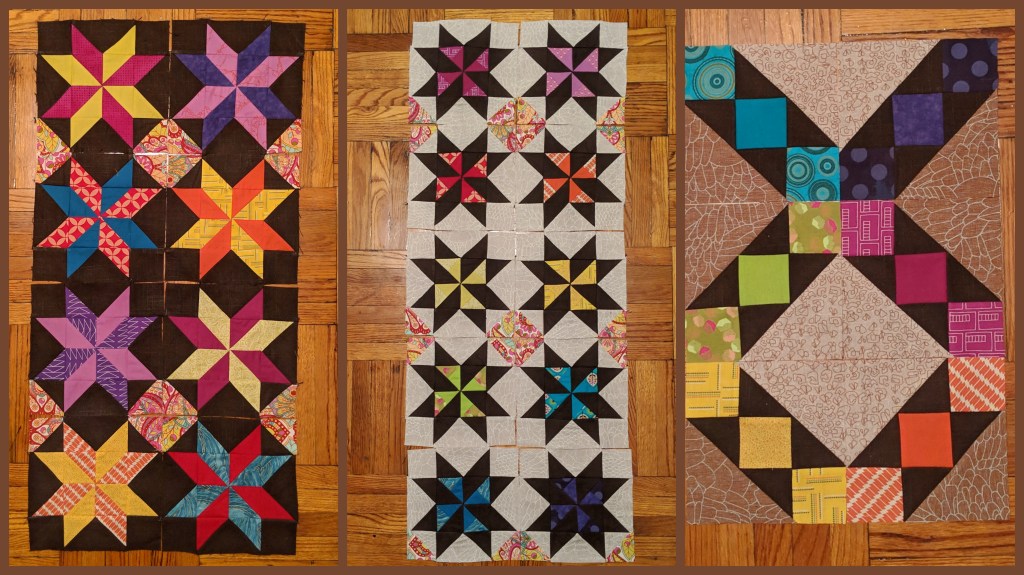
I decided to sign up for the National Quilters Circle mystery quilt challenge in the fall of 2018. It was designed by Toby Lischko, and we received new instructions once a week for about nine or ten weeks. I signed up because I wanted to find out just how a mystery quilt worked, because I thought it would be a great way to use up some of my stash, and because this particular one was free. Yay!
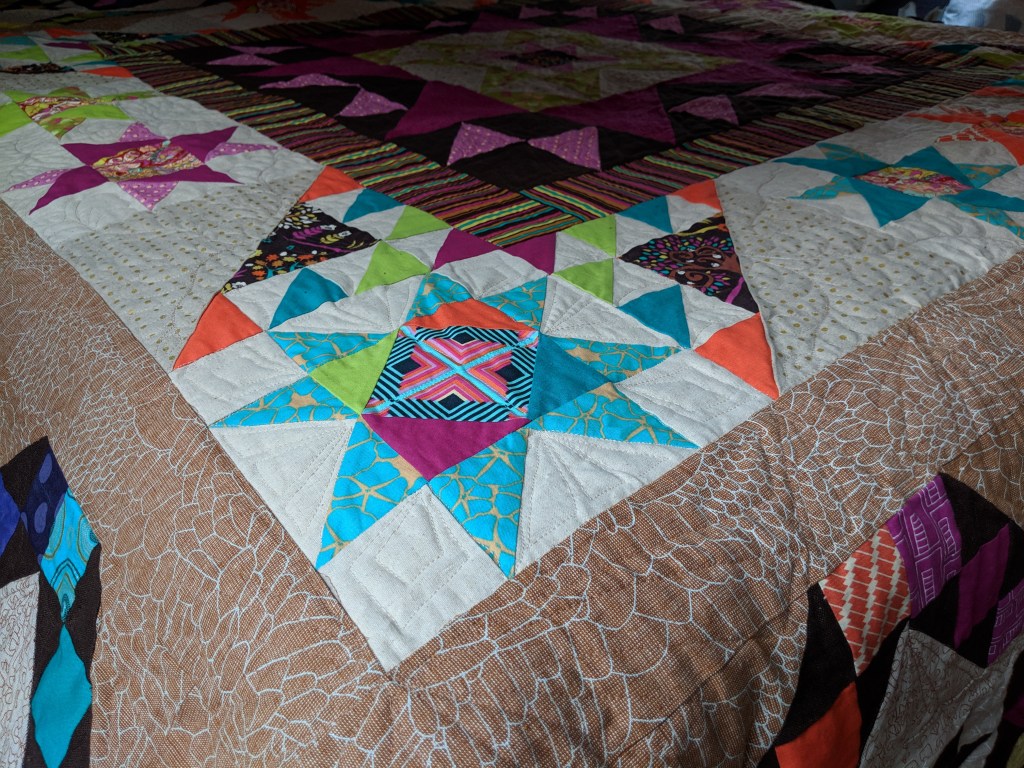
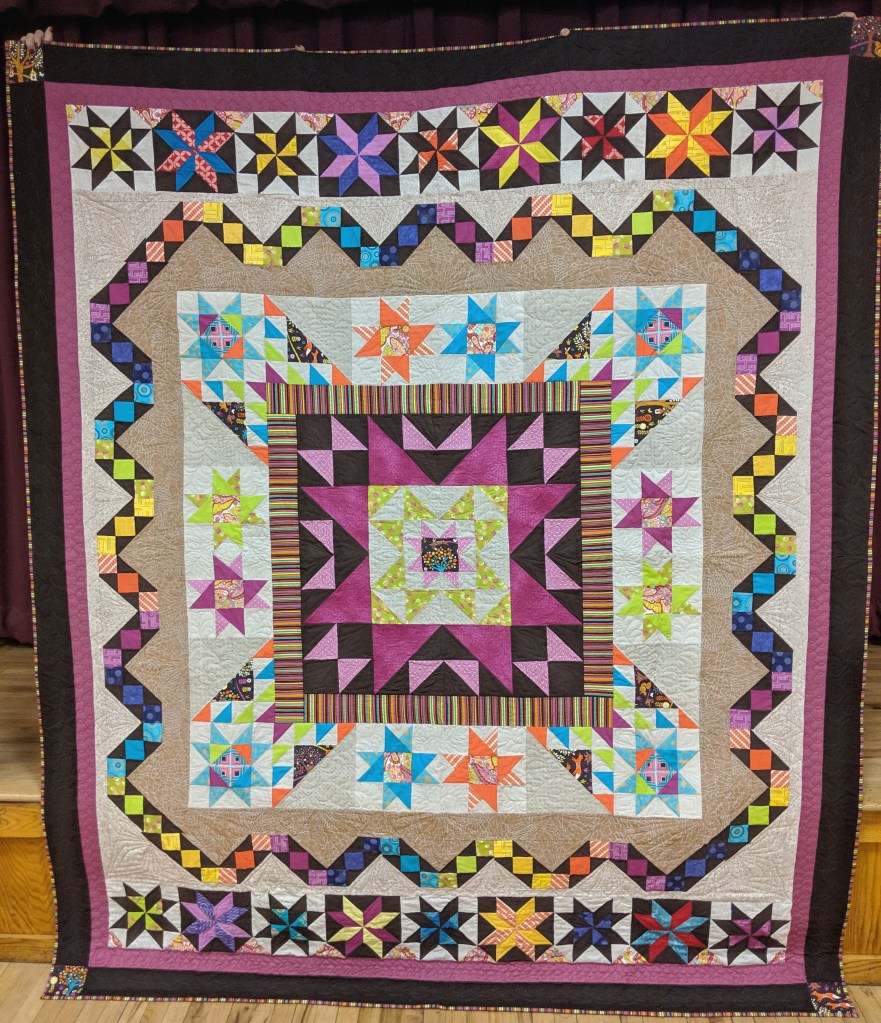
Our first set of instructions told us that the quilt was going to be a medallion quilt, meaning you start with one large block in the middle and then piece a variety of borders around it for the rest of the quilt. I had never done a medallion quilt before, so I got excited about that. The instructions also gave us yardage amounts and a very general color guide — so many yards of a dark color, so many yards of a complementary light color, so many yards of a neutral, etc.
I decided right at the start that I was going to try to only use my stash if at all possible. The tricky part was that most of my stash consists of fat quarters and a few half-yard packs, so I wasn’t going to have enough of any one particular fabric to use it throughout the entire quilt. So that meant I was going to have to get really creative about the colors I used. On the one hand, I always love thinking outside the box, especially when it comes to color. On the other hand, by the time the quilt was finished, I definitely would have made some different color choices had I known how the blocks were going to end up being placed.
I really enjoyed the overall process of the mystery quilt challenge. This particular quilt is filled with stars and really forced me to get serious about keeping my points. I learned so many new techniques with all of these blocks.
However, the reason why I probably won’t do another mystery quilt challenge again is because I had a bit of an epiphany once I put the top together. This was something that had been simmering in my subconscious for a while, but it really hit home with this quilt. As much fun as I had putting the top together, the prospect of putting it all together as a quilt sandwich and quilting it did not excite me in the least because it wasn’t my design. I realized that at this point in my quilting journey, I only get true satisfaction from quilting when it’s my creation from beginning to end. Maybe that will change over the years, but for now it’s just the way it is.
Even though I made that realization and even though I dragged my feet a bit, there is a larger part of my personality that cannot keep a project unfinished. So I did eventually put it all together and quilt it. This was by far the largest quilt I’ve ever made, and the fact that I was able to free-motion quilt it all on my little Janome DC2012 made me realize I could really do anything on this baby.
Once I finished quilting it, I kind of had no idea what I was going to do with it. I finally decided to gift it to my grandma for her 94th birthday. I’m hoping the bright colors will brighten up the upcoming gray days of winter. So while I have no intention of participating in a mystery challenge anytime soon, I am very happy I completed this one.
Have any of you participated in mystery challenges? What are your favorite kinds of quilt challenges? Do you prefer working from someone else’s design or creating something completely on your own? We all work differently and I’d love to hear your stories. Happy crafting!