Come up with an idea – check! Make some prototypes and confirm that my idea is a good one – check! Decide on the color scheme – check! Now it’s time to start putting it all together! Yay!! While most of the steps of creating a quilt are exciting, this is where I really start to have fun. This is also the point in the process where I might deviate a little from some other makers because I prefer to fly by the seat of my pants a bit more than is comfortable for many people.
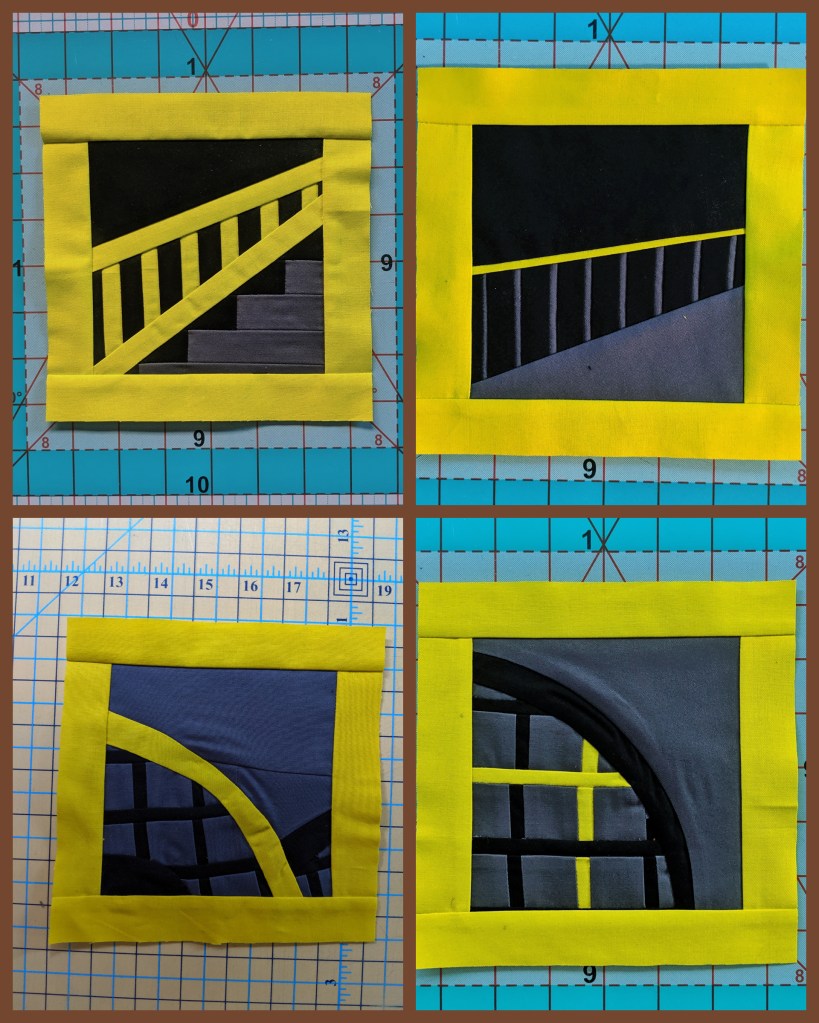
This particular quilt is very much improv based. The only parameters I set for myself were the finished size of each block and the color scheme. I did make prototype blocks for several of my designs, but I was getting very bored with that so I decided it was time to start in with the real fabric and just see what happens. I always get way more excited when I work with my real fabric and colors knowing that I’m actually creating the final quilt.
I started with the blocks I had already experimented with when I was making prototypes. And even though I had already worked on the designs in the prototype phase, some of my blocks still did not work the way I wanted, so that meant redesigning or scrapping the idea all together.
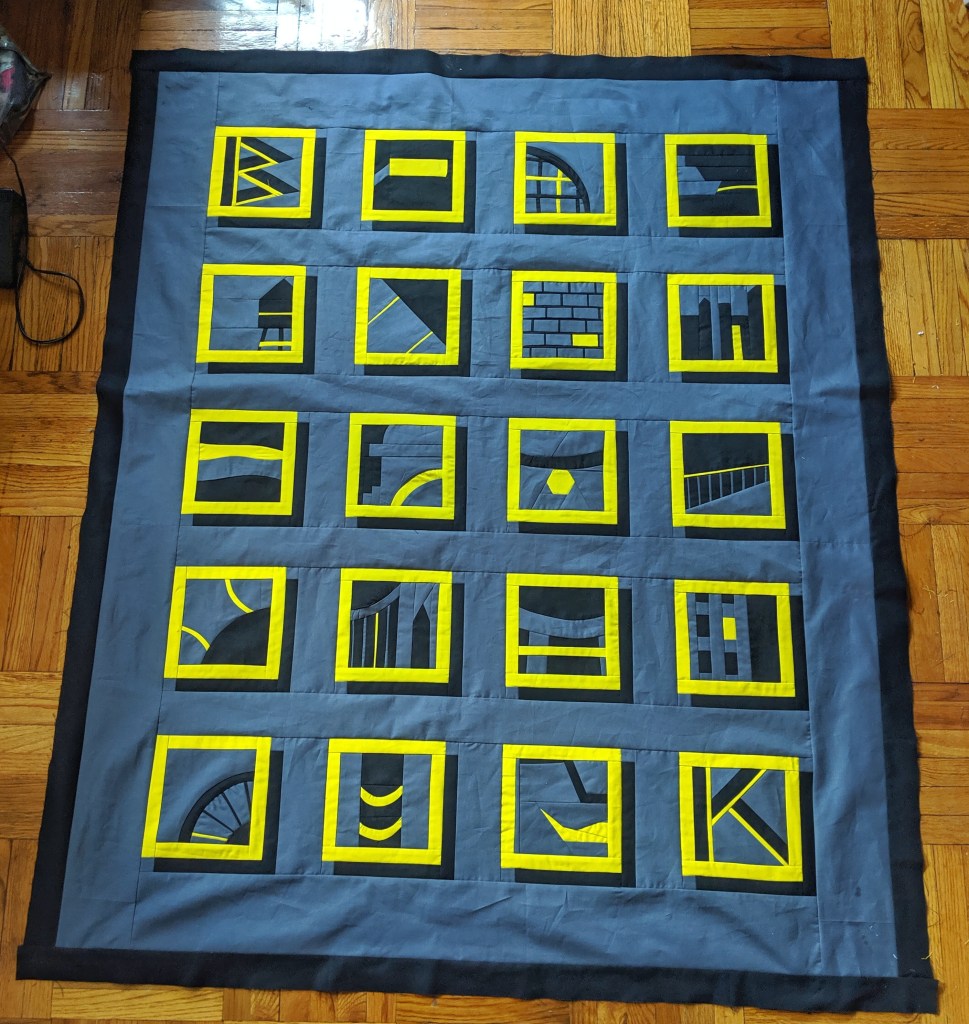
I did not have a set number of blocks in mind when I started thinking about putting this quilt together, but I did know I wanted it to be a wall hanging. And as someone who lives in an apartment with relatively small walls, that meant the quilt wasn’t going to be too big. As I made more and more blocks, I realized that my final number of blocks was most likely going to be 20. Once I had that number in mind, I suddenly felt like this whole thing was much more achievable.
After creating my 20 blocks, it was time to slap them up on the design wall and decide on the overall quilt layout. Because I had framed each of the blocks in the pear fabric, I already knew I wanted to have sashing in between all of the blocks to keep the bright pear color from overwhelming the overall quilt. (For those who don’t know what sashing is, think of it as the inner borders of a quilt that surround each block.) Once all of the blocks were on the design wall, I was able to rearrange them into an order that felt balanced and also start thinking about how wide I wanted the sashing to be in between each block.

Then I needed to decide what color I wanted to use for the sashing. I pretty quickly decided gray was the way to go, but I was starting to think the pear borders around each block were too strong. Did the blocks need another border of black around them? Then I remembered seeing a bunch of Instagram posts of quilt blocks with a shadow effect that I thought was super cool, and I decided that was going to work really well with this particular quilt.

Once I made those design decisions, I started cutting and piecing everything together. After I had pieced all of the blocks together with sashing, I decided the outer border needed to be a bit thicker and that I wanted a second border to frame the whole thing. But should I add another border of pear? I love the color so much, so maybe I should add just a bit more? Ultimately, I decided there was more than enough pear already, so I committed to a simple black border around the entire quilt. I felt like that was the best design choice to complete the overall graphic look I was trying to achieve.

The next steps will be deciding on my backing and making the quilt sandwich, so stay tuned for my next post about this quilt. I’d love to hear about your creation process. Do you like to fly by the seat of your pants? Or do you prefer having a pretty set design plan in mind before putting everything together? Please share your stories in the Comments section below so we can all learn from each other! Happy crafting!!