Fun with FMQ!

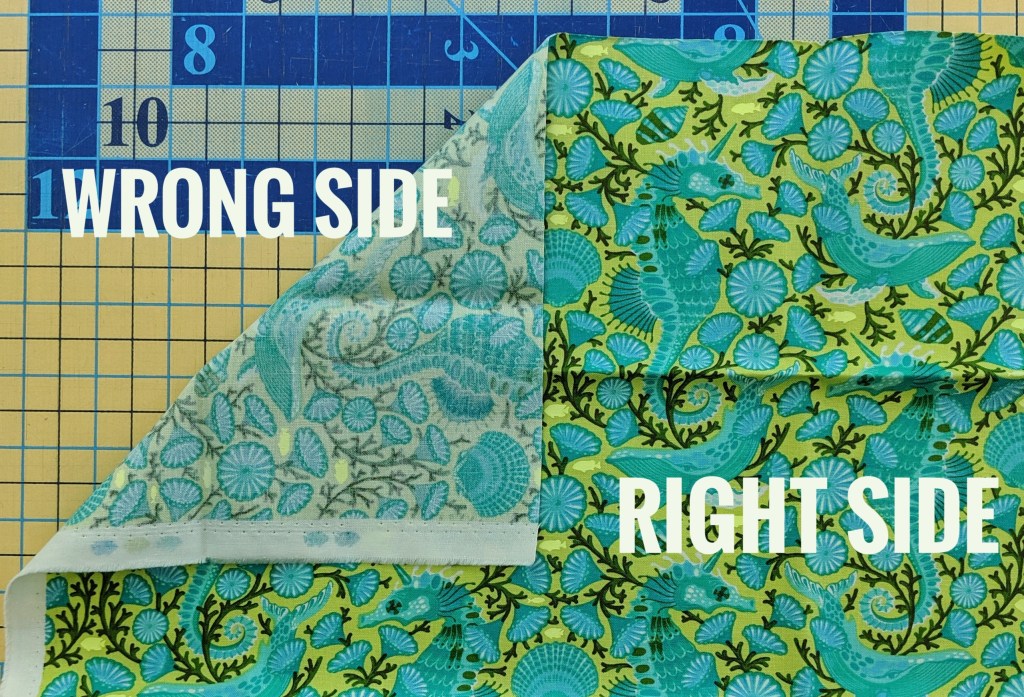
I LOVE free-motion quilting — or FMQ, as the cool kids call it!! If you’ve scrolled through my quilt gallery, you’ve probably noticed that I pretty much free-motion quilt almost all of my quilts. I love how versatile and creative it allows me to be when creating the quilting design of my projects. In today’s post, I’m going to take you on a little journey through my FMQ history. Enjoy!

When I quilted my very first quilt, I used a walking foot and straight-line quilting. I did not enjoy the process. at. all. I had to keep turning the quilt over and over through my tiny, little machine, and by the time I was finished I didn’t think I would ever quilt again.

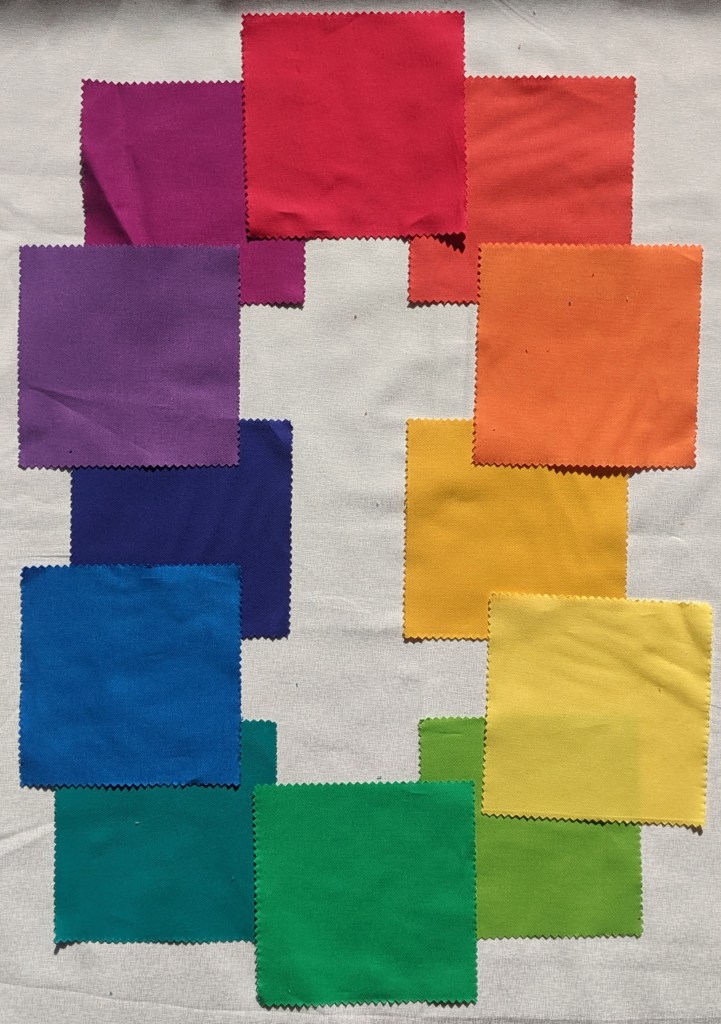
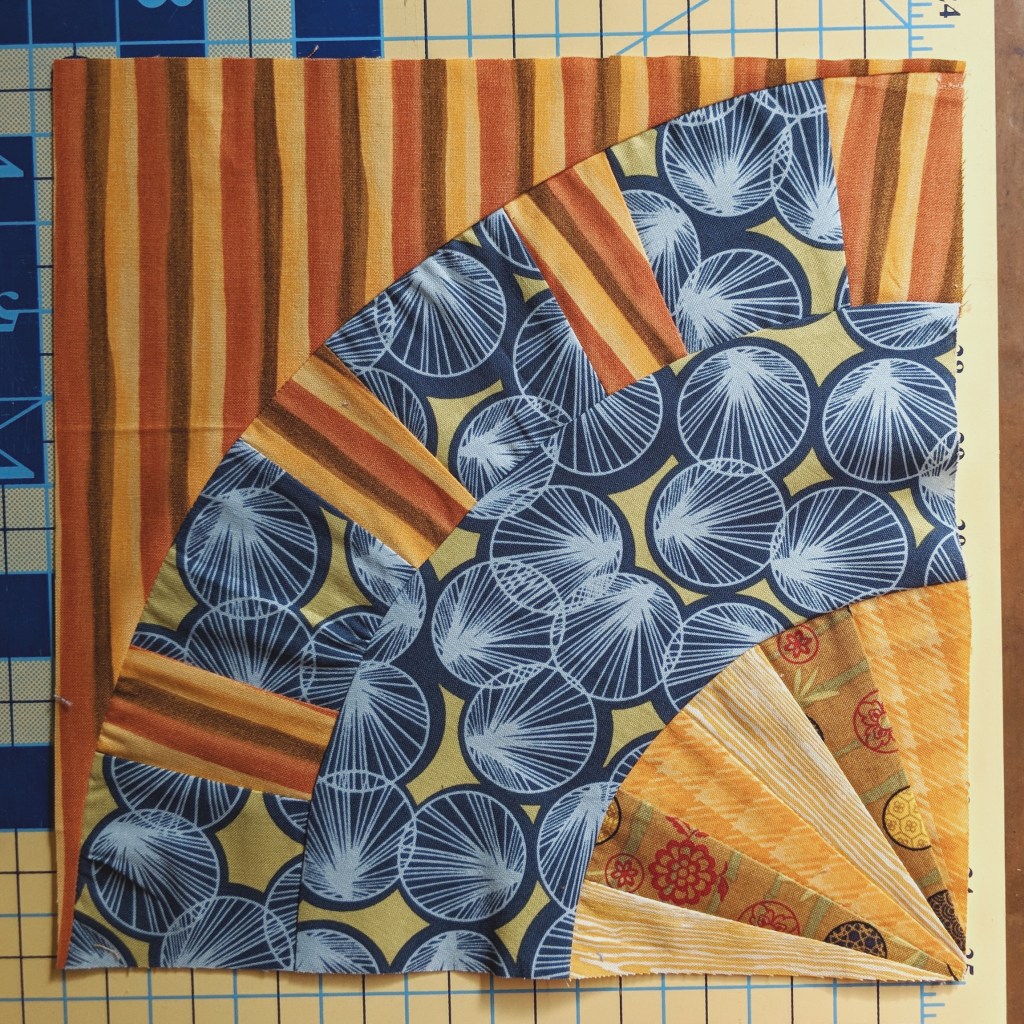
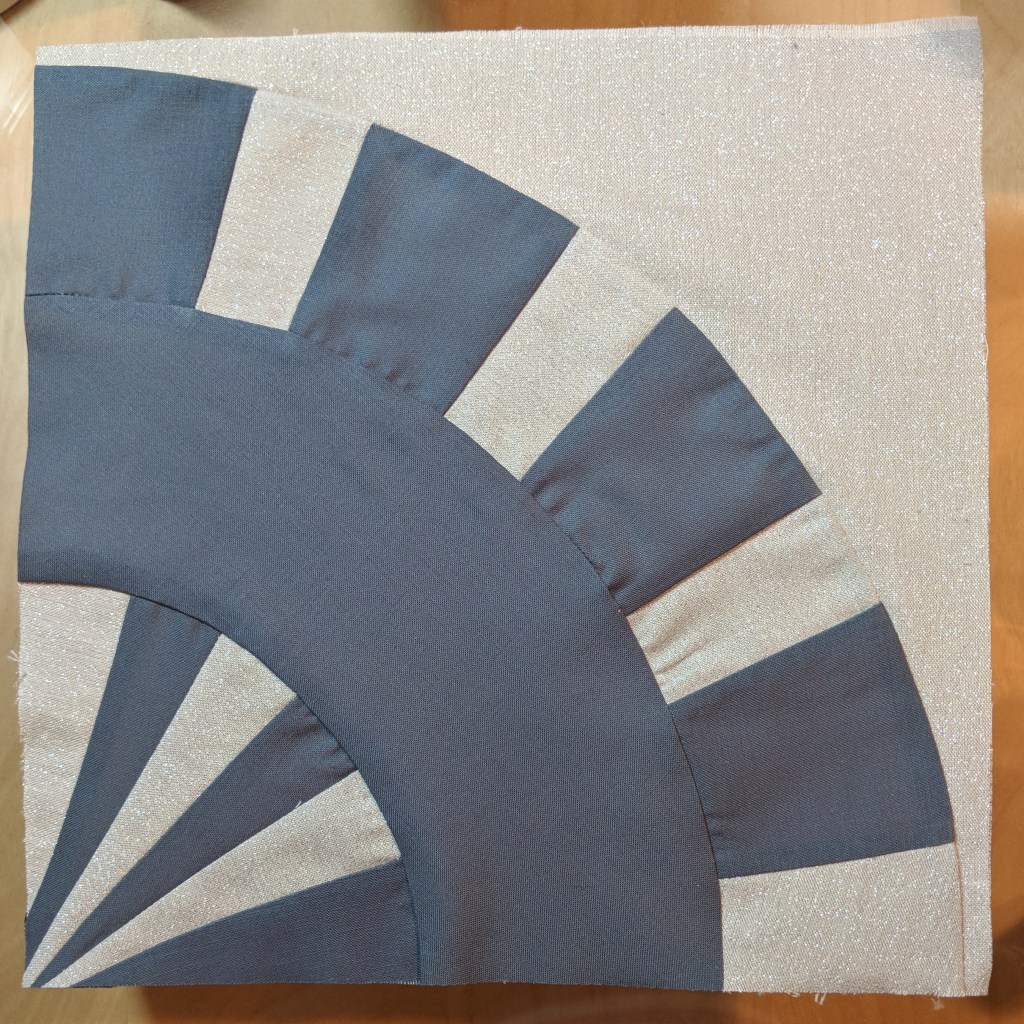
But while I was obsessively trying to find out as much about quilting as I could, I ran across this crazy thing called free-motion quilting. Suddenly I was eager to try my hand at it which meant making another quilt. Yay! I chose a 20-block sampler quilt designed by Amy Gibson for Craftsy, and I paired that with Leah Day’s free-motion quilting class which was specifically designed to help you quilt Amy Gibson’s sampler quilt.

Because I was brand new at FMQ, I decided to use the quilt-as-you-go method so I could just concentrate on one 10″ x 10″ block at a time. It only took a couple blocks to realize that FMQ was a game changer for me. The actual quilting process became my favorite part of making a quilt!

Once I discovered FMQ, there was no turning back. I started free-motion quilting all of my projects. Here are a few of my favorites. For “Beyond the Machine,” I quilted mostly straight lines, but I still used the free-motion quilting technique instead of a walking foot because I wanted the freedom of moving the quilt in any direction without turning the whole thing around.

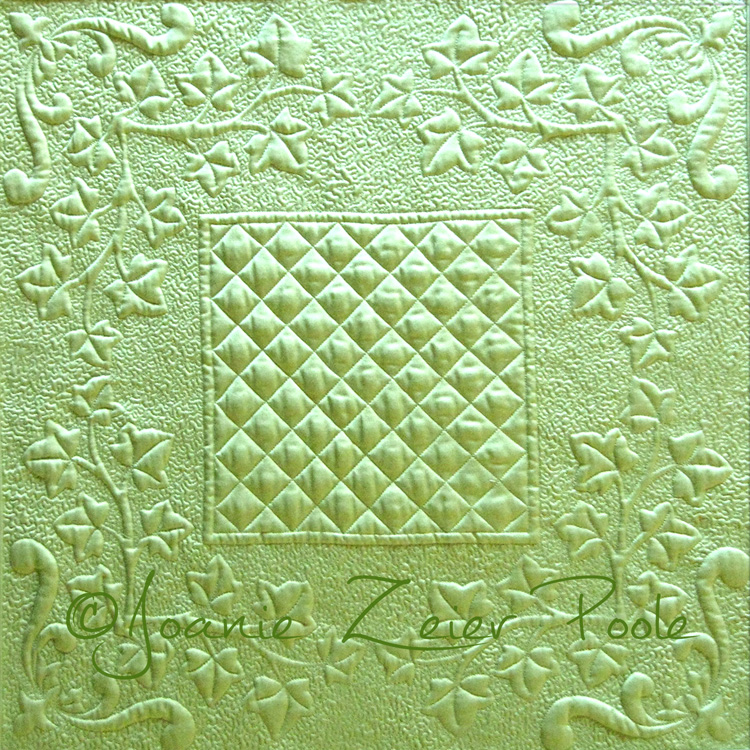
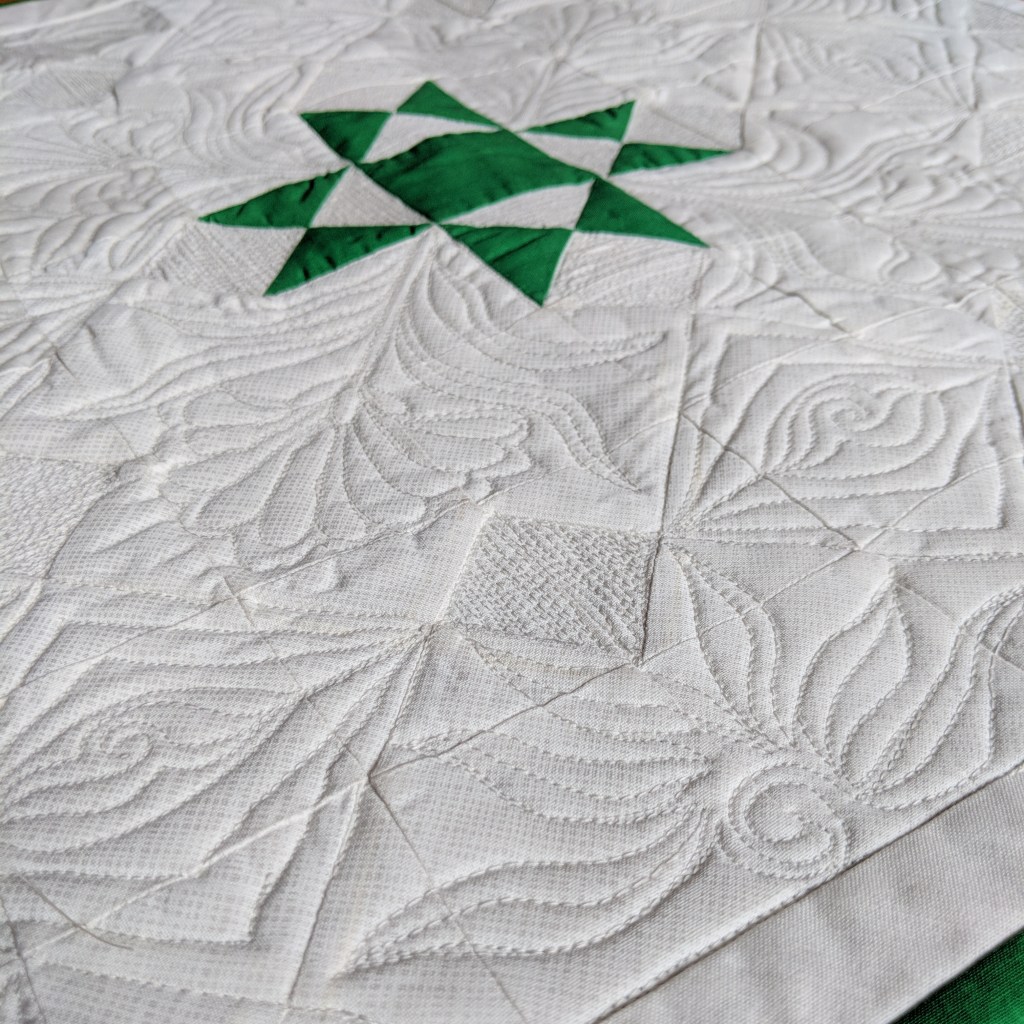
I specifically designed “Verdant Promises” with eight all-white Ohio Star blocks so that I had tons of negative space to quilt in as well as natural borders to help contain the different designs.

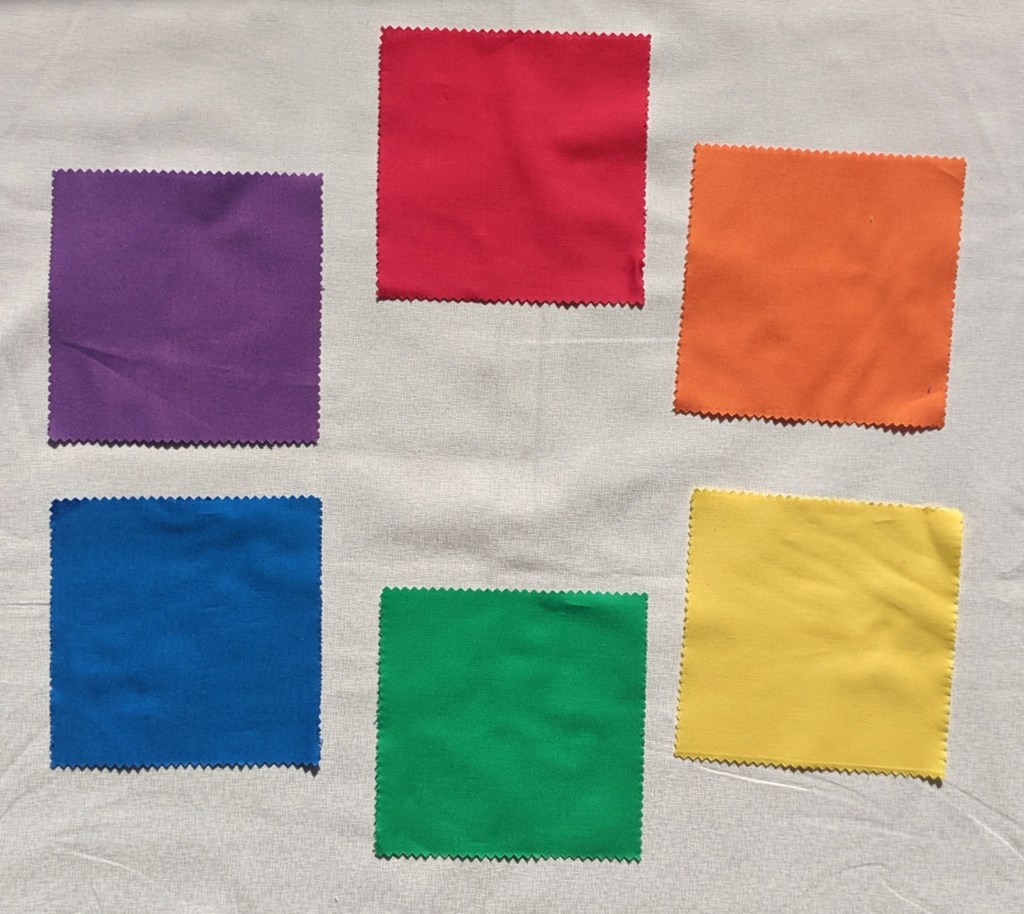
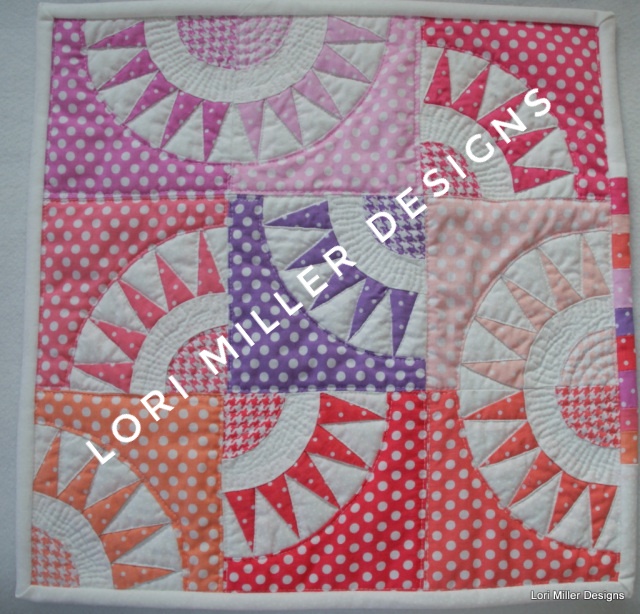
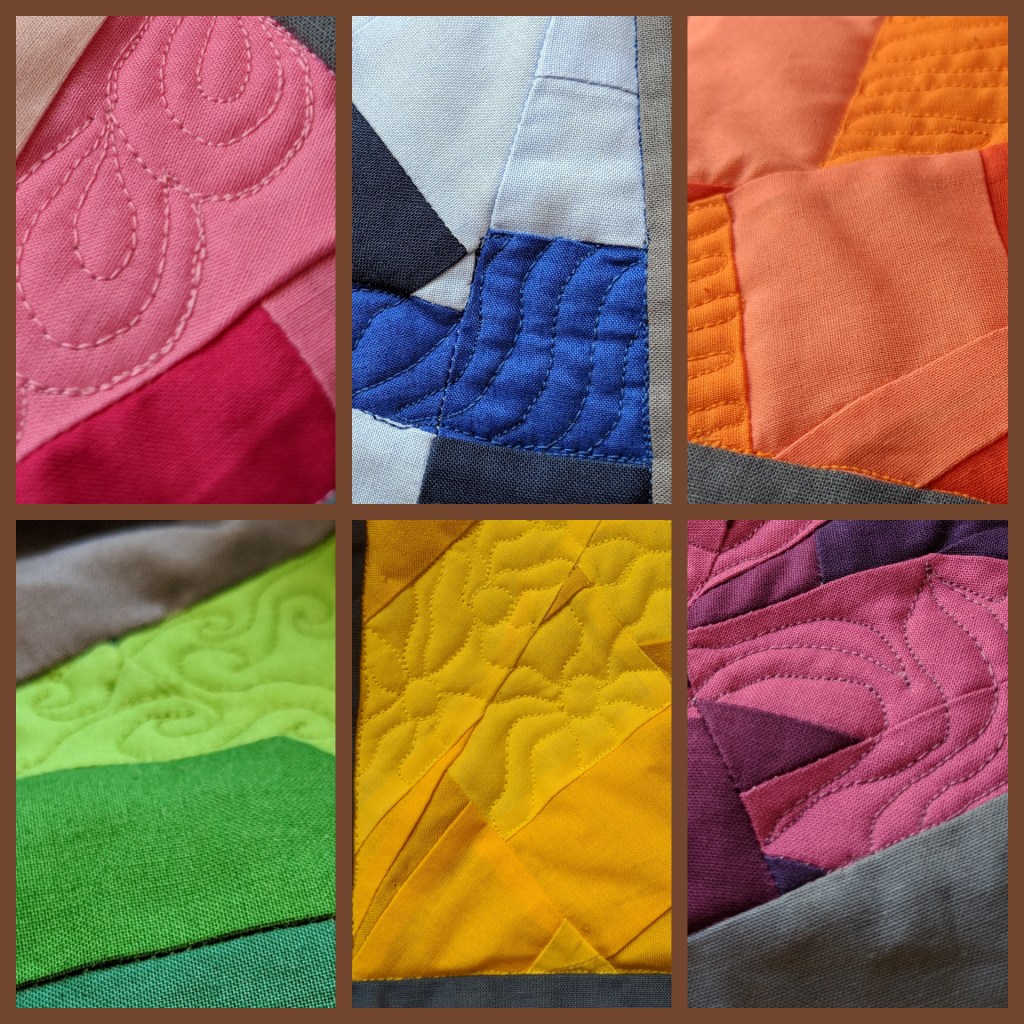
The blocks for “Caged Cacophony” are one of six colors, so I decided to give each color a specific FMQ motif. Then I had fun with the borders.

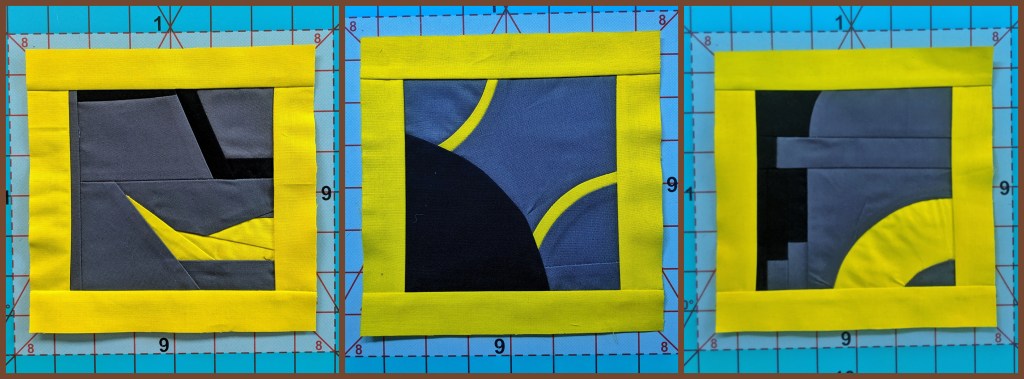
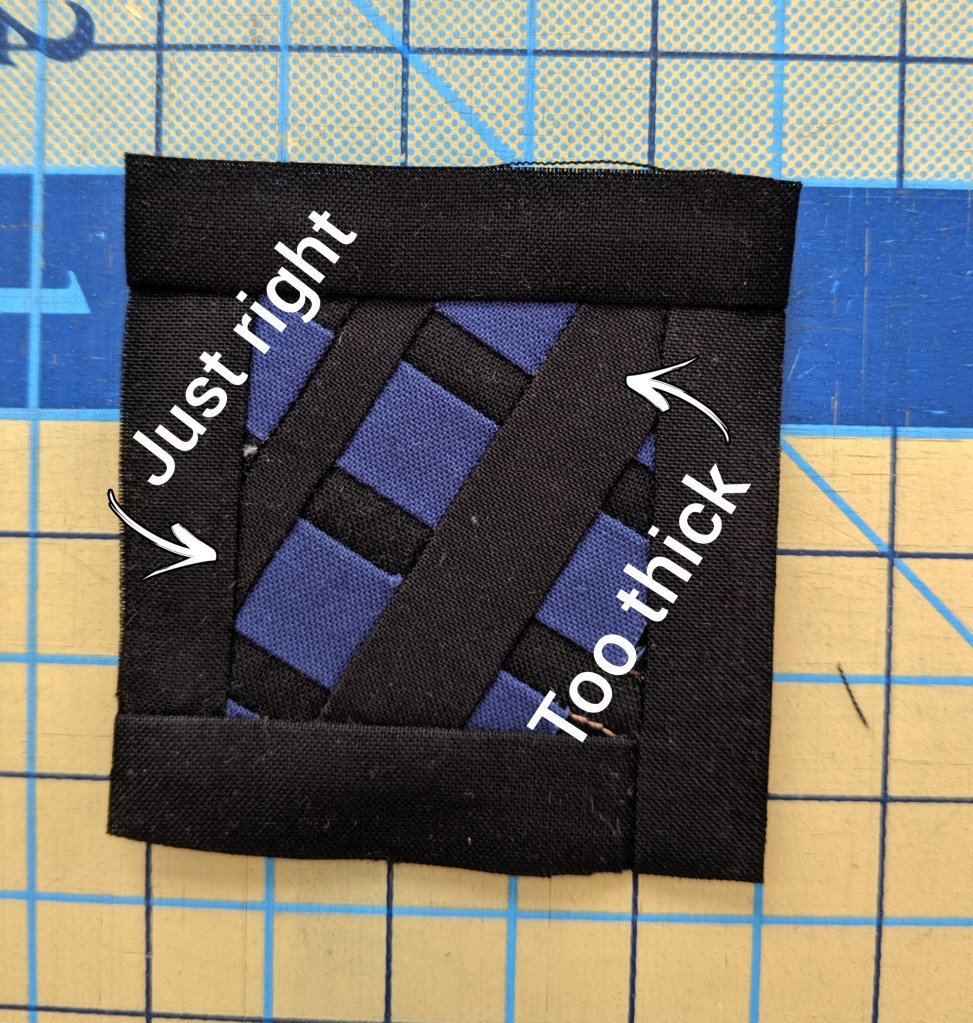
“Urban Collective I” was my first foray into graffiti-style FMQ. The blocks are just quilted in the ditch, but the sashing and borders are filled with quilting. I love the contrast of modern quilting with the traditional blocks.

This next quilt is just a solid fat quarter that I used for practice. I started with a specific design idea for the center, but then I just let the quilting take me where it wanted to go. This was my first whole cloth experience, albeit a very small whole cloth. I hope to do a wall-sized whole cloth quilt someday.

Because “Baby’s First Chevron” has such a modern look, I wanted the quilting to maintain that feel. So instead of filling up all of that negative space with tons of FMQ motifs, I simply used straight lines to extend the chevron pattern throughout the quilt but in different directions that keep the eye moving. Even though these are straight lines, I still used the FMQ presser foot and technique because a walking foot would have been too cumbersome with so many changes in direction.

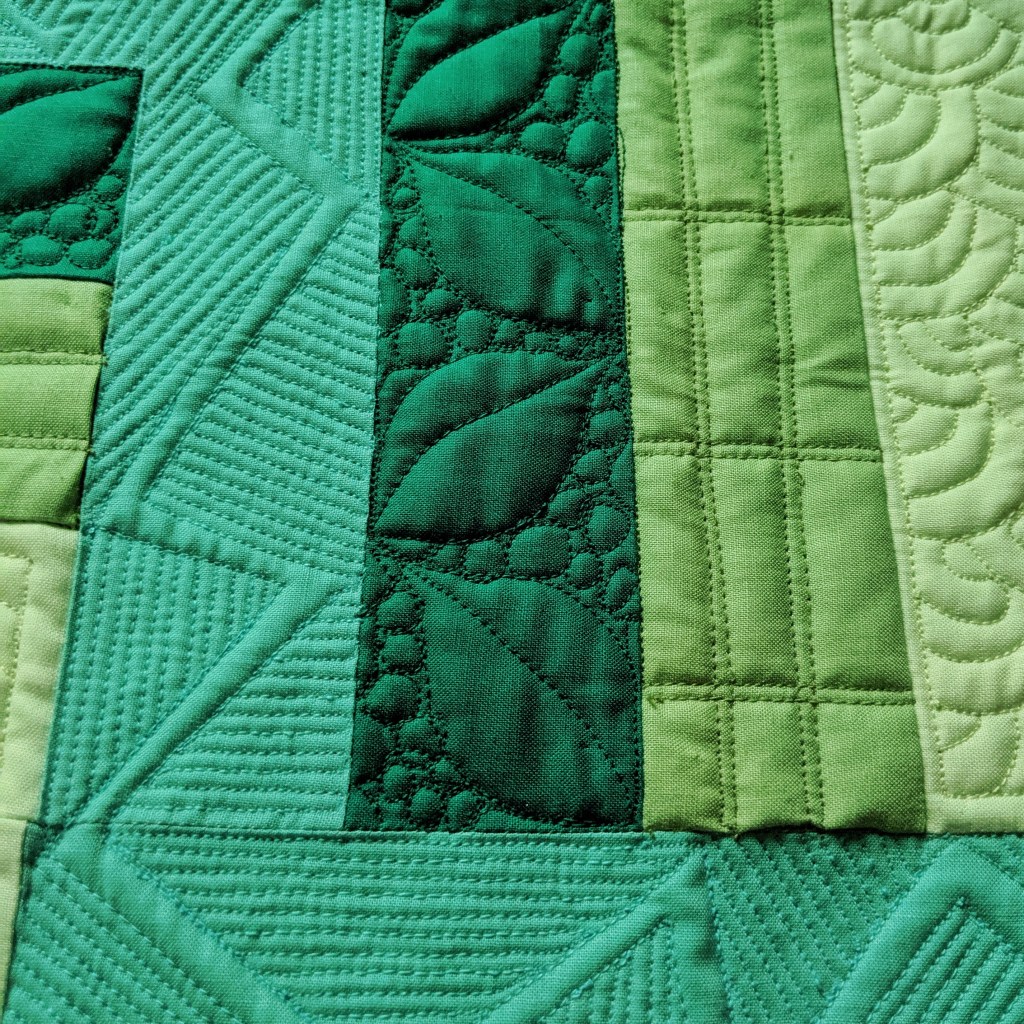
“Greener Pastures” shows my basic FMQ design approach when I don’t have anything specific in mind. I try to decide if I want the design to be more geometric with sharp, straight lines and angles or something more organic with curves. I decided to alternate between the two for the different strips in this Fence Rail quilt.

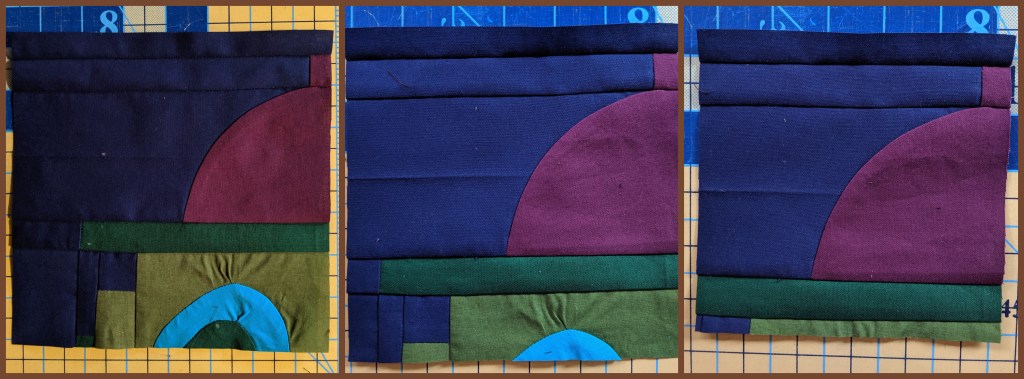
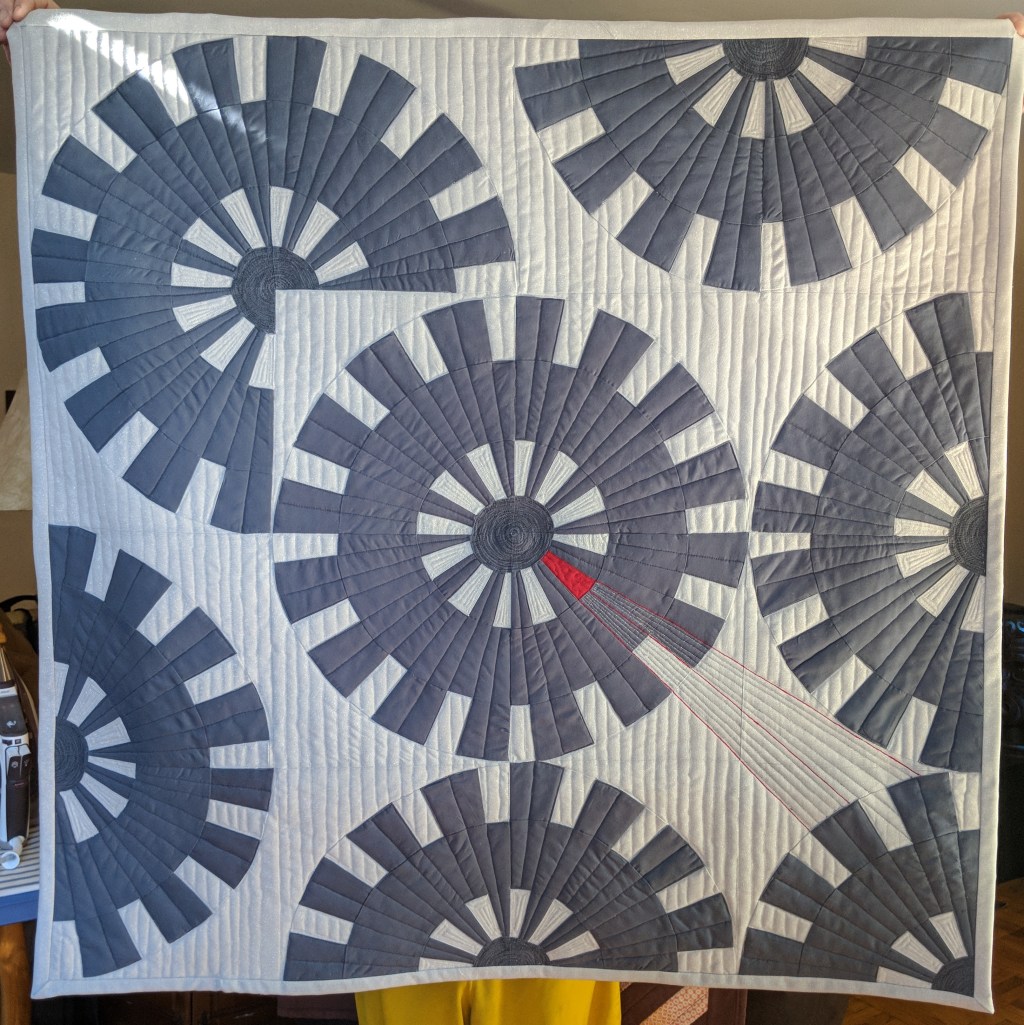
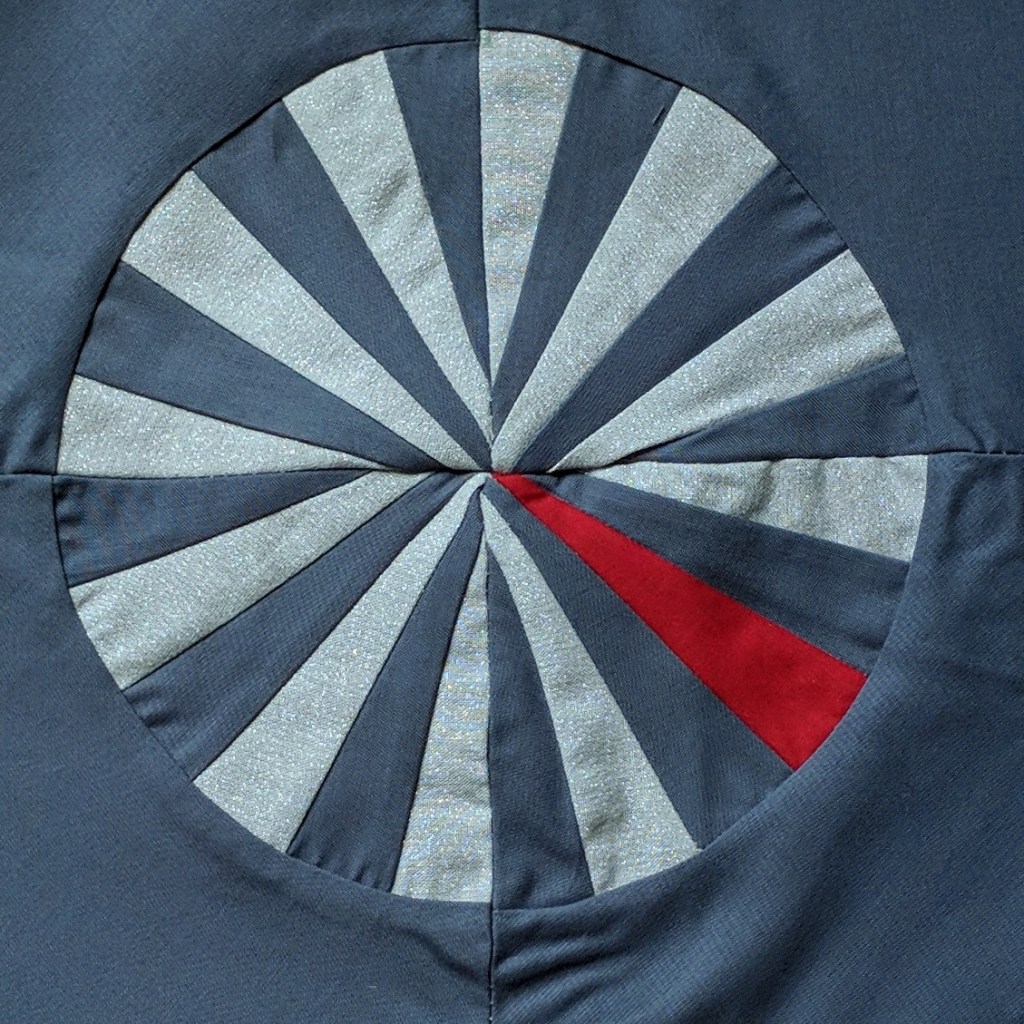
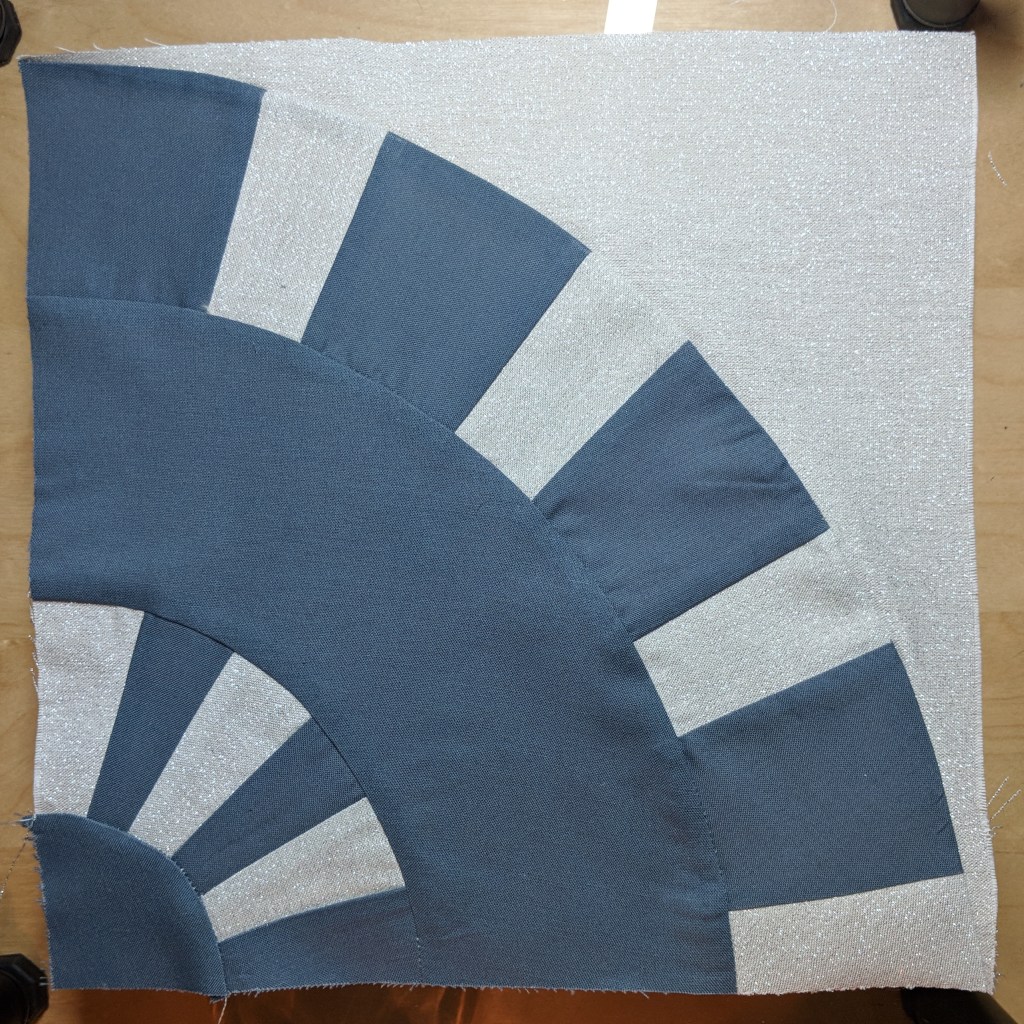
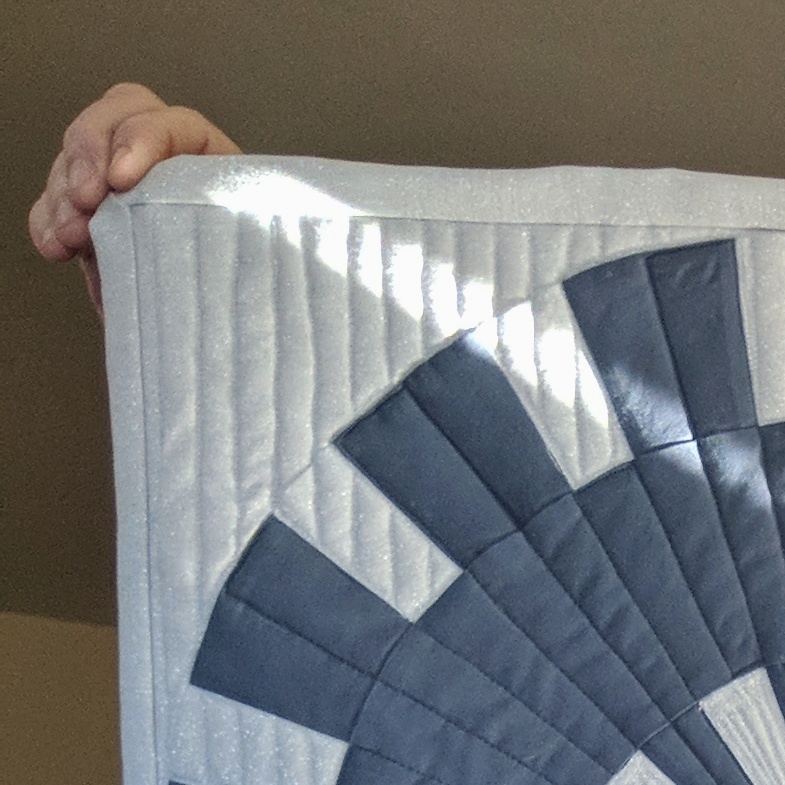
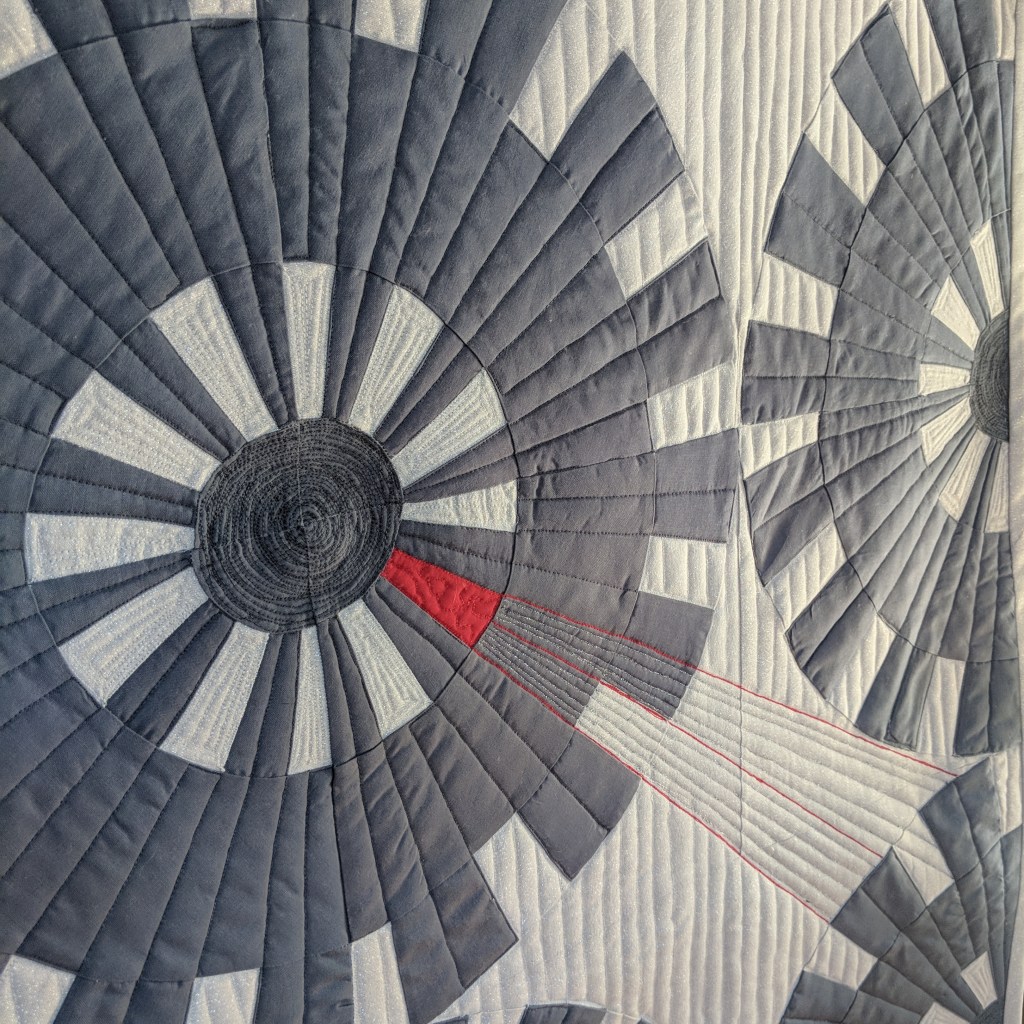
My most recent FMQ project was “We Only Got One, Folks,” where each of the inset circles represents an important aspect of conservation — earth/plants, water, air, and endangered species. I chose FMQ motifs within the circles to enhance the individual designs. Then I “wrote” in cursive around each of the circles, using words and phrases representing each of the conservation aspects, something that would be impossible with a walking foot.

I really love how FMQ gives me so much freedom when it comes to the quilt design of all of my projects. I can choose to do simple straight lines if I really want the quilt top pattern to stand out. Or I can go crazy with the quilting if that’s the wow factor I’m looking for. Do any of you free-motion quilt? Do you love it as much as I do? If you don’t FMQ yet, what are you waiting for? I bet you’ll fall in love with it as deeply as I have once you give it a chance. Let me know what you think, and happy crafting!!

Improv Piecing: Oh, the Possibilities!

The first few quilts I made were all about learning how to follow a pattern, learning basic quilting techniques and blocks, and getting comfortable with using my sewing machine and tools. Then I bought a Craftsy class taught by Joe Cunningham a.k.a. Joe the Quilter. The class was called “Pattern-free Quiltmaking.” I suddenly realized I could just take pieces of fabric, sew them together, and make beautiful blocks without any plan! This was so exciting!

Those of you reading this who are more experienced quiltmakers will know that this is not a new concept. “Crazy quilts” have been around for a couple centuries, but I had no idea at the time. As I began experimenting on my own as well as doing a little online research, I realized just how much freedom improv piecing can give you. Also, what a great way to use your scraps! (The image below is NOT MY WORK.)

My first real attempt to create something completely through improv piecing was a wine bottle holder. I had a bunch of Christmas-themed fabric scraps that I didn’t want to just throw away, and I had a Secret Santa party coming up. So I just started sewing, cutting, sewing, cutting, over and over until I came up with enough fabric to create the bottle holder. I loved the process and I loved the result!

I then decided to try an approach that combined a bit of a plan with improv piecing. I selected three fat quarters that were different shades of the same hue, cut them into strips, pieced the strips together, and then started randomly cutting and sewing them all back together. I then squared them off until I had enough to create a queen-sized quilt. My favorite discovery during this process was that I could take all of the scraps and put those together into rainbow strips which I used as partial inner borders for the quilt. This is one of my very favorite creations and it is proudly displayed on our bed.

My latest discovery that amped up my improv piecing was from reading Victoria Findlay Wolfe’s book Modern Quilt Magic. One of the chapters is about the kind of improv piecing I’d already been doing, but then she goes into free-form curves. Gasp!! I could improv piece curves??!! This blew my mind and it has opened up a whole new slew of possibilities for my improv piecing game.

While I still like just sitting down and randomly picking out scraps and sewing them together for a “crazy quilt” type style, what I really enjoy doing is combining sketched out ideas with improv piecing to come up with truly unique blocks that will never be completely replicated. That’s what I’m working on right now with my current quilt. Sometimes the process is frustrating because the improv just doesn’t work out the way I want it to. But for the most part, I find myself so fulfilled by this process.

Have any of you tried any sort of improv piecing? I’d love to hear from you. I find it meditative, but maybe some of you find it frustrating? Share your thoughts in the Comments section below and happy crafting!!

Creating a Quilt: Part 2 – Prototyping

Last week’s post was about coming up with the idea for an original quilt. This week is about my least favorite part of the creation process — prototyping. Ugh. In past posts I’ve mentioned how I love every aspect of the quilting process, but I lied! Prototyping is a necessary evil to all acts of creation, whether you’re making a quilt, repainting your bedroom walls, or designing a more efficient way to get through airport security. (Could someone get on that, by the way??) The reason I do not like prototyping is because it consumes so much time and energy and even resources (like thread and fabric if we’re talking about quilts), resulting in 99% of the work being thrown out. But it’s that final 1% that makes prototyping an absolutely essential ingredient to the creation process. It’s so much better to spend all of that time and energy figuring out what works and, more importantly, what does NOT work right at the beginning rather than getting halfway through a quilt top only to discover you should have done it all differently.

And so I have begun my prototyping process. I’m going to share my failures and what I’ve learned so far. I still have more prototyping to do, but I think you’ll get the idea of how beneficial this is from what I’ve accomplished so far.

One of the aspects of my design that I need to figure out is the size of each of the blocks. I decided to pick one of my sketches that would probably require the largest size block and see where to go from there. The block is based on the view of Manhattan from the Brooklyn Promenade in Brooklyn Heights. Keep in mind I’m just using scrap fabric, so this is not necessarily the color scheme I’m going with for the overall quilt. I like the overall outcome of this block, especially the railing of the promenade, but I made my first discovery soon after finishing this block. I realized that this was looking way too literal for my overall vision of the quilt. After making this block I realized I really want my blocks to be far more abstract. Simply by splitting the skyline from the promenade, I created two abstract blocks that I preferred far more than the original one.

Next, I decided to work on some improv curves, which I’m kind of obsessed with. I actually really like how this bicycle wheel came out and probably won’t change too much about it, other than the colors. But this block brought up yet another important discovery for me. I really liked the size of it. But I still hadn’t decided if I wanted all of my blocks to be the same size or if I wanted to mix them all up. I could visualize each way, and they both appealed to me.

Since I had such success with my bicycle wheel, I decided to attempt more improv curves with my cockroach block. Blech! What a disaster! The first one did not work AT ALL. For the second attempt, I created two separate blocks and then sewed them together. It’s better, but it’s still not what I ultimately want. I’ll need to keep working on this one before I attempt it with whatever real fabrics I’ll ultimately choose for the quilt.

As I was thumbing through my sketches I realized many of my blocks will use a grid, so I decided to make a little sample of that to see how that would turn out. Once again, I made an important discovery, which was about how thick I wanted to grid lines to be.

I then made what turned out to be my largest block yet, which is based on a fire hydrant. I actually like how it turned out, though the curves at the bottom of the block were not ideal. That’s when I realized I actually have smaller circle templates that I should have been using. Important lesson, people — utilizing all of your resources requires you to actually remember all of the resources you have!!

The last block I’ve worked on so far is my subway train block. When I finished it I thought it was fine. Just fine. But something was bugging me about it. The next day I was working out and staring at all of the blocks I’d made in between sets and — boom! — I had a big ol’ revelation. I decided to cut that subway train down to a 5.5″ square, and I really liked how it became a bit more abstract and more like a random modern quilt block than an attempt to create a realistic subway train. It was a very subtle difference but really impacted my thinking.

I then decided to cut down my fire hydrant block to see if that improved as well. And it did! I think the extra blood pumping into my brain during my workout helped me work through this problem, so I encourage you all to incorporate regular physical exercise into your creative process. It really helps!!

So now I’ve made some decisions about my overall quilt design. Because I’m ultimately an improv piecer, I’m going to be using improv piecing for all of my blocks, which means they’re all going to come out to whatever size they come out to. But then I’m going to cut them all down to 5.5″ squares. And depending on how large the original blocks turn out, I might be able to get more than one 5.5″ square out of it. This also means I’m definitely making my blocks more abstract than realistic. Perhaps a future Brooklyn-inspired quilt will use these same sketches for something more realistic, but this one is going to be modern as hell (or at least that’s my goal).

My last important bit for this post is stressing the importance of actually notating all of these discoveries somehow. I’m using Google Keep on my phone to list all of my thoughts so far. This whole process is going to take some time, so I need to make sure I don’t forget some crucial discovery I made the month prior once I actually start sitting down to my machine with the real fabric.

For now, I need to keep prototyping and fine tuning my ideas. While I don’t really enjoy this part of the process, I am well aware that it is far from a waste of time. And what about you? Have you ever created something from a completely original idea? What was your process like for making it a reality? Please share your thoughts and ask any questions in the comments section below. Happy creating!!

Creating a Quilt: Part 1 – Inspiration and Ideation

The Brooklyn Quilters Guild 2020 quilt show is coming up, and I finally came up with an idea for the quilt I want to make for it. My friend Shannon Reed (@knittingchick on Instagram and @sreed151 on Twitter) suggested I use this as an opportunity to post my process from the very beginning to the very end of the quilt’s journey. I thought that was such a great idea, so here we go! Thanks, Shannon!

When I’m trying to think up a completely new quilt, the first thing I do is look for inspiration. Sometimes the inspiration is given to me by a prompt for a quilt challenge or contest. Sometimes — VERY rarely — the idea just pops into my head fully formed and my finished product looks exactly like what I pictured in my head from the very beginning. This happens very rarely for me. In fact, it’s maybe happened one time so far. Generally, I’m a big fan of prompts and parameters.

In this case, however, my inspiration came in a roundabout way and I just allowed my brain to take that curvy path to what I think will be a pretty cool quilt. I’ve been looking at all the beautiful quilt blocks people have been posting on Instagram for the Tula Pink #100blocksin100days challenge inspired by her City Sampler book, which happens around this time every year. And then I was chatting on my Facebook page with Johnny Barfuss (@johnnybarfuss on Instagram) who had suggested I take a look at Elizabeth Hartman‘s book Patchwork City, and I mentioned I had been thinking about designing my own blocks. Like all good quilters, Johnny was very encouraging. So I started doodling some blocks in my sketchbook without any ultimate goal in mind.

When I looked into Elizabeth Hartman’s book, I read how her blocks were inspired by objects and places in her daily life, and — boom! — that was when inspiration struck. Eureka! I realized I could combine this desire to design some new blocks with my desire to create an original quilt for the upcoming quilt show. I would sketch out a bunch of images that pop in my head when I think specifically of Brooklyn. Then I would make those into a series of blocks and create a Dear Brooklyn sampler quilt, as an homage to the Dear Jane quilts that I ogle every time I go to a quilt show.

My first step was listing all of the ideas I could think of for my quilt blocks. At this point I wasn’t thinking about what would make a good block and what would be impossible. I just let the ideas flow and kept the list going. This is the beginning of the ideation phase (just in case that’s a new concept for you). In the design world, the ideation phase generally involves a whiteboard and hundreds of Post-its. My version involves my smartphone’s Google Keep app and a sketchbook.

Once I had a good-sized list, I started sketching the ideas out. My sketches varied between abstract and realistic because I hadn’t decided yet what direction I ultimately wanted to take my quilt. I think it’s important at this very early stage of the creative process that you don’t put too many limitations on yourself. Editing will come later and is necessary for the final product, but right now just allow yourself to create anything and everything that comes to mind. You never know — one of those absurd, impossible ideas might end up being what works the best.

I started looking over the several sketches I had drawn and decided I wanted my quilt blocks to lean more towards abstraction versus realism. In fact, right now I’m thinking I want them to be so abstract that someone looking at my quilt won’t even necessarily know the reference material for each of the blocks. So I started making thumbnail sketches of the more realistic blocks, focusing on a small section of the overall sketch. As the creator of the quilt, I want to be able to look at the blocks and know exactly what inspired them, so I don’t necessarily want the blocks to be super abstract. But on the other hand, I’m not so concerned that anyone else looking at the quilt will be able to instantly see the source material for each block. In other words, I’ll know that block with a series of curves was inspired by a cockroach, but a random viewer of my quilt would probably never guess that’s how the block came about.

And that’s where I’m at so far. I still have a lot of sketching to do for most of my ideas. The next phase will be playing with scraps of fabric to see how the blocks work in reality and not just on paper, so you can look forward to seeing how that turns out in the next post about this process. I’d love to hear about how you find inspiration in your quilting and other craft projects. Do you prefer parameters when you’re creating? Or are you someone who can some up with ideas completely out of the blue? Please share in the comments section below, and let’s get a conversation started. Happy quilting!

Quilt Shop Road Trip – August 2019

I grew up in Maumee, OH, a suburb of Toledo. My parents and brother and his family still live there, so I try to visit at least twice a year. My foray into quilting has given me a fun new way of re-exploring my hometown and the area by finding local quilt shops. My latest trip was the best one yet!

I discovered The Quilt Foundry fairly soon after I started quilting two and a half years ago. It’s located in downtown Maumee in the historic Buttergilt Building. The shop consists of two large rooms filled with bolts of fabrics as well as an additional spacious classroom and workshop area. I try to get to this shop every time I’m visiting the family, and I’m never disappointed. My only regret about this shop is that I wasn’t quilting when I actually lived in Maumee, so I wasn’t able to take advantage of all of its myriad offerings. Although maybe it’s for the best because I don’t know if my bank account could have survived a quilting addiction at such a young age!

My mom helped me with researching more quilt shops in the area and found the Quilters Travel Companion, a website with maps and links to various quilt shops and quilt shows all across the United States and Canada. That’s how we discovered The Door Mouse just outside of Bettsville, OH. This is an area of Ohio I’ve never really explored, so it was fun driving through the country. We even spotted a couple of barn quilts, though I sadly did not take any pictures of them. (Must be better about these things!) The Door Mouse is a huge store in a renovated barn out in the middle of nowhere. They have pretty much any style of quilting cotton you could want as well as a huge selection of flannels.

My niece is a little bit obsessed with Ann Arbor, MI, which is just about an hour’s drive north of Toledo. So we decided to take a day trip over the state border, and of course I had to visit at least one of the local quilt shops while we were there. Now, I’m going to admit that looking at the photos of the exterior of the Ann Arbor Sewing Center, I thought it was going to be kind of a lackluster shop without a lot of personality. Boy, was I happily wrong!! This shop has a HUGE selection of fabrics in all styles. They also sell a large variety of Bernina, Husqvarna Viking, and Pfaff sewing machines. I had a truly lovely conversation with one of the staff and Doni Houghtaling, one of the owners of the store. I truly felt welcomed, and if I lived in Ann Arbor I would definitely be taking advantage of their full range of classes and clubs they offer every day of the week.

We visited the final quilt shop of my trip on our way down to see family in Cincinnati. We took a quick detour to Loveland, OH, and stopped by The Quilter’s Studio of Loveland. This is yet another enormous quilt shop, boasting nearly 5,000 bolts of fabric. And, man, if you love batiks, this shop is an absolute MUST. In addition to the hundreds of batiks, they have a great selection of contemporary quilting cottons. They also have four longarm machines that were being rented out by four customers when we visited the shop, all of whom were more than happy to show off their gorgeous quilts to my parents and me.

My quilt shop road trip did not disappoint in the least. I am always amazed at just how friendly and helpful every single person I’ve ever met in a quilt shop is. I mean, seriously! It must not be possible to work in a quilt shop without being the friendliest person on the planet! The quilting community is a true community in the best sense of the word, and I feel so fortunate every day to be part of it.

I’d love to hear about your favorite quilt shops — where are they located? What do you love about them? Any fun stories you want to share? Please leave a comment and show some quilt shop love!!

Quilting 101: Color Theory

I imagine most of you crafty, quilty people out there have a natural sense of color — what you like and don’t like, what colors work together, etc. — so you may dismiss any sort of deep dive into color theory, preferring to stick with your intuitive sense of color rather than thinking too much about it. I totally get that! And I don’t necessarily disagree. Trusting your own color sense is very important as an artist. But I also believe that knowledge is power, and having even a little bit of knowledge can elevate your color game.

Before I go any further, I have a big ol’ disclaimer. I am by no means a color theory expert. I have sat in on a couple different color theory classes, though never as an actual student. This post is just brushing the surface, so if you are fascinated by the topic or you want to really up your color game I strongly urge you to check out some of the resources I’ll list at the end of the post.

Something to keep in mind is that color is science. Every color is a specific frequency of light that we can see because of the rods and cones in our eyes. And while most of us do not need to spend years studying the science of light and color theory in order to create visually stunning pieces of art, having a basic understanding of how colors actual work together can help you in those moments when something is just not coming together and you can’t intuitively figure it out.

Most of us learned about the primary, secondary, and tertiary colors in grade school. You start with pure red, yellow, and blue. Those are your primaries.

When you mix red and yellow, you get orange. Yellow and blue give you green. Blue and red = violet. Those are your secondaries.

Then your tertiary colors are red-orange, yellow-orange, yellow-green, blue-green, blue-violet, and red-violet. All of these colors can be beautifully organized in a color wheel to show their relationship to each other.

As a heads up, many color theory classes these days work with a different set of primaries, secondaries, and tertiaries based on printer colors. I am not going to go into any detail, but I just wanted to mention it in case you encounter it elsewhere. So if someone tells you that the primary colors are magenta, cyan, and yellow, they are not selling you a line of BS. They’re just working with a different color wheel.

When I’m thinking about color and a quilt design, I generally think about figure, background, and contrast. What do I want to stand out in my quilt? What do I want to blend in? Do I want any transparency effects? These questions are often better answered when you have a grasp on color theory versus just relying on your intuition.

In order to understand how color can help define a figure from a background, let’s start with some basic color vocabulary. To get a grasp on these definitions, I’m going to use one color. Let’s go with green. Hue is the name of a color. Green is a hue.

Saturation is the intensity, or purity, of a hue. Adding gray to a hue will lessen the saturation, making it look duller.

Value is how light or dark a hue is. Adding white to a hue gives it a lighter tint. Adding black to a hue gives it a darker shade.

Looking at a color wheel can quickly help you see the relationships colors have to each other. The colors that are opposite each other on the wheel are complementary. Red and green, blue and orange, violet and yellow. Complementary colors provide striking visual contrast. And depending on the saturation you use, it can even make your eyes do some funky things and create visual effects.

Analogous colors are next to each other on the color wheel. They blend together very easily which is often soothing to the eye.

When I’m thinking about a quilt design, I think about what I want to stand out, which I call the figure. The “figure” could be an actual object, but it could also be just the main design motif that I want to emphasize in the overall quilt. Most everything else is the background.

Here’s something you have possibly never really thought about. If you want to create depth in your design and you’re using a dark background color, warm colors — red, orange, yellow — will appear closer, and cool colors — violet, blue, green — will appear farther. However, if you’re working with lighter backgrounds, the opposite is true. Isn’t that fascinating? This is one of those examples where knowing the science can be helpful because you wouldn’t necessarily know this intuitively.

Sometimes I see people struggle with losing their overall quilt design because they smashed together all of their favorite colors rather than selecting colors that provide enough contrast to create figure and background. When you’re looking at your quilt design, decide what part of the design you want to stand out. Use your favorite colors for that part. Then use a neutral for the rest, and that will be the background of the design. Your “neutral” can even be a color, but make sure it is very different in saturation and/or a significantly different tint or shade from the main colors of your design.

If you’re still struggling with your figure disappearing into your background, take a photo of your quilt design with your chosen colors with your phone. Then use one of your photo editing apps to turn into a black-and-white picture. Now you can really see the saturation level of each color by seeing them in the grayscale.

If all of your colors are close to or have the same level of gray in your picture, you might want to pick some different tints or shades of certain colors so that the main part of your design will stand out.

And stepping away from color just a bit, what I just said above can apply to print patterns as well. I love me some scrappy quilts, but make sure you’re creating contrast with high-volume prints and low-volume prints so that your overall design doesn’t disappear due to lack of contrast among all of the different prints you’ve chosen.

I think I’m going to stop now because, honestly, my knowledge only goes so far. However, I want to give you some great resources if you decide you want to really dive into the details of color theory. My first suggestion is find a local color theory class offered by a college or university or local artisan. Not only will you get firsthand knowledge from experts in their field, but you’ll also work on projects that will really cement the lessons. If that’s not possible for you, there are plenty of tutorials online. One of those tutorials is “Color Theory for Quilters” with Katie Pasquini Masopust for iQuilt.com. It is not free, but it is specifically geared for quilters so it’s worth a look. I also really like the website worqx.com. It goes through many aspects of color theory in a relatively simple manner. There are also some fun games you can download to your phone like I Love Hue and Blendoku. Either game is a fun way to get a better feel about how colors work together.

I would LOVE to hear from YOU about your own color theory journeys and ideas. We all see and think about color differently, and no one is ever wrong as long as they love what they’ve created. Please share your stories in the comment section below. Happy Quilting!!

Designing My First Original Quilt: A Step-by-step Guide

The quilt featured on my home page is the very first original quilt I ever designed, pieced, and quilted all on my own. In making this quilt I had the epiphany that I feel so much more joy when I create a quilt from scratch rather than following someone else’s instructions. This is not a judgment for anyone else’s process or creative expression. We are all on our own journeys, and I respect and honor that. But for me, I find more fulfillment realizing my own creative ideas versus someone else’s. In this post, I want to take you through the process of creating this quilt from start to finish. If you haven’t tried designing your own quilt, I hope this inspires you to rise to the challenge. You might be surprised how it could change your outlook on your creative process!

This particular quilt started with a prompt. The Brooklyn Quilters Guild was gearing up for its 2018 quilt show, and the co-presidents put out a mini quilt challenge to celebrate the guild’s 25th anniversary. We were given the following parameters.

R E Q U I R E M E N T S :

Shades of gray (white OK)

A drop of red, not more the 3 x 3 inches or less than 1 x 1 inch.

40 x 40-inch quilt

Quilt pattern of your choice

Quilt must have sleeve, label, and name attached.

Keep in mind that we are celebrating the 25th anniversary of our guild, our new location at Industry City, and a little modern twist. Be creative, have fun, and make some beautiful fiber art.

I didn’t really know this about myself at this point since this was my first original quilt, but I have since realized that I love prompts and parameters. Creating something out of thin air does not come easy for me, so I need a starting off point, even something rather open like the above prompt. I began thinking about being a Brooklyn quilter and a New Yorker. I had been seeing a lot of New York Beauty quilts online recently (see photo below), and I thought it might be fun to do an industrial twist on that idea.

I opened up Electric Quilt 8 (EQ8) on my computer and drafted a block that resembled a quarter of a cogwheel.

One of the many benefits of working in EQ8 is that I was then able to print out paper templates for the block.

I grabbed some fabric scraps and created a very rough draft of the block just to make sure everything fit together and the dimensions were correct.

Then I went back into EQ8 to begin playing with the overall quilt layout. The images below are just a couple of layouts I tried out. Using the computer program allowed me to make quick adjustments without having to actually sew all of the blocks together like you would with a design wall.

Now it was time to figure out the real fabric I wanted to use. I found a great fabric shop on Etsy called AA Cotton Creations, and they had just what I was looking for. I chose a light gray background fabric with just a touch of metallic glitter to honor the silver anniversary of the guild. Then I decided to go with Kona Cotton in Metal because, you know, the cogwheels are made out of metal. Nothing too mind blowing there! Once the fabrics arrived, I began cutting them up and piecing them together into my 16 blocks.

After piecing all 16 blocks, I realized I might not like how the center spokes come together once the blocks are sewn to each other. I decided to piece four of the blocks together to make one complete cogwheel to see how it would look.

AAAHHH!!! That is NOT what I wanted the center of my cogwheels to look like! I went online to look at actual cogwheels and realized I was missing the essential central hub. So I picked these blocks apart and added another quarter circle to each block.

Wow! What a difference that made! I talked about process in my previous post, and this is yet another example of how the creative process is usually not a barrier-free journey from beginning to end. Don’t let these challenges discourage you. Get that problem-solving brain working and overcome these obstacles because the end result will be so much more worthwhile!

Now that the top was pieced together, it was time to quilt. I really liked how modern this quilt looked, so I wanted the quilting to reflect that same feeling. I decided to quilt straight lines going from top to bottom in the background. But because I wanted a feeling of movement to come from the cogwheels, I quilted straight lines moving in the direction of each of the teeth of the cogs. I filled the hubs with thread to give them a fun texture.

I had my friend Ryan come over as a second pair of eyes to look at what I had done so far, and he wanted to see some red thread used in the quilt. That’s when I thought of having the red piece start to emit its own light in opposition to the rest of the lines. Then I quilted gem-like lines in between the center spokes so that I could have the red “gem” start to crack and break. I thought a silver metallic thread would be a fun way to add just a bit more glitz to the quilt to emphasize how this red piece was breaking out from the machine.

And that’s pretty much it! I love how this quilt came together. There were many frustrating moments, but I couldn’t have been happier once it all finally coalesced into my first original quilt. I’d love to hear your thoughts on what you think about creating an original quilt versus following someone else’s pattern. What brings you more joy? Tell me what you think. Happy Quilting!!!

Pennsylvania National Quilt Extravaganza, September 2018

The Craft of Quilting: Process

Many moons ago, I earned a degree in Musical Theater. Tra-la-la!! As I was learning how to sing to the balcony without ripping out my vocal cords and how to form the perfect pair of Fosse jazz hands, I also learned about the difference between art and craft. The art of acting — or painting or playing the violin or dance, etc. — is not easily defined and can be associated with vaguely defined terms like “talent” or “the it factor.” The ability to tap into that mysterious inner fire of creation is essential to any artist. But equally essential is the development of one’s craft in conjunction with their art. Yes, to be a successful actor, you need to have that inherent ability to capture the attention of a 1,500-seat theater full of people and bring them with you on your character’s journey. But being able to successfully do that eight performances a week, 50 weeks a year requires craft.

Now, I have to admit that when I first started quilting, I didn’t think too much about any of this. I mean, sure, I was learning techniques and trying to improve each time I pieced a block together, which is part of honing one’s craft. But as long as I was following someone else’s instructions to achieve their design, the idea of process never really crossed my mind. In fact, it wasn’t until my third original quilt that I realized I couldn’t wing my way through designs that were percolating in my head and just expect them to appear fully formed under my sewing machine.

You see, I had decided to create a quilt as a housewarming gift for a very dear friend. Because she is a fellow crafter, I knew she would have no problem with me experimenting a bit with my scrap bin to make something fun. I decided I would make a bunch of Log Cabin blocks using a somewhat random selection of scraps and just kind of figure out the rest as I went along. After I made about 11 or 12 blocks, I decided to slap them up on my design wall to see what order I wanted to put them in, and I was horrified by the result. They looked horrible together!! It didn’t matter what order I put them in. They all completely clashed with each other, and I had a fit because I had spent so much time making all of them.

After I managed to calm down, I stood and stared at the blocks for a very long time. I mean, like, a really long time. (One of the things I’ve learned about myself over the years is that I am not a quick thinker.) I gave myself permission to just stand and stare and let my creative juices do some behind-the-scenes work in my brain.

I eventually came up with a couple solutions. One, I would use sashing to put some much needed space between each of the blocks. Two, I would frame each block with the same navy blue I had used for the center square of each Log Cabin. Once I tried that on a few of the blocks and put them back up on the design wall, I realized it was actually going to look amazing!

This was a big epiphany for me. I thought, Oh, yeah! This whole designing-a-quilt-thing is actually a process! Sometimes ideas work, sometimes they don’t. Sometimes they don’t work until you try something two or three or four more times. And that’s great because it means you’re thinking like an artist! No one creates perfect pieces of art out of thin air no matter how brilliant they are. You have to ponder, sketch, workshop, rehearse, change your direction, think outside the box, and all of that good stuff before you actually achieve your vision.

Now I want to offer a few suggestions specific to quilters who want to start working on their process.

  • Sketch out your ideas or use a program to help you sketch out your ideas
  • Get a design wall
  • Make test blocks using fabric you don’t care about
  • Don’t get frustrated when your test blocks don’t automatically come out how you wanted them to; use it as an opportunity to discover the changes you want to make
  • While it’s always great to stretch yourself and try new skills, don’t feel guilty if you decide you just don’t like certain techniques; embrace your strengths
  • Take an art class that has nothing to do with quilting and learn about composition, form, line, color theory, and all that good stuff that can elevate your quilt designs to a new level
  • Take photos throughout the process of your quilt so you have an archive of how you overcame past challenges
  • Don’t be afraid to ask others to look at what you’re making if you find yourself stuck, though be aware that some people do not know how to give a helpful critique (I should probably write a post about how to participate in a critique)

I’m sure if I sat here for another few hours, I could come up with many more suggestions, but I’ll stop here for now. Instead, I would now love to hear all about your process! Please leave a comment and share how your process works, so we can all help each other continue progressing through our exciting quilting journeys!

Quilting 101: Resources

When I started my quilting journey back in March of 2017, I did what I always do whenever I have no idea where to start.  I Googled. I quickly found Craftsy.com (now mybluprint.com), and saw what a rich resource of all things crafting it was. Because I’m still somewhat new to the quilting world, I still use the Internet all the time to find out more about techniques and patterns, to shop, and just to get inspiration.  In this post, I’ve listed a bunch of resources that I use on a regular basis. I’m sure this list will continue to grow over the years, and I welcome any input you would like to see added. I’m always eager to learn as much as I can about all things quilting!

Quilting/sewing resources

YouTube — Go to youtube.com and search for the names listed below.  If you like the videos, be sure to click on the thumbs up icon and also Subscribe so you don’t miss out on any upcoming videos.  

Missouri Star Quilt Co. — Jenny Doan is an inspiration both as a quilter and a businesswoman.  She and her family have built a true quilting empire in Hamilton, Missouri, and I love how she is able to come up with easier ways to create traditional quilt blocks.  If you like working with precuts, this is definitely the channel for you!

Midnight Quilt Show — Angela Walters is the free-motion quilting queen!  She also has a great sense of humor, and I love her quilting philosophy of how finished is better than perfect.  I particularly like these videos because they’re short and very well produced.

Man Sewing — Rob Appell has A LOT of energy and enthusiasm for all things sewing, including quilts.  He gives great advice and offers a large range of different sewing techniques and projects.

Mr. Domestic — Mathew Boudreaux has an infectious joy that comes through in all of his video tutorials.  He also has incredible technique. If you’re looking to hone your skills and get ready to show your stuff for juried shows, you should definitely check out his videos.  

Fat Quarter Shop — Kimberly Jolly has created an amazing business with Fat Quarter Shop.  Not only is she a great retailer, but she produces so many informative videos on a regular basis that run the gamut of all things sewing.  She also has block-of-the-month clubs and other sew-alongs that help you feel like you’re part of a big quilting family.

MADE Everyday — Dana Willard’s YouTube channel has tons of very highly produced sewing tutorials.  Only a handful are quilting related, but this is the first channel I go to whenever I need to learn a technique such as sewing piping around a pillow or inserting zippers or making a vinyl bag, etc., etc., etc.  

Social Media — Before I started quilting, I was not that much into social media.  I originally joined Instagram as a way to chart my quilting progress, but I quickly discovered the enormous amounts of inspiration that can be gained from following all the amazing quilters through social media.  It’s a great way to become part of a worldwide community without leaving your sewing room.

Pinterest — This is the place to go when you just want to scroll through pretty pictures of whatever you’re interested in.  You can create your own folders and save the pictures as a reference whenever you need inspiration.

Instagram — I’m totally an Instagram convert!! I love following the many awe-inspiring quilters all over the world and seeing what they are producing every day.  It gives me motivation to keep producing my own work so I can show off what I have to offer, too.

Facebook — Facebook is a little trickier when it comes to following quilters because you have to request to be their friend unless their account is set up so that you can follow them.  However, pages can be set up on Facebook which you can join and share photos, thoughts, and compliments about whatever your group is focused on. When I was working on a mystery quilt challenge through National Quilters Circle, I joined their Facebook page, and it was such a great way to chart my own progress along with everyone else’s.  

MeetUp — This is a great app when you’re looking to actually meet people in real life.  Gasp! Yes, people actually still want to hang out in real life together these days.  I haven’t actually used MeetUp for anything quilting related … YET … but I have used it for other purposes and it’s been great.  If you’re having trouble finding a local quilters guild or a group of like-minded craft enthusiasts, I highly suggest you start your own MeetUp group and see who wants to join you.  

Local quilt shop/sewing/craft store — I’ve traveled all over the country, and it seems like there’s a quilt shop just about everywhere I’ve gone.  Not only do the people who run these shops have great knowledge to share with you as a customer, they also offer classes and bring in professional quilters for trunk shows and lectures.  I have yet to go to a quilt shop where the staff hasn’t been incredibly friendly and generous with their time.

Local/national quilters guild — When I realized I was actually a quilter I decided I needed to meet other quilters.  At some point I heard the term “quilters guild” and did an online search to see if there were any in my area.  Sure enough, there were several. I went to a Brooklyn Quilters Guild meeting and immediately joined. I’ve been a member since the fall of 2017, and it’s been so wonderful being part of a quilting community.  Not only do you get to share your love of quilts with like-minded people, but most guilds do a lot of charity work and that is good for the soul.

Websites/blogs — Sometimes I don’t necessarily want to sit through a YouTube video to learn a simple technique, so I just do a quick Google search for blogs.  A lot of these blogs are also retail sites, so you can do some shopping while you’re browsing online. If there’s a blog that speaks to you in particular, you should subscribe to their newsletter so you stay up to date with their regular posts.  

Local colleges — A lot of the local colleges offer classes for non-enrolled students.  I took a basic sewing class at the Fashion Institute of Technology several years ago that helped me get over my fear of my sewing machine.  Learning from an actual live person and having a structured curriculum worked really well for me.

Books/magazines — Honestly, I don’t really buy many craft books or magazines these days.  I pretty much find everything I need online. But there are still lots of amazing books and magazines being published today, so if you’re someone who loves filling their shelves with crafting books to show off to your visiting friends and families, go out and get some.  What I like most about crafting books is that the authors usually mix technique with their own personal stories. There are also great coffee table books out there if you just want to look at high-quality photos of pretty, pretty quilts.

Non-sewing resources

If you’re looking to step up your quilting/crafting game and go beyond following someone else’s pattern, I suggest you start thinking like an artist.  I’ve had the fortune to sit in on a lot of art classes over the last several years, and I’ve seen how much students grow and evolve over their college years because of technique and theory classes as well as structured critique from their professors and peers.  I’ve listed a few things to consider if you want to think outside the box. It can be so helpful to let ideas and techniques from other artforms influence your own work.

Color theory — As a crafter, you probably have a natural sense of color theory, but learning the science behind color can really boost your crafting game.  One of my favorite aspects of color theory is the idea of transparency. There are some really great guidelines out there if you want to create the optical illusion of overlapping colors in your quilts.  

Worqx.com — This website has TONS of color theory information at your fingertips.  I highly recommend taking a glance through it.

Interaction of Color by Josef Albers is the go-to color theory book most art students have to read in college.  These color theory principles serve as the foundation for your work with color.

Art history — Looking at what artists have been doing over the millennia is so inspiring.  As a quilter, I’m not looking to mimic any artist or their work, but I love seeing what they do in their own medium and thinking about how I could maybe apply one or two elements into my own work.  

Other creative arts — There is inspiration to be found everywhere!  This is just a tiny list of areas that might spark an idea in your own process.  

  • Photography
  • Painting
  • Drawing/illustration
  • Commercial design
  • Architecture
  • Textiles and patterns

Quilting 101: What Is a Quilt?

This is the first of a series of posts I’m calling Quilting 101, where I’m going to walk you through the basics of quilting as well as introduce you to some vocabulary.  

Today’s post will start to answer:  What exactly is a quilt? At the most basic level, a quilt is made up of three layers, also known as the quilt sandwich. The front of the quilt is often called the quilt top.  Then you have the backing.  And in between you have the batting.  Those three layers are sewn together, and that is called the quilting.  

That said, I am by no means a quilting purist — I do not belong to the Quilt Police — and I truly believe the answer to “What is a quilt?” can be far more varied and nuanced.  In fact, I want to emphasize this one very important point. There are no hard and fast rules to any of this. Some of the most exciting pieces of fiber art I’ve seen were created by people who broke all of the so-called quilting rules and just went crazy with fabric and thread.  First and foremost, quilting is and should always be fun!

As I go through this introduction, keep in mind that everything in the quilting process that involves needle and thread can be done by hand, on a sewing machine, or a combination of both. Because I prefer using a sewing machine over hand sewing, most of my posts will be dealing with machine piecing and quilting.  But people have been creating beautiful quilts completely by hand for centuries, so if that’s what you prefer, go for it — see the last sentence of the previous paragraph, please.

The beginning of the quilting process usually starts with creating a design for the quilt top or choosing a premade design.  Once you’ve made that decision, it’s time to find the fabric — oh, the pretty, pretty fabrics!!

If you haven’t already done so, please find your local quilt shops and bask in the glory of their gorgeous merchandise.  I certainly buy plenty of fabrics online, but nothing beats seeing the colors and prints in person and actually feeling them before deciding what you want for your project. And even when I do buy fabrics online, I try to buy from quilt shops through Etsy versus big retailers like Joanne or Fabric.com.  That said, sometimes you want something very specific and you just have to buy it where you find it.

You can technically quilt with any kind of fabric — cotton, silk, denim, jersey knit, even leather! I mean, the list goes on and on, but most quilters use quilting cotton or a medium weight cotton because it’s the easiest to work with, so that’s what I would recommend to anyone just starting out.  

Quilting cottons come in a huge variety of prints and solids.  Printed fabrics will have a right side and a wrong side.  The right side is the side with the printed design on it.  The wrong side will look like a faded version of that design or not have the design on it at all.  Solids usually don’t have a right or wrong side — both sides are the same.

There are many ways to create the quilt top.  Most quilts use piecing methods or appliqué or a combination of both.  Piecing is when you put two pieces of fabric right sides together and sew a seam along the edge.  

Appliqué is when you sew a piece of fabric on top of another piece of fabric.  In other words, you apply a piece of fabric on top of another.  

Another way to create a quilt top is to use a panel.  Panels are large pieces of fabric with an image printed on them.  Depending on how the panel is printed, you can use it as a single piece for the top or you can cut it up and sew it back together to form a new design or you can add borders around it so that it becomes the centerpiece of your pieced top.  

You could also create a whole cloth quilt, which is simply a large piece of fabric, usually a solid, with no piecing or appliqué.  The purpose of a whole cloth quilt is to show off the quilting.

Most pieced and appliqué quilts will require you to cut up fabric and sew it together. There are a variety of tools to expedite the cutting process including self-healing cutting mats, rotary cutters, quilting rulers specifically designed for rotary cutters, and of course scissors.

If you are piecing a quilt top, you usually create a series of blocks and then sew the blocks together into bigger blocks and on and on. Most blocks are pieced using a quarter inch seam. You might also hear the term “scant quarter inch,” which means a seam that is just one or two thread widths shy of a true quarter inch.

Once you’ve pieced two pieces of fabric together, you need to press the seam with an iron.

The middle layer is the batting.  There are many kinds of batting made of many different fibers.   For the purposes of this post, just know that the batting is the fluffy stuff in the middle of the quilt, which is what makes the quilt all warm and cozy.  

The bottom layer is called the backing.  Just like the top, there are many ways to create the backing of a quilt, though most quilters use either a single piece of fabric or very large pieces of fabric sewn together rather than any sort of complicated piecing techniques.  Of course, some quilters are over achievers and love to make the back of their quilts just as visually interesting as the front of their quilts. Again, see my statement above about doing whatever the heck you want as long as you’re having fun.  

Once you’ve prepared the three layers of your quilt, you need to baste them together before you quilt them.  Basting is simply a no-nonsense way of putting layers together so they don’t move when you are ready to do more controlled sewing. At this point in my quilting journey, I pin baste all of my quilts using curved safety pins.  However, there are several methods for basting a quilt, and the method you choose is simply a matter of personal preference.  

Once your quilt is basted, it’s ready to be quilted.  A lot of quilters do not find any pleasure from the actual quilting process, so they pay someone else to quilt their tops for them.  However, it is totally possible to quilt any sized quilt on your domestic machine, so if the only reason you’ve avoided this step in the past is because you’re afraid to try, stop being afraid and just go for it! You might be surprised at how fulfilling you find this part of the process.  I certainly was!

There are a few different ways to quilt on your home machine.  A very popular and relatively fast way is to attach a walking foot and quilt straight lines from edge to edge.   

There’s also free-motion quilting, which is basically “doodling” with thread on your quilt.  

Of course you can always hand quilt the layers together.  

And finally, you could do any combination of these techniques or even come up with a new and creative way of securing the three layers of your quilt together!

Once the quilt has been quilted, it’s time to square it up, which eliminates all of the extra fabric on the edges of your quilt and gives you a clean, raw edge.  

After you’ve squared it up, it’s time to add the binding or facing, which are two different techniques to cover up the raw edges.  

And that’s it!  You just made a quilt!  (Or at least you imagined making one.)  Have you started your quilting journey yet?  If so, what is your favorite part of the process?  What’s your least favorite? Post your comments below and let’s share our joys and tribulations with the quilting community.  Happy quilting!