I just finished a quilt and figured I might as well blog about the process I went through to create it. Please feel free to reach out with any questions!
I belong to the Brooklyn Quilters Guild and ever since the COVID pandemic, we’ve been holding small outdoor quilt shows where we hang our quilts on the rod-iron fence that surrounds the block where we have our monthly meetings. Check out our YouTube channel to see videos of our past fence shows!
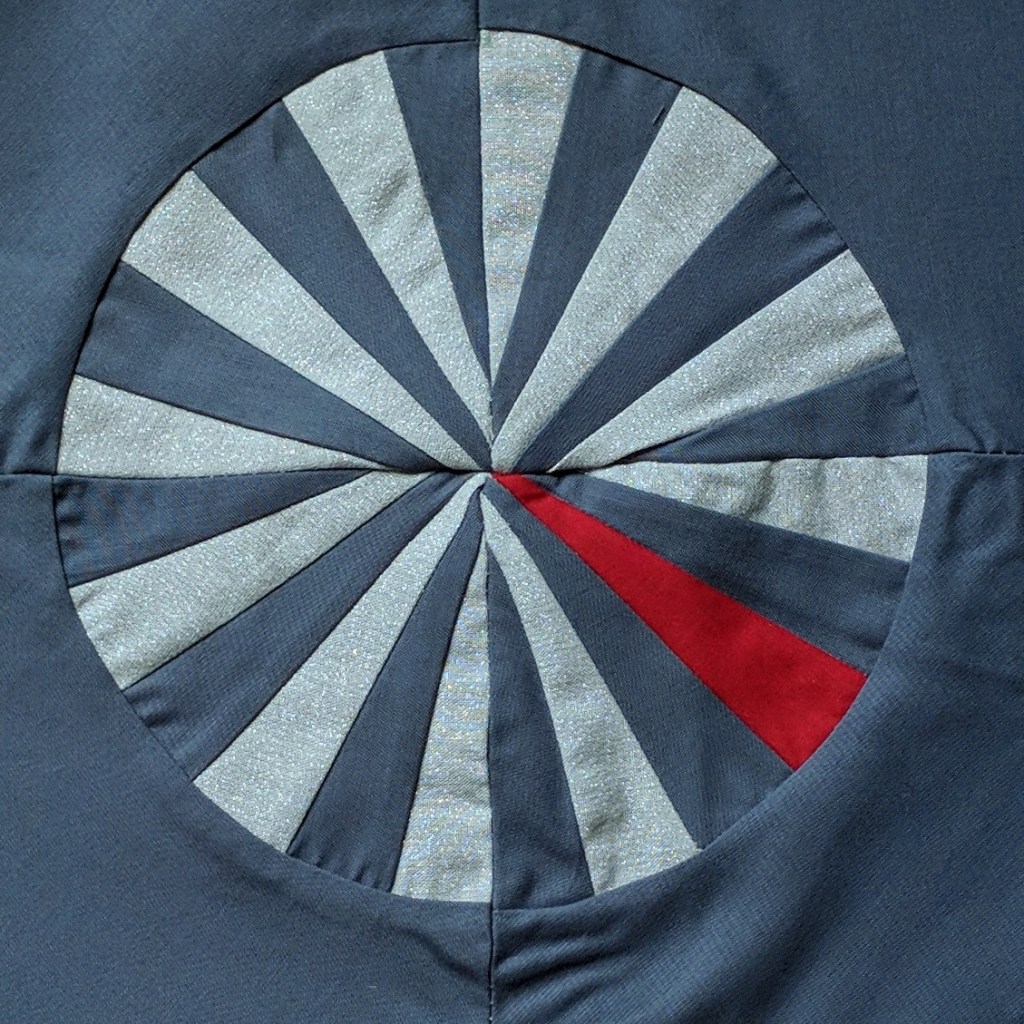
We will be having our next fence show sometime in the early fall of 2024, and the theme is The Stories We Tell: Folktales, Fantasy & Folly. I was very excited when I heard the theme because I am a huge fantasy/sci-fi fan. I immediately started thinking of whole-cloth quilt ideas with images of dragons and other mythical creatures floating in my mind. However, my drawing skills are still fairly rudimentary, and I quickly realized my ability to free-motion quilt a dragon isn’t quite there yet. So then I thought about a quilt I made in 2023 for a different guild challenge which is pictured below. The idea behind that quilt was a scaled and feathered creature staring out at the viewer.

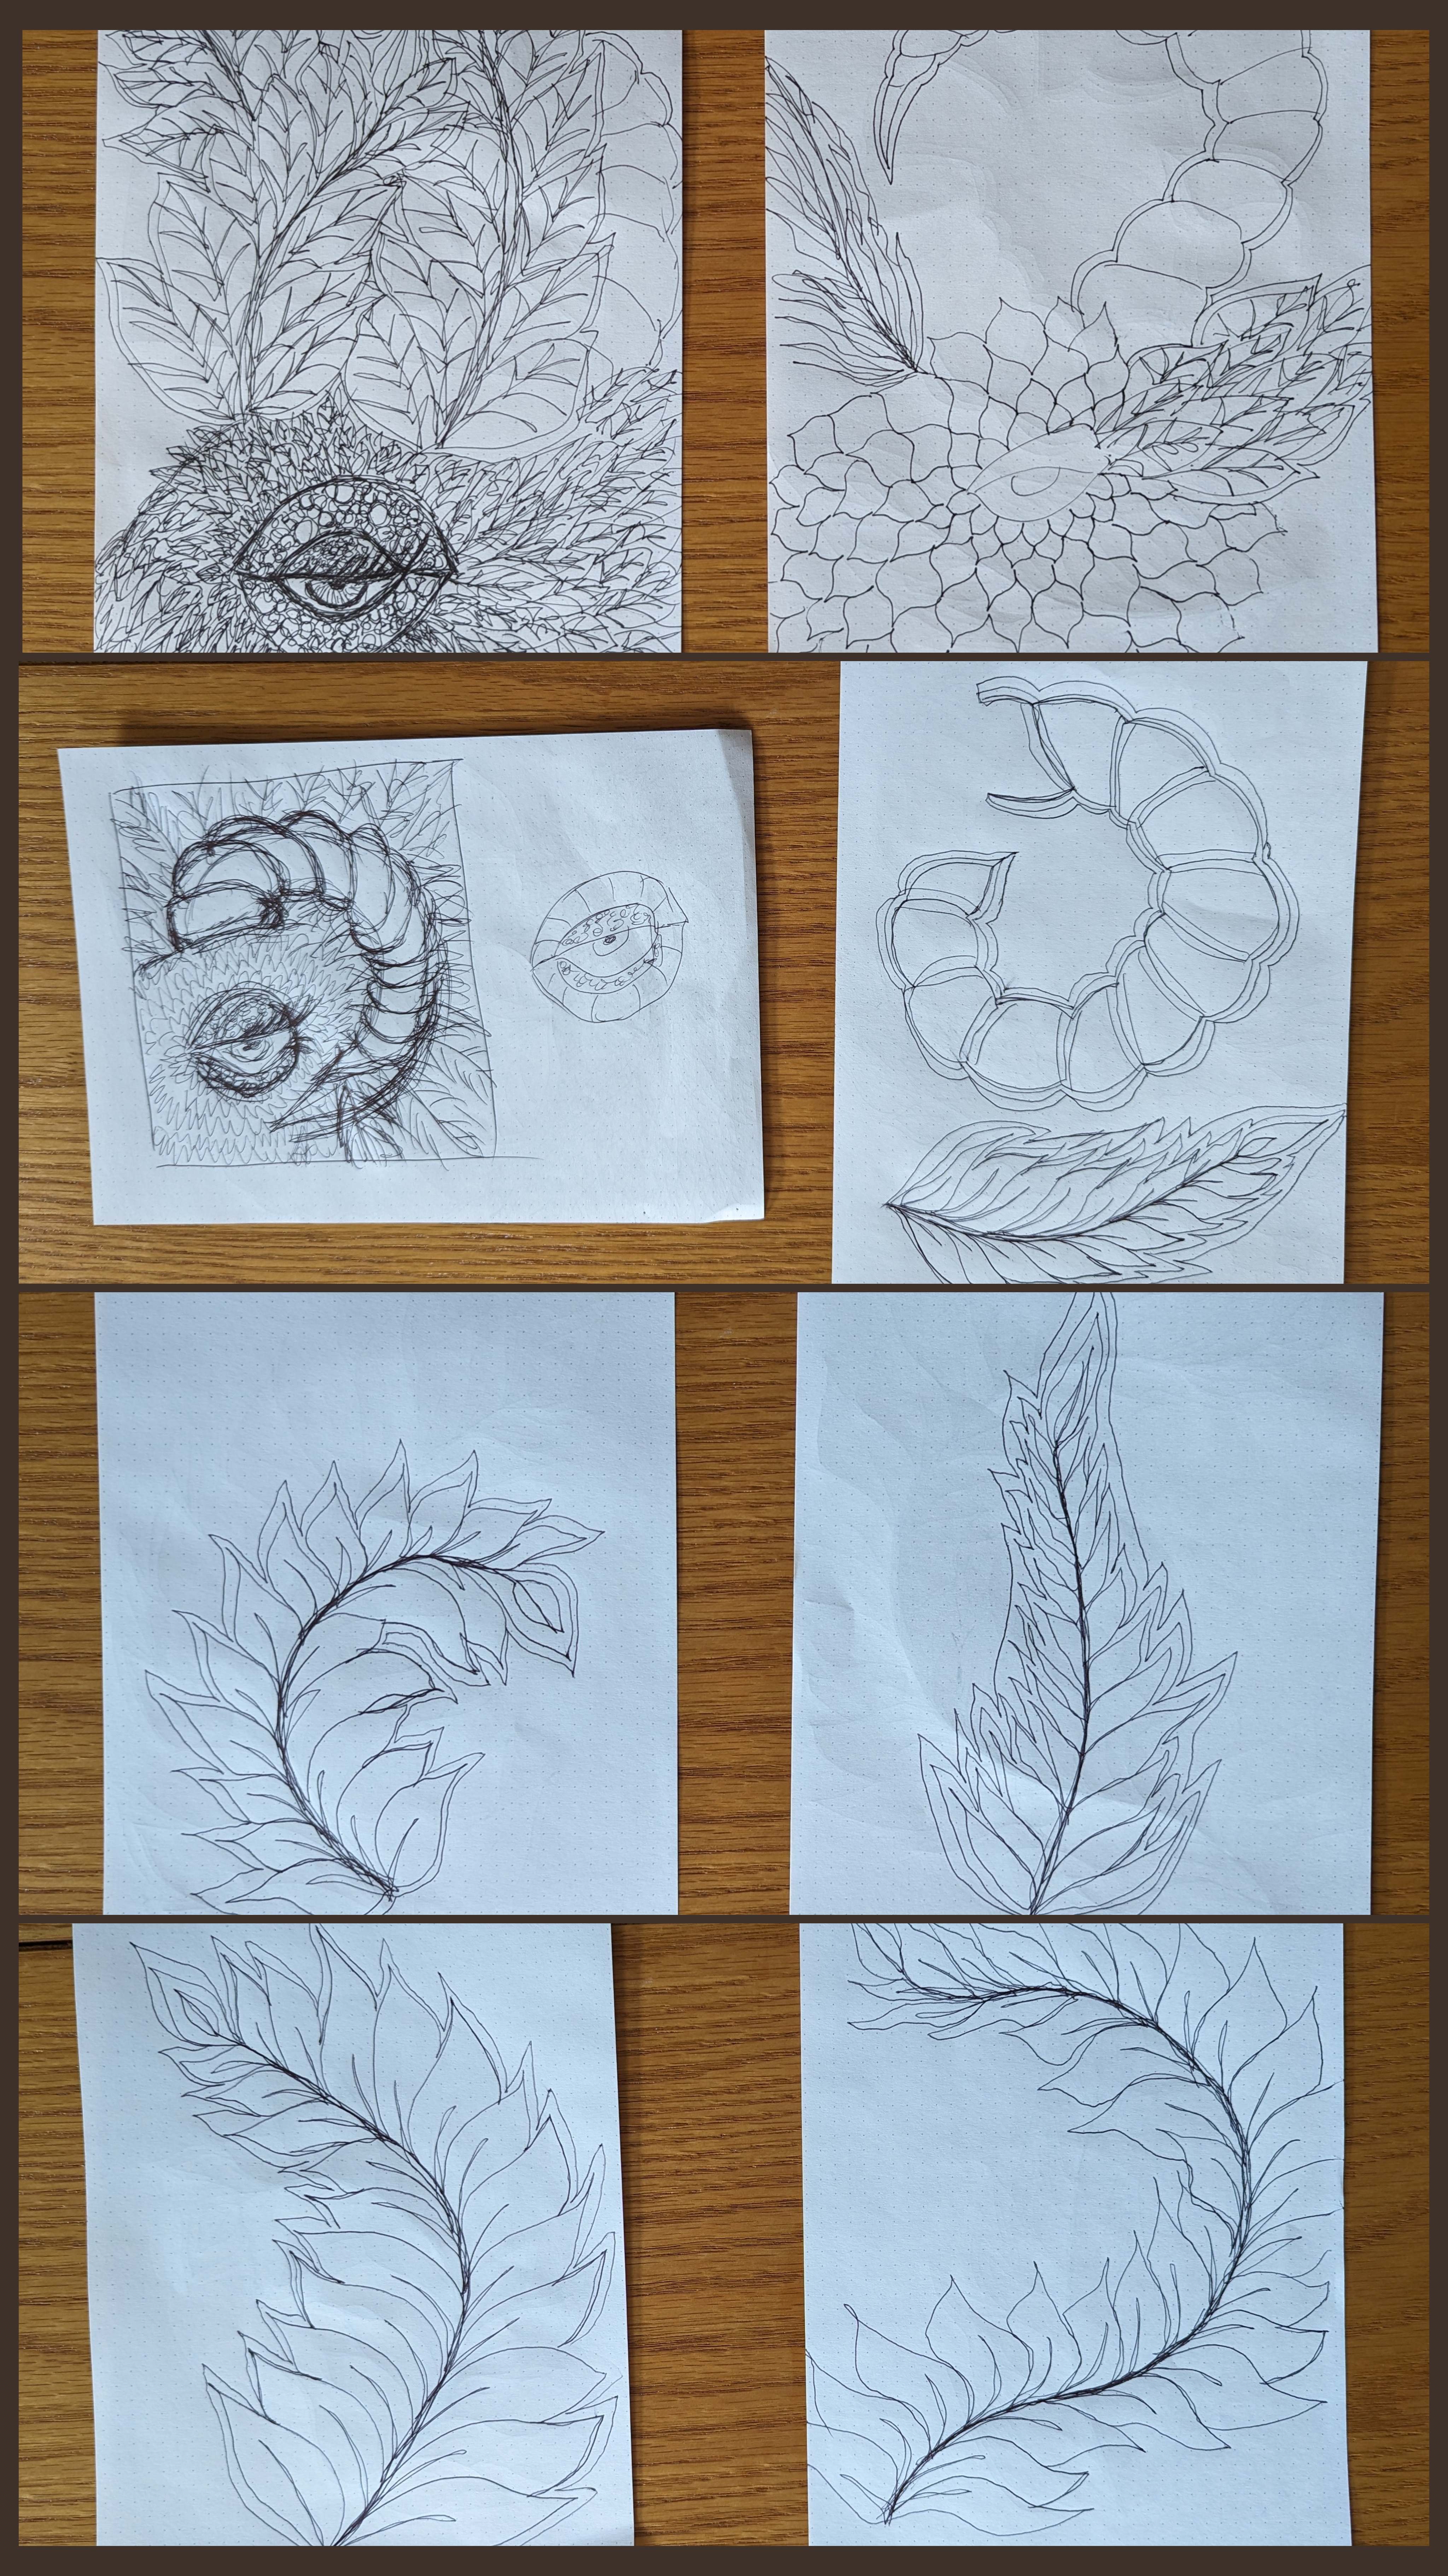
I had also purchased two yards of beautiful raw silk from a quilt show in the fall of 2023. I knew that was the fabric I wanted to use along with some pools of polyester thread that would shine beautifully on the finished quilt. I love free-motion quilting feathers, so I decided to do an online search for images of “feathered dragons.” The images that came up right away were Quetzalcoatl, the Mesoamerican mythological figure that is often referred to as a feathered serpent that flew through the air and provided rain for crops, among many other abilities. Using those images as my starting point, I started sketching out ideas with pen and paper until I was ready to work with my actual fabric.
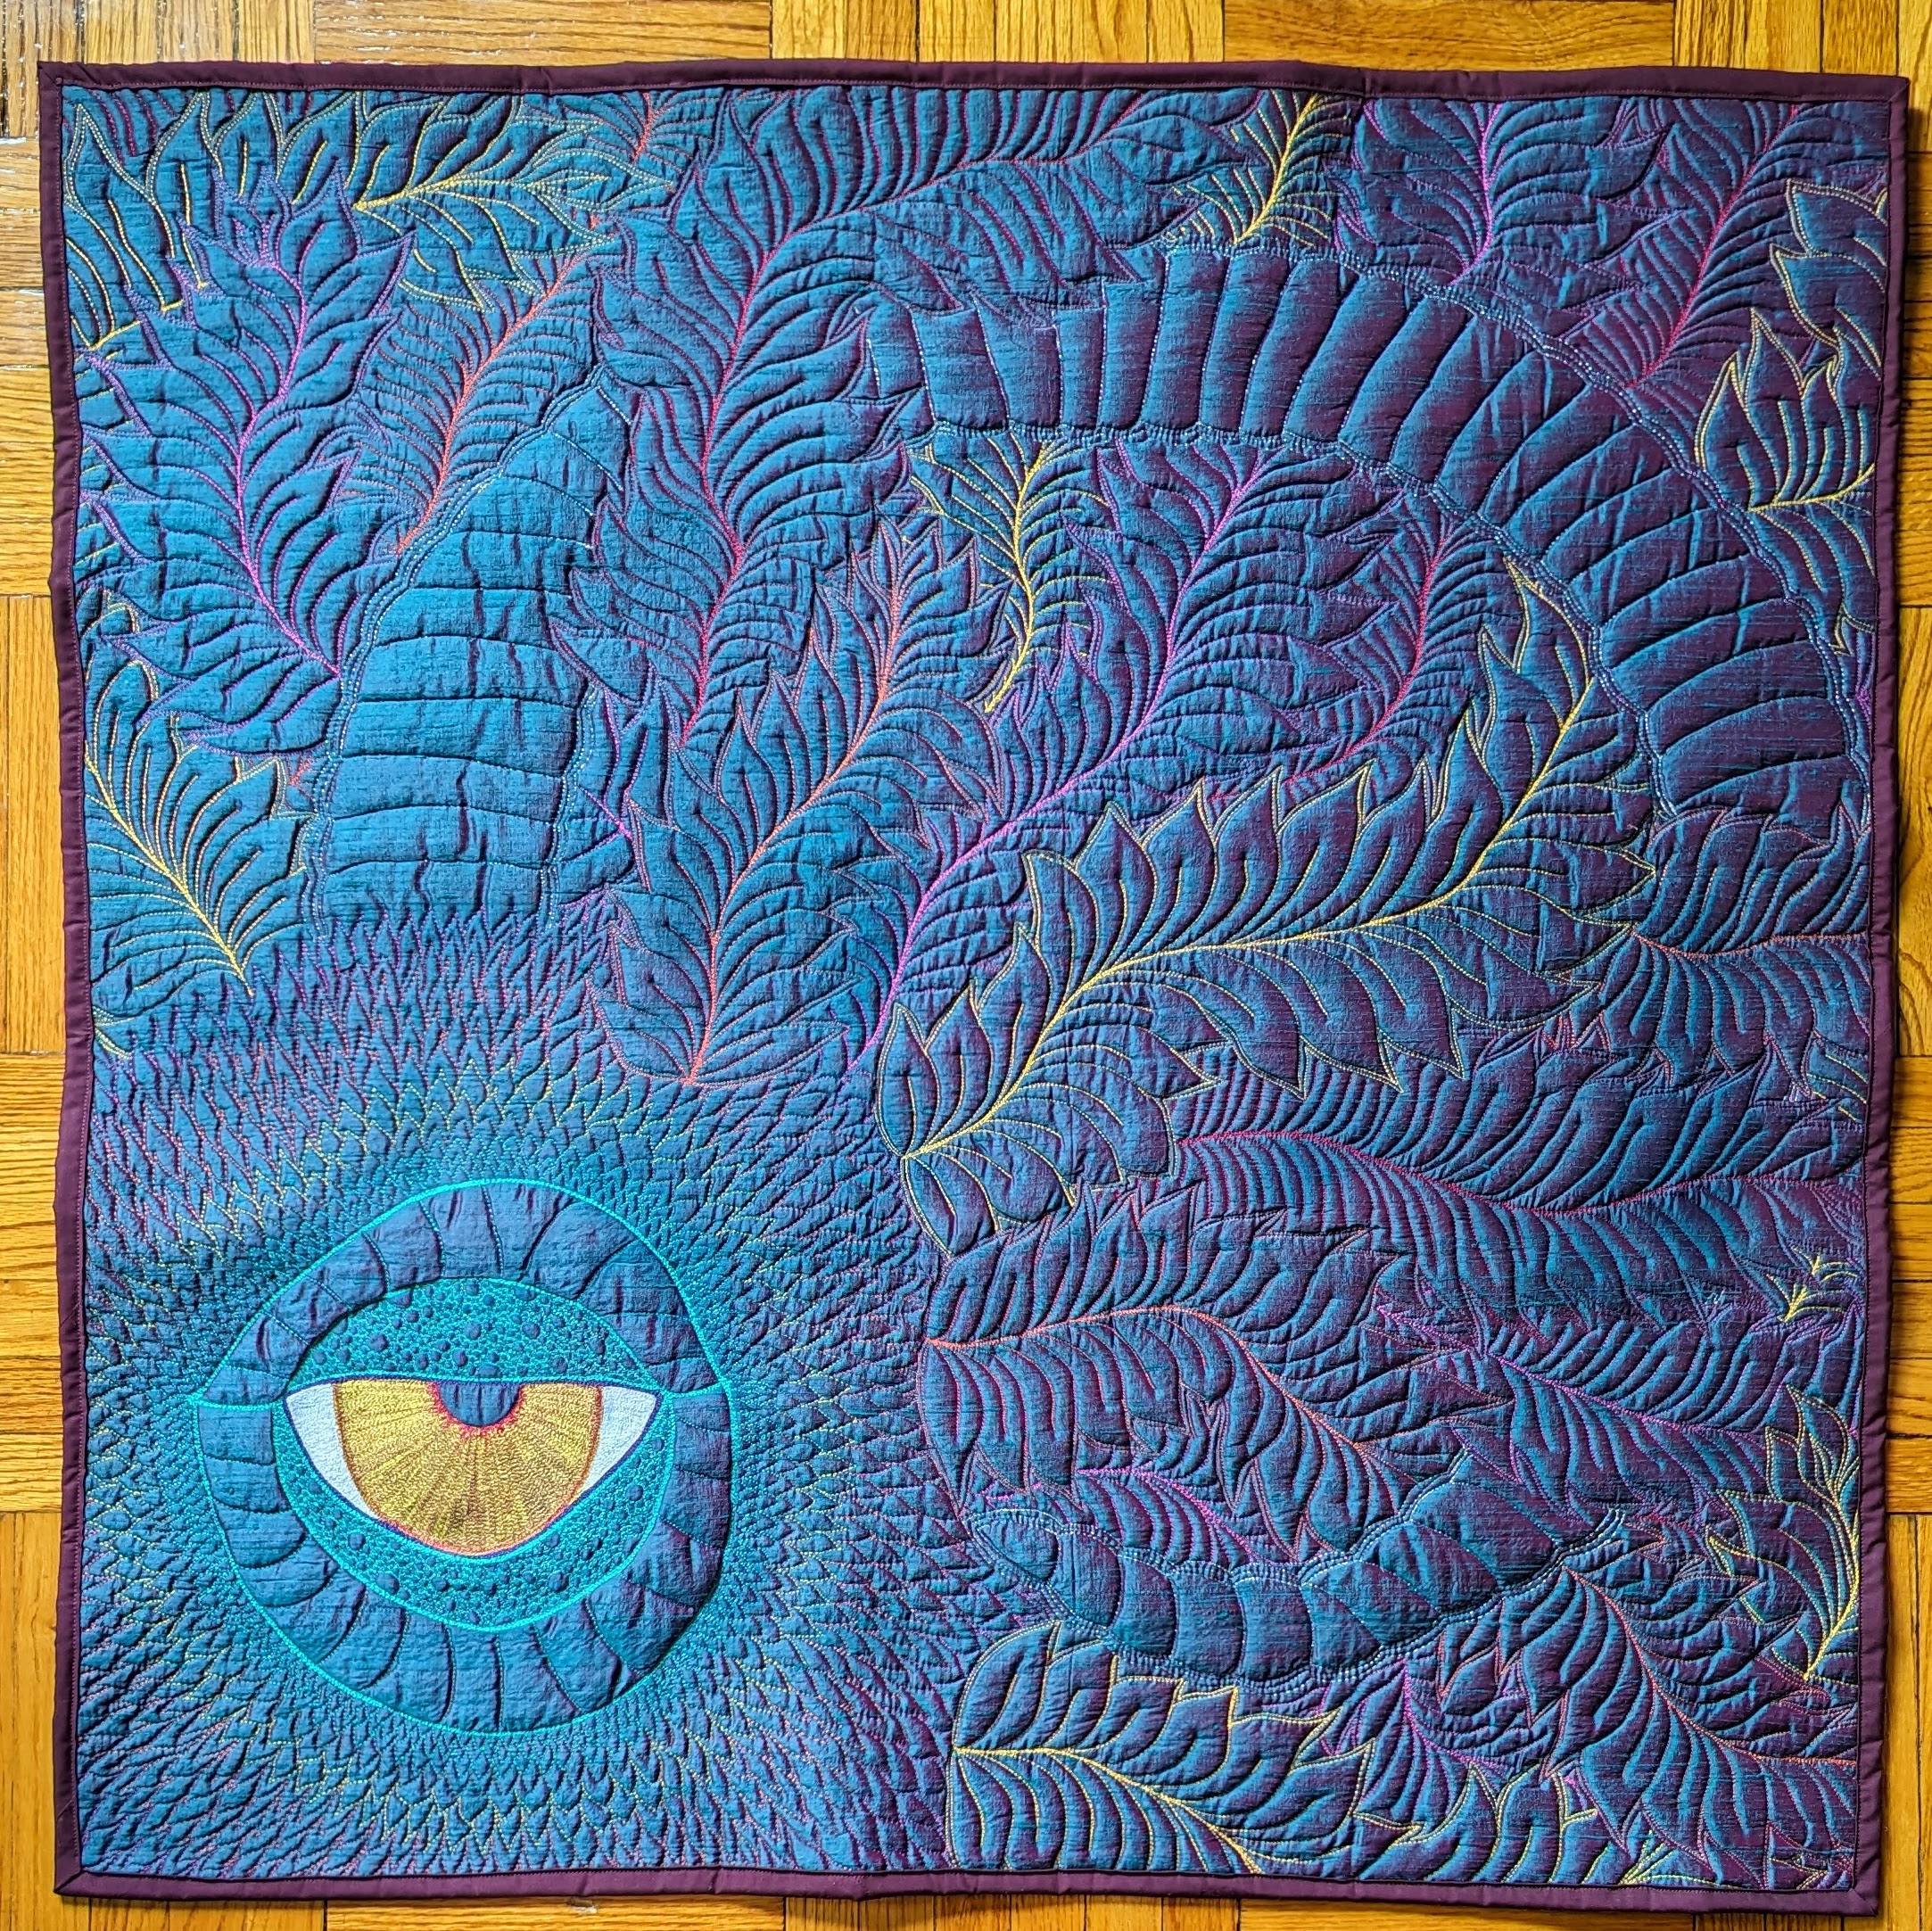
I pin basted the gorgeous raw silk together with a very high-loft batting and my cotton print backing fabric. Then I took small pieces of all three layers and tested out the different colors of polyester thread that I thought about using to see what colors would work best. I quickly saw that the green and purple threads didn’t stand out enough for the overall design I had in mind. I loved how the warmer colors worked, so I decided the feathers were going to be red, pink, orange, and yellow. And because the raw silk generally looks blue (though sometimes magenta depending on the angle and lighting), I knew I wanted the large eye to contrast so I decided to make a yellow-orange eye with red highlights.


Once I had made those design decisions, I began the actual thread painting and quilting. I used the same general process as I did with my O, beware . . . quilt. I started by thread painting the eye. I layered several different colors of thread on top of each other to create the iris of the eye, which gives depth and plays with the light beautifully, much more so than if I had just used a single thread color. Once the eye was finished, I used silver metallic thread to create the horn (which is not a feature of the typical Quetzalcoatl images you typically see).
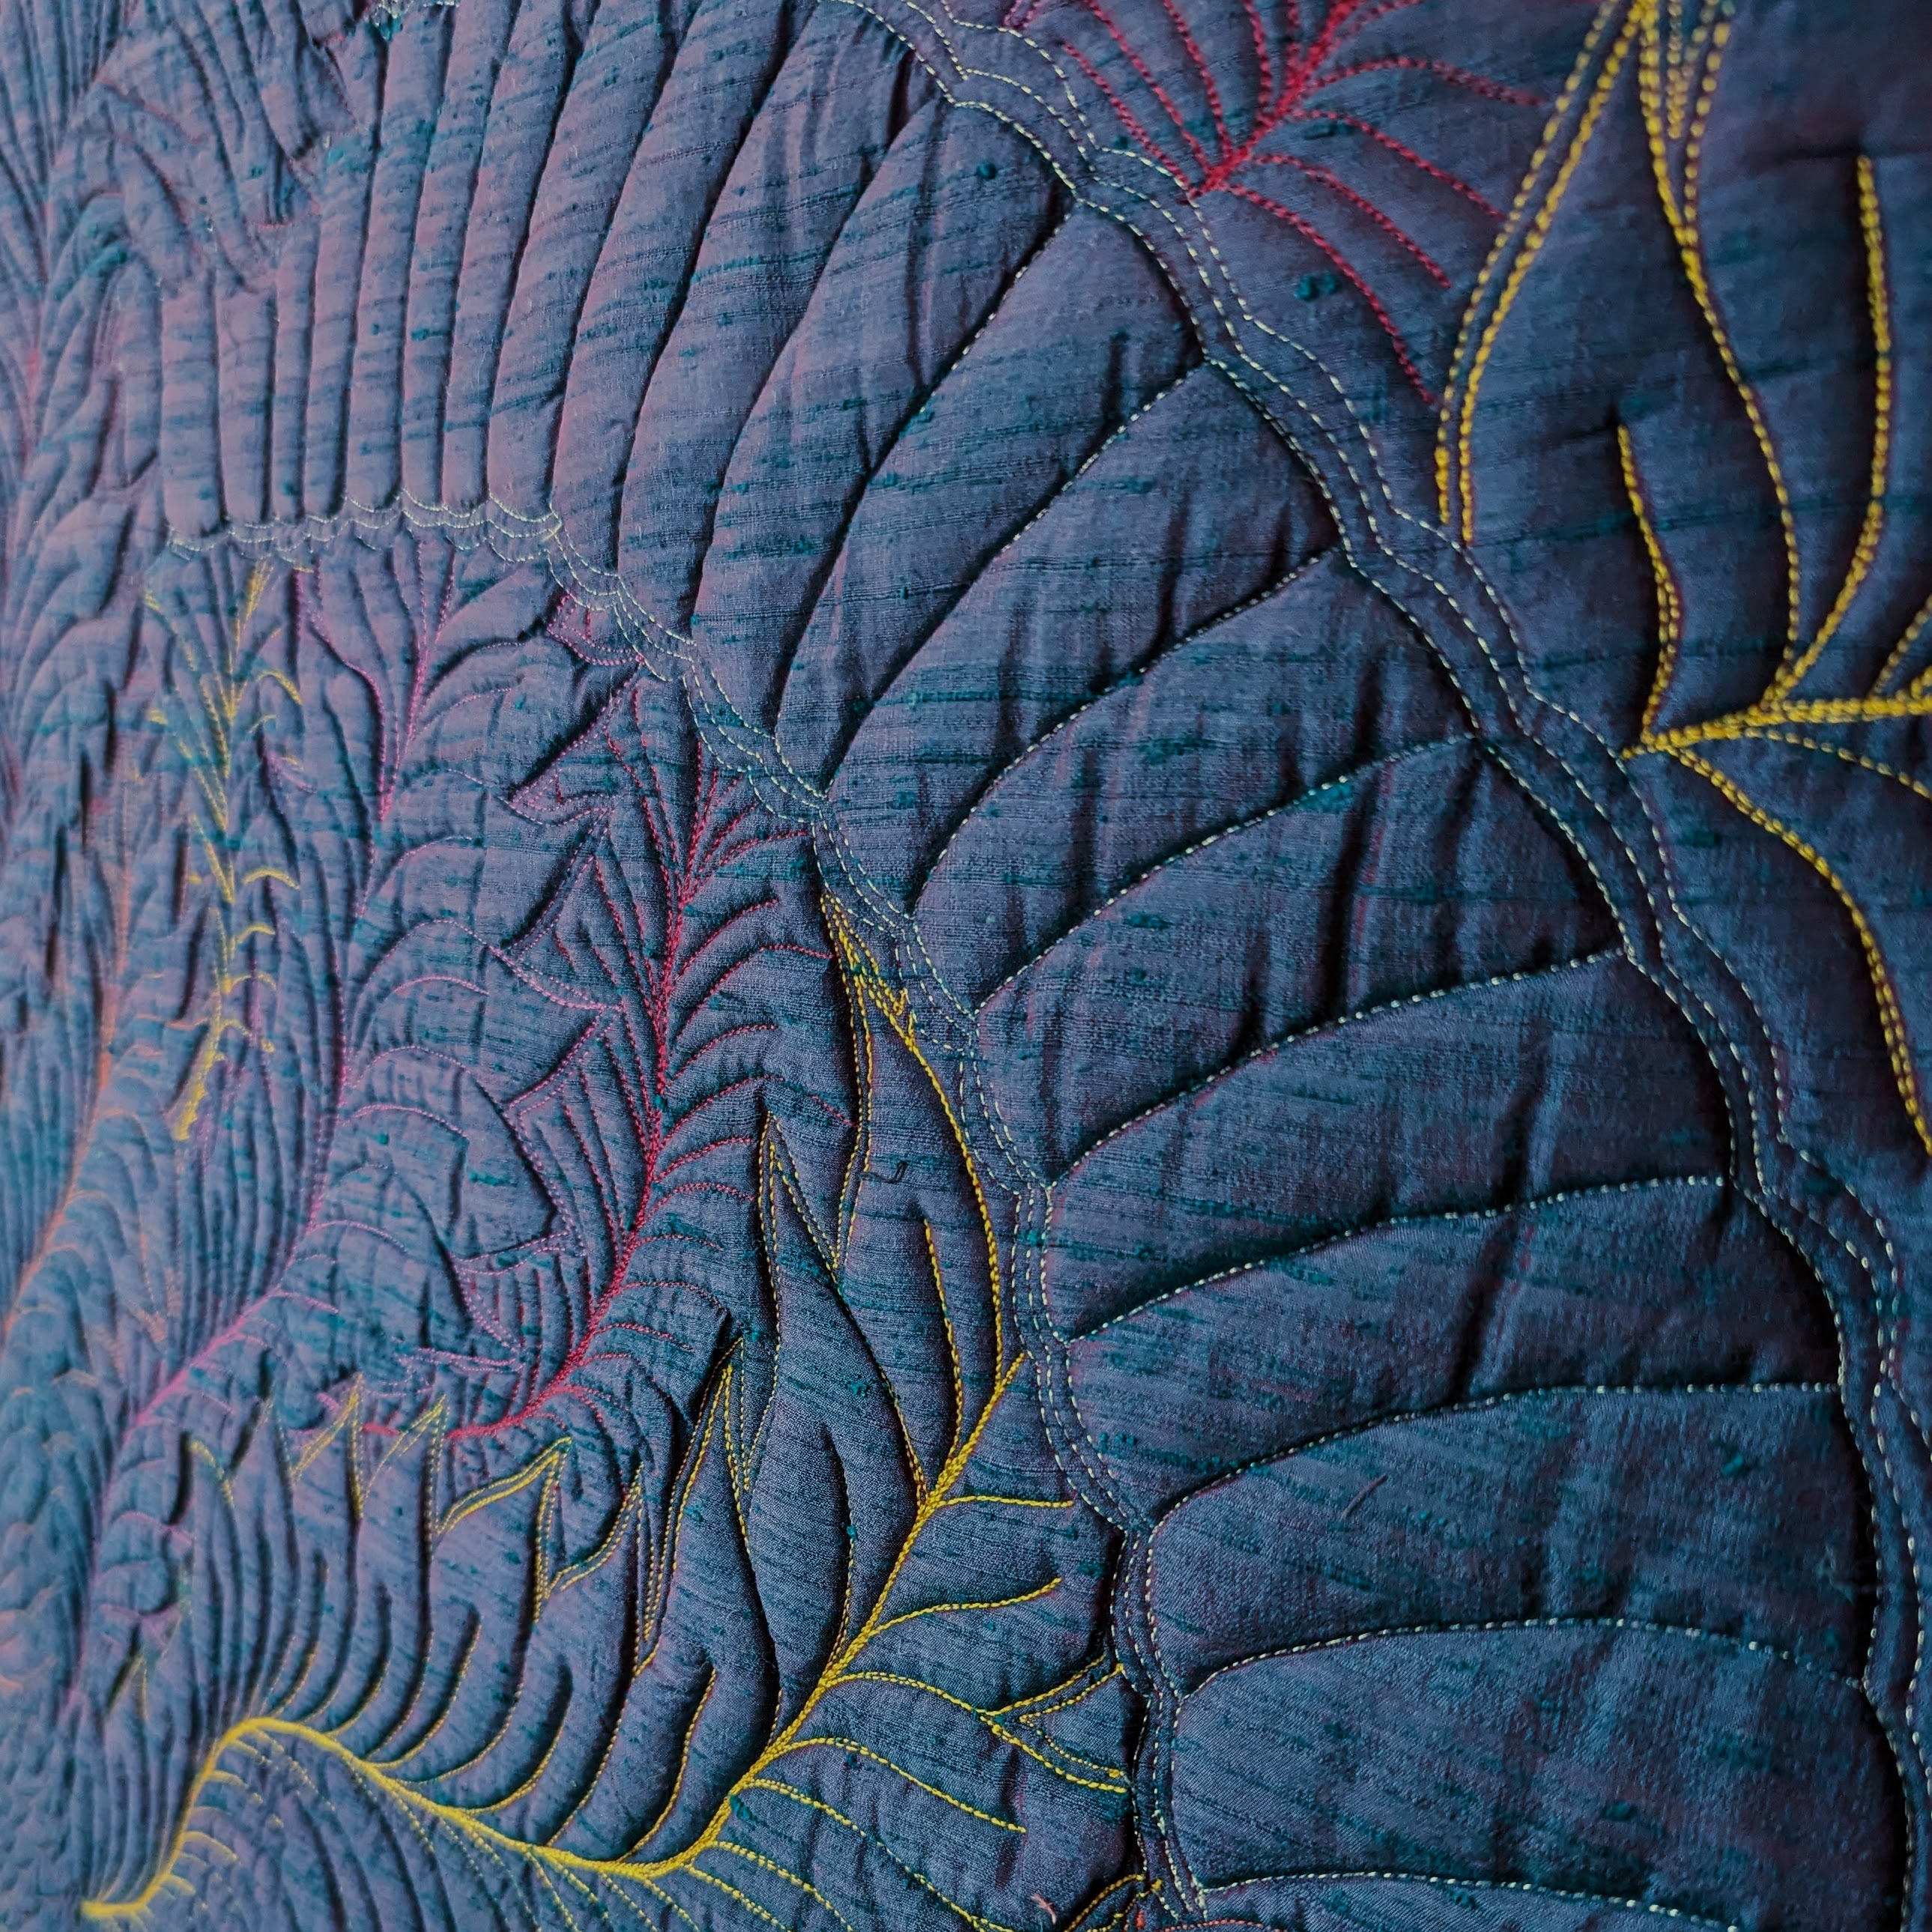
I didn’t love the overall look of the horn, but I decided to start working on the feathers and see if that would change how I felt. After I quilted the first couple of feathers, I realized I needed to pick out two sections of the horn and quilt some feathers in front of it while the rest stayed behind it. I hate picking out quilting threads and usually avoid it at all costs, but I knew this would make a huge positive difference. And it turns out I was 100% correct. I was much happier with the overall design of the quilt once I had some feathers quilted on both sides of the horn.

Once the whole thing was quilted, I needed to block my quilt. I set up my ironing board with my full-length wool pressing pad, turned the quilt backside up, drenched a tea towel with water, wrung it out, and then ironed the back of the quilt in sections with the wet towel in between. This is a blocking process I used when I crocheted a sweater several months ago, and it works really well. I then hung the quilt from my photo stand and used rubber covered clamps to stretch the quilt out from the top and bottom corners. In the future, I need to figure out a way to attach clamps on all four sides so that the quilt will dry perfectly flat. But this time I did what I was able to do, and the quilt dried pretty flat.

The quilt needed to finish at 36″ x 36″, but I intentionally created a larger piece because such dense thread painting and free-motion quilting will shrink the overall quilt size quite a bit. I still ended up having to cut off about two inches of fabric from both sides when I squared it all off, but I think that tightened up the overall composition of the piece which was nice.
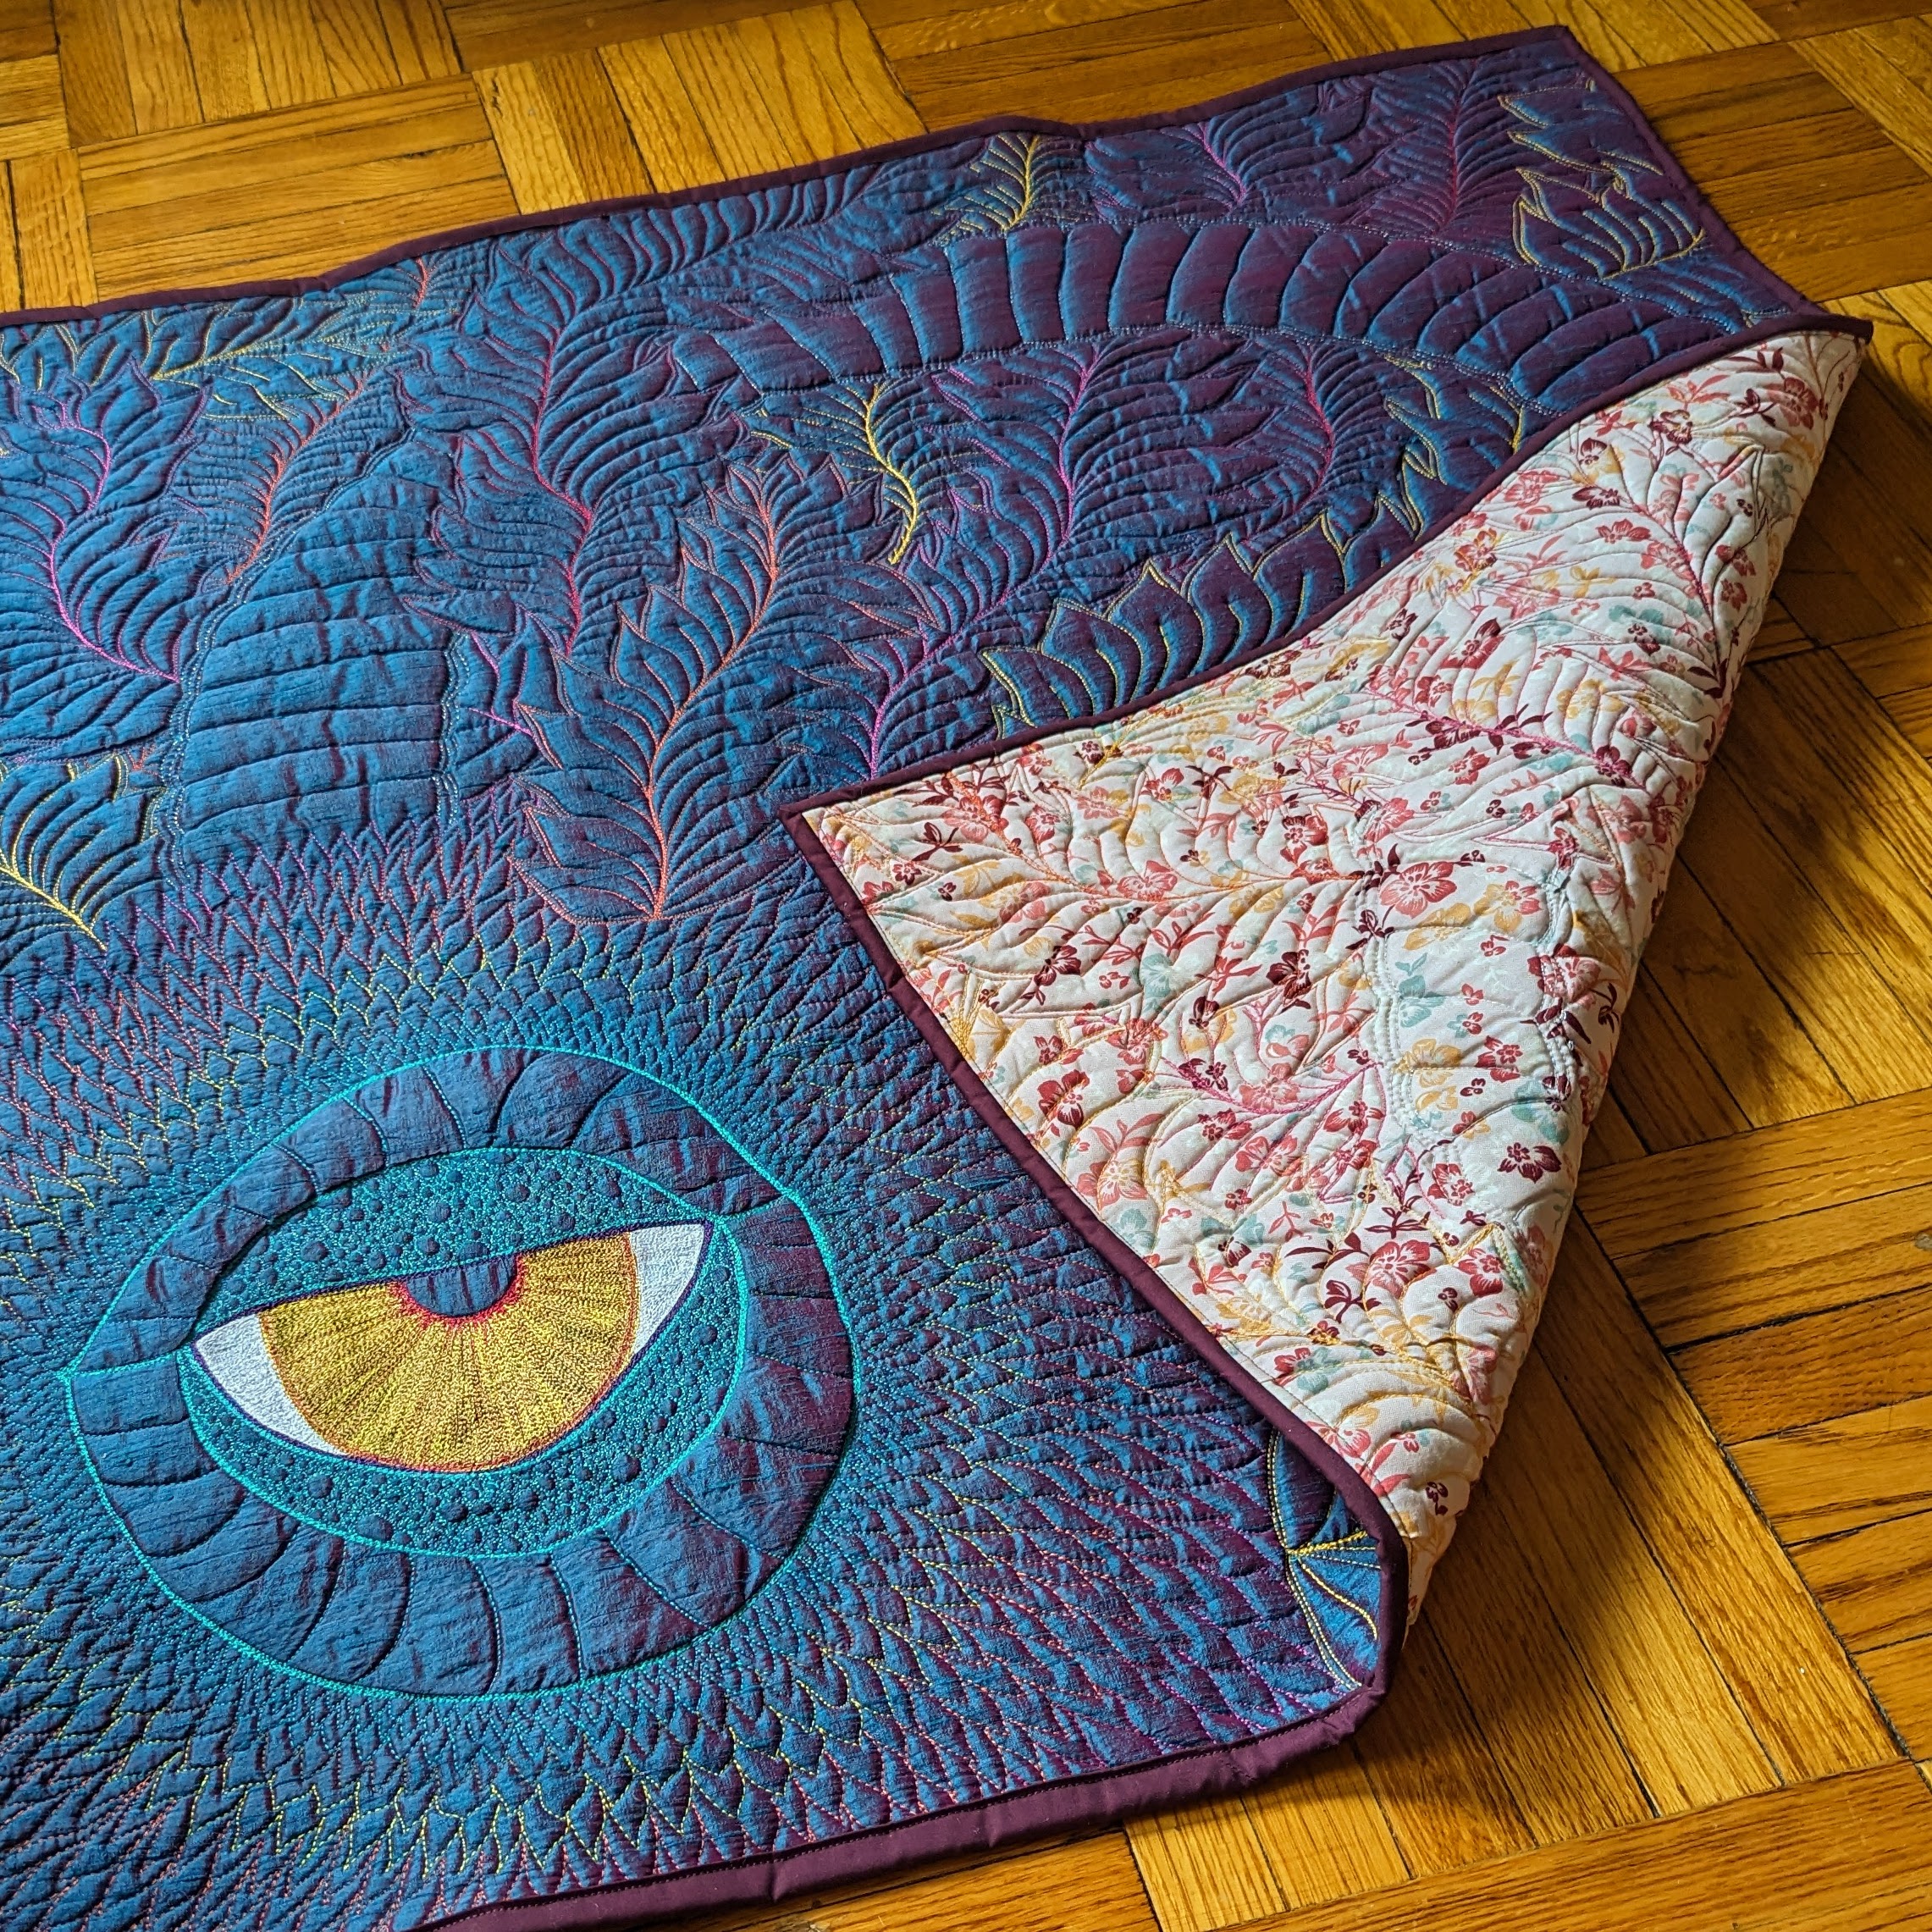
And then I made a totally rookie mistake with the binding. I was halfway around the quilt when I realized I had started machine sewing the binding on the back of the quilt rather than the front. Normally, I like to machine sew the binding to the front of the quilt and then hand sew the rest of the binding to the back of the quilt. Since I was already halfway around, I decided I was going to use this mistake as an opportunity to practice my machine binding. So I went ahead and sewed the entire binding with my machine. And wouldn’t you know it, the more often you practice something, the better you get! My machine binding is starting to look pretty good these days. And it sure saved me TONS of time! So that’s the whole process for how this quilt came into existence. Reach out with any questions and thanks so much for going on this journey with me.